Hi,
I am trying to upgrade from an old Richdel to Rachio 3 controller. The old wiring does not make any sense to me after I took the old controller off.
Info:
Old Controller: Richdel 476PRi
New Controller: Rachio 3
No of Zones: 4
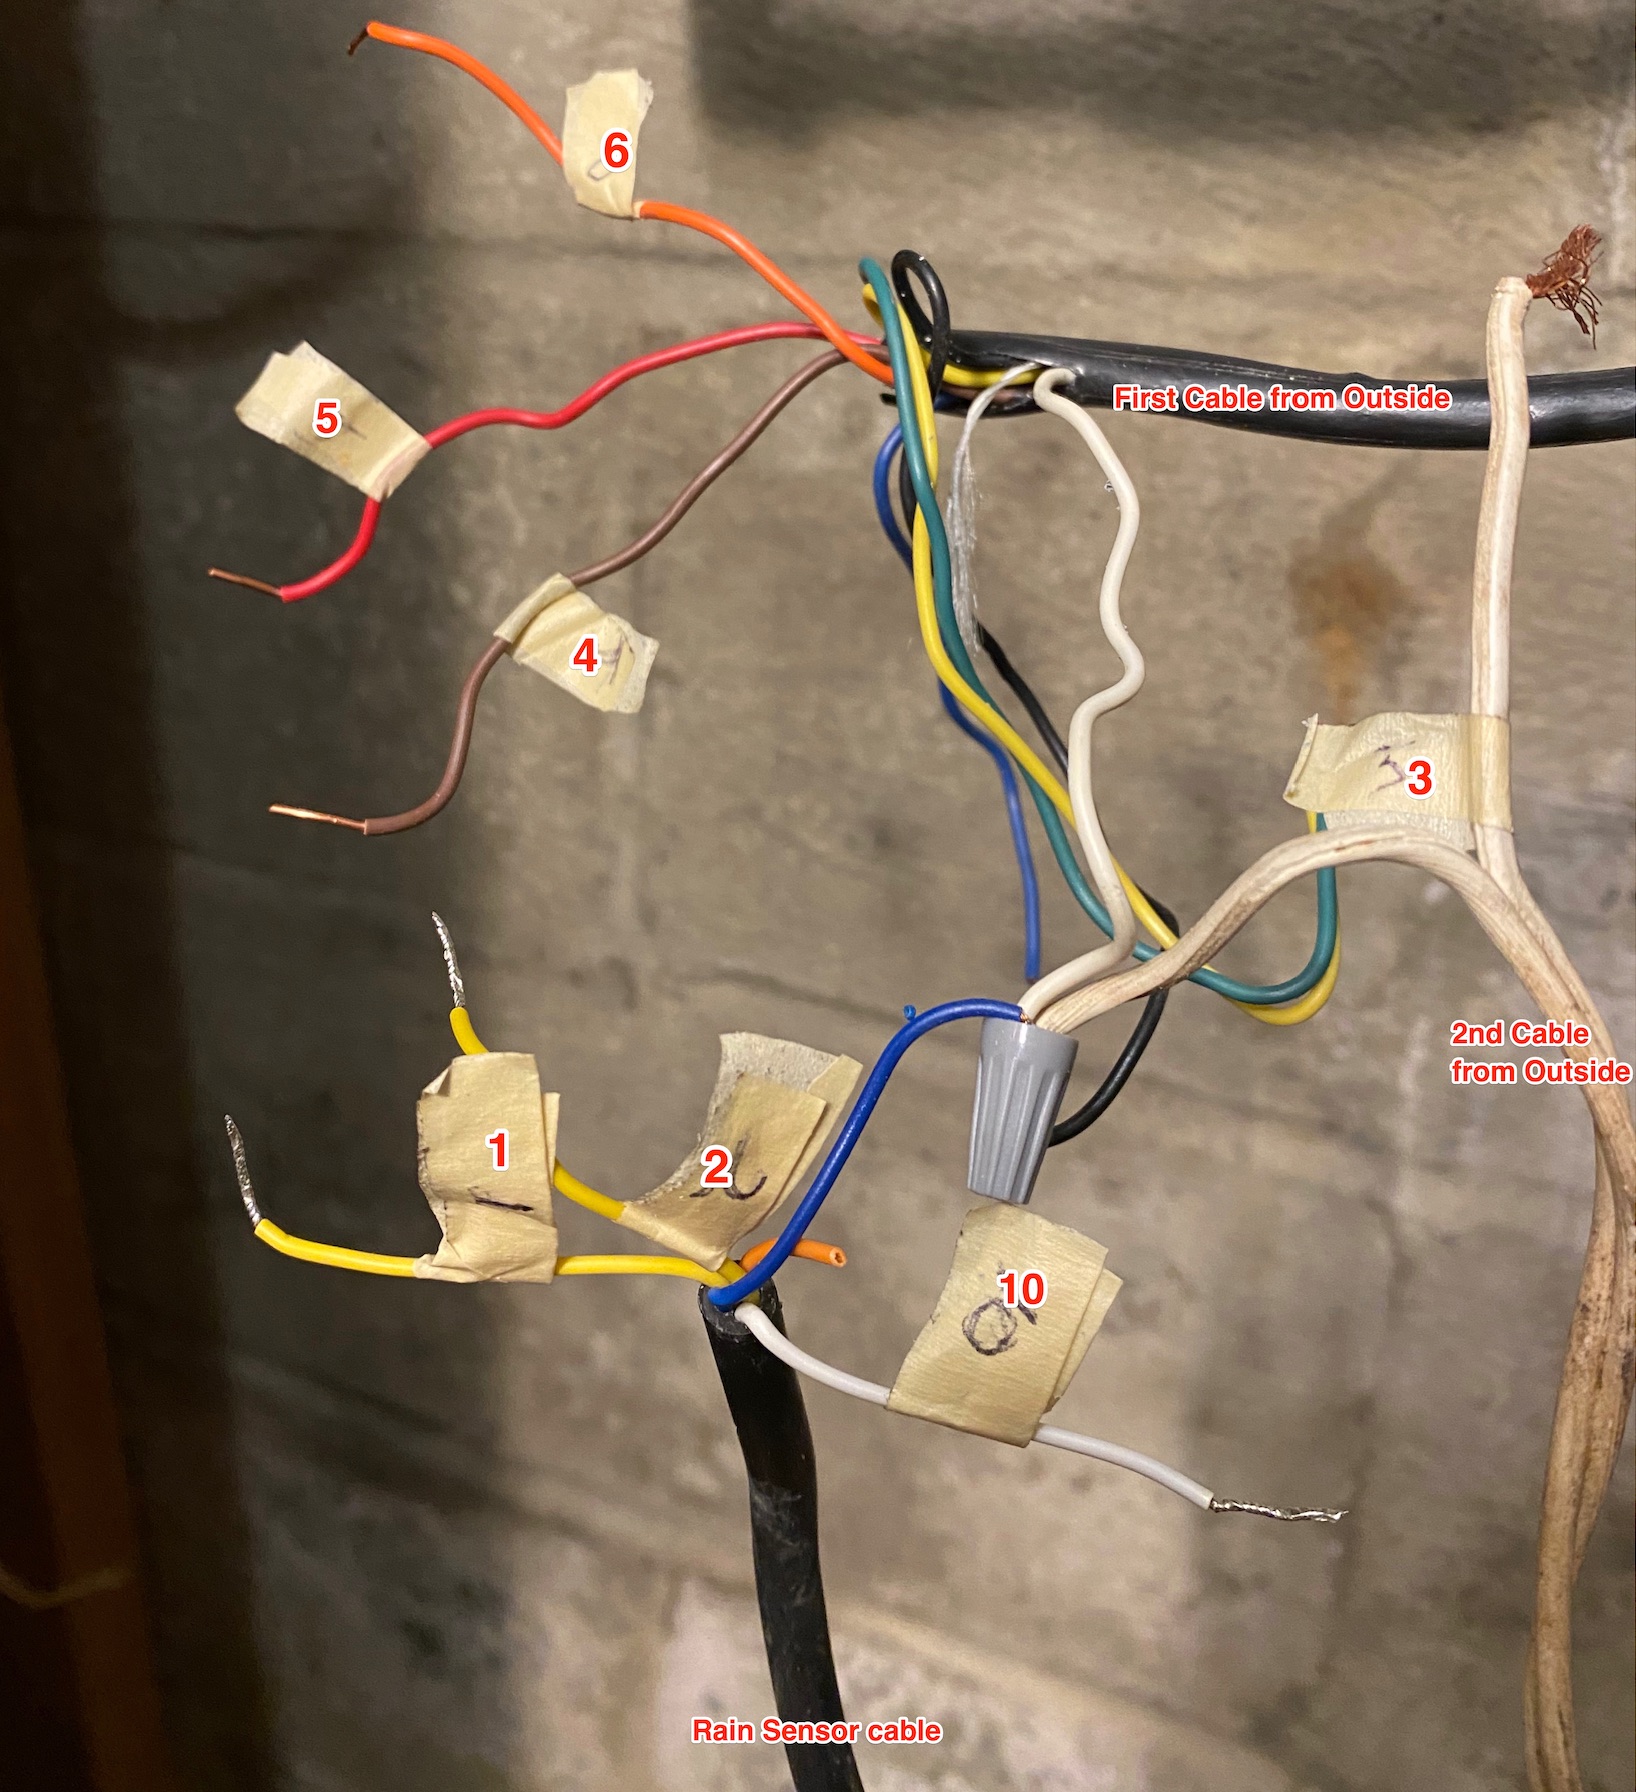
Finally, what you primarily interested in is the “First cable from outside”. White wire from that cable goes to any of the C terminals on Rachio, while others are attached to any available numbered terminal. During the setup, you’ll be able to identify, photograph and name a zone, so which wire goes where does not really matter (besides white).
It doesn’t look like you have a master valve, so indicate as such during the setup.
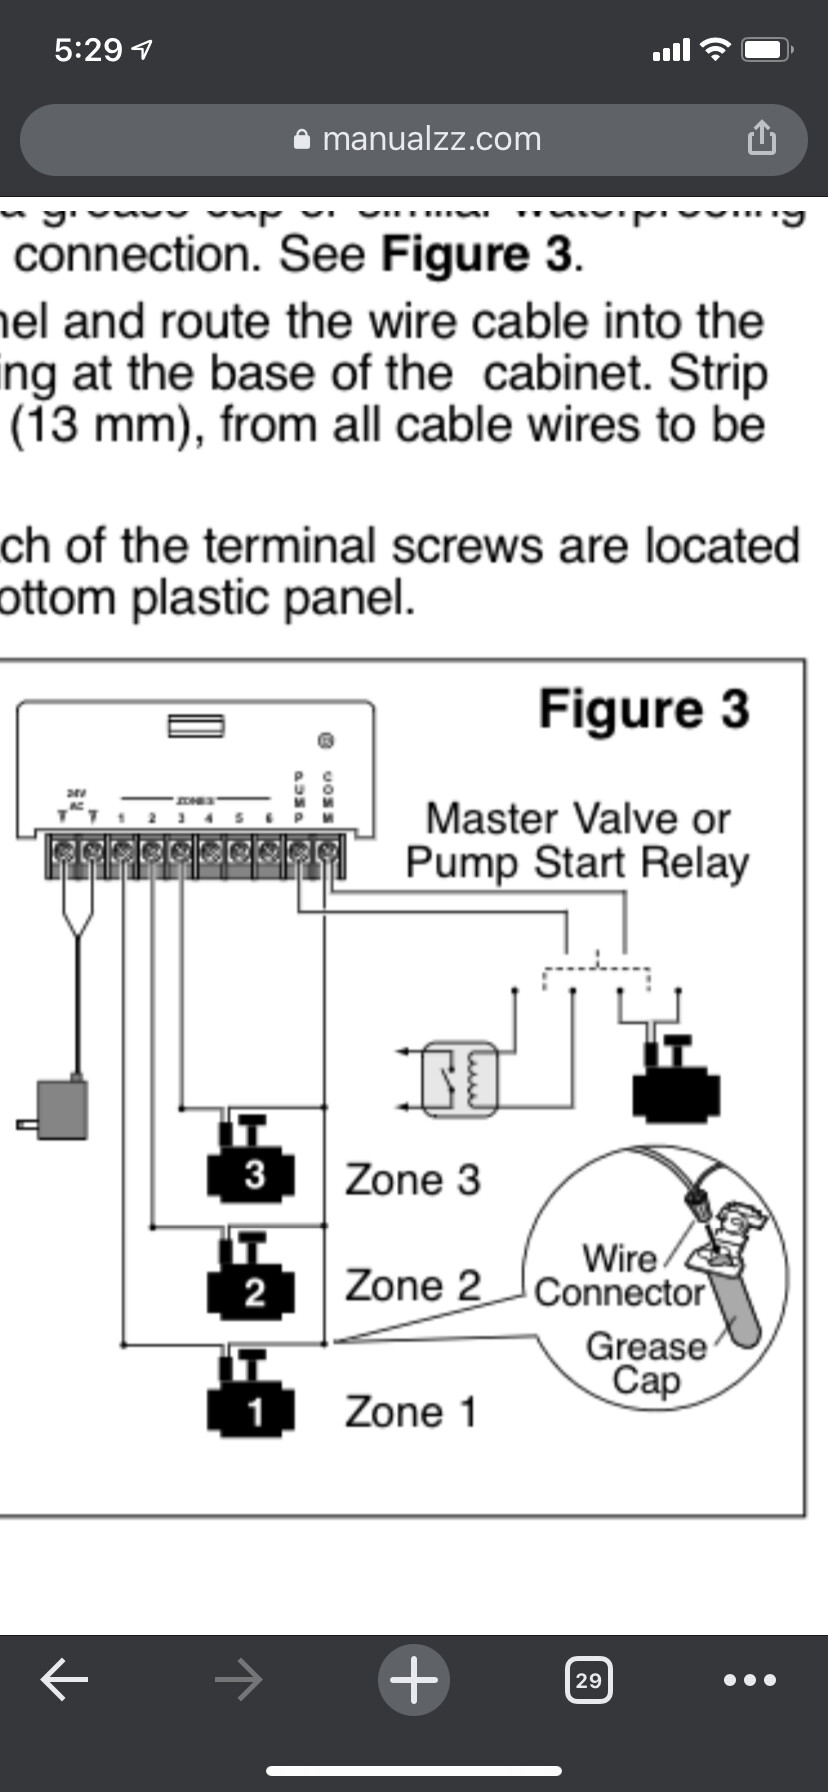
I am glad you included the last image as I was finding it a little difficult to find the manual. It looks like the terminals are as follows, starting from the left:
" - braided white & yellow wires (rain sensor power)
Zone 1 - braided white (2nd cable)
Zone 2 - brown (1st cable)
Zone 3 - red (1st cable)
Zone 4 - orange (1st cable)
Zone 5 - N/C
Zone 6 - N/C
Master Valve / Pump Start Relay - N/C
Common - red (unknown), black (unknown), & white (rain sensor)
Wire Nut:
Blue (rain sensor)
White (1st cable)
Braided white (2nd cable)
Rachio
Zone 1 (from old 3) - braided white (2nd cable)
Zone 2 (from old 4) - brown (1st cable)
Zone 3 (from old 5) - red (1st cable)
Zone 4 (from old 6) - orange (1st cable)
Common - white (1st cable) & braided white (2nd cable)
To connect the rain sensor (if you wish, may or may not need it depending on how close & accurate weather stations are), I will try this (not 100% positive on some of this, but getting the information from: How do I install a rain sensor? (Generation 2) (rachio.com))
Thank you @Gene & @Thomas_Lerman for your responses. I don’t want to use the Rain sensor, so without that, this is how I understood your instructions. Is that the correct wiring?
I agree with @Gene, as you noticed, one of the 2nd cable was connected to zone 1 and the other to common (through the wire nut). All four zones should work with that configuration.
@Gene@Thomas_Lerman thank you for your help! I followed your instructions for the last white pair and was able to manually test all 4 zones!!!.. looks like we’re back in business!!