@azdavidr - I’ll take a stab at it, but I’d go with what @Brad or @Emil has to say. My sprinkler system is underground and Rachio hasn’t provided the underground installation instructions yet and I haven’t pulled the trigger on a Gen 2 -> Gen 3 upgrade.
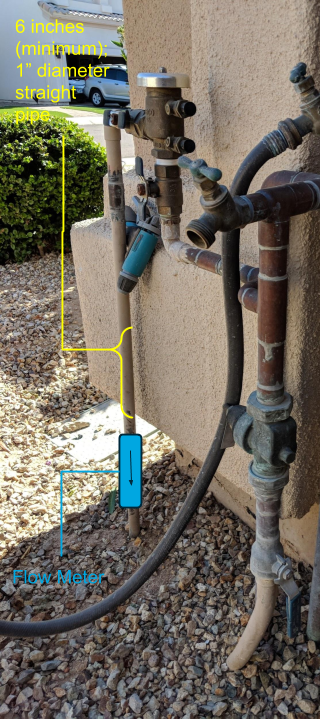
Edit: One bullet is the total length of everything including the flow meter and the second bullet is the lead in which is included in the total length (first bullet). If I was in your position, I’d place the flow meter low (below the house outcropping) and replace the pipe from there to the top 90 degree elbow with 1" pipe. So that would be more than 6 inches of 1" pipe to allow the water to settle down more, if the plumber is going to replace 6" of pipe another 7" won’t make much cost difference. From what I’ve read in the other post the main issue seems to be at higher flows - which you won’t have.
Looks like you have plenty of room to install the flow meter on the lower portion of the house. If needed, you can dig out around the pipe as it goes into the ground. Also, the fittings for the 3/4" to 1" transition could be placed along the house where the pipe is closer (you might need to spray paint it after if you don’t want the copper to shine).
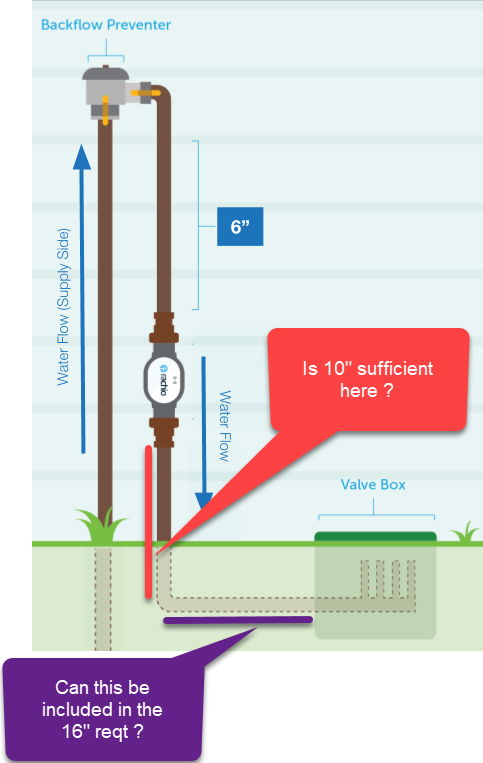
Here’s a crude mockup of how I imagine it being installed:
I dug down to see what’s happening underground, and there is an elbow below the soil. With the flow meter placed there I would have somewhere around 10" of straight pipe before the underground elbow. I’d have more with the horizontal run to the valve box after the underground elbow (which might actually be PVC, but I’m not sure). Here’s an annotation showing the 10", and the horizontal run that I’m referring to.
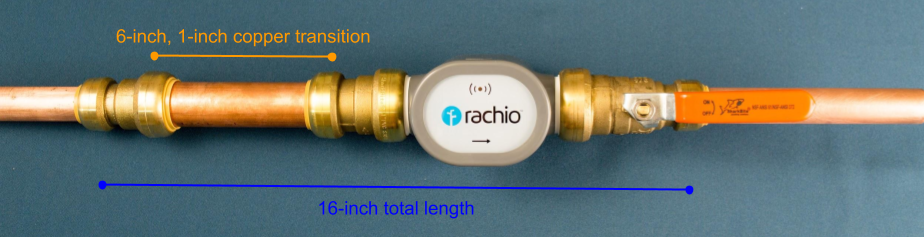
I’ll double check the measurements of the transition pipe, flow meter, and fittings tomorrow. The 16" includes the flow meter; not sure if you’re including that in your measurements. However, I think you could have the transition pipe start higher (closer to the house) to accommodate the limited clearance you have by the ground.
Hi @azdavidr, as @emil mentioned just now the 16" includes the flow meter, fittings, and 6" of 1" pipe. I would second Emil’s suggestion to place the meter closer to the ground.
In regards to improving performance below 1GPM, basically just follow the recommended install guide and that will put you in the best position to measure low flow. We are working on improving accuracy between 1GPM and 0.5GPM through some averaging techniques. One big challenge below 1 GPM is that the flow itself is actually just inconsistent. We see this on our highly calibrated mag meter and that’s why they have reasonably long averaging built into those meters. When you calibrate right now, the readings below 1GPM are going to be hit or miss because we’re only making a single measurement at the pressurize time you specify. There are a couple improvements coming soon…
Glad to see you’re upgrading your system with the flow meter @azdavidr! It’s really cool. I was so pumped when I finally got to install mine! We’ve been working on this for a while
Thanks for the great explanation @brad. I can see what you mean about low flow rates and variability causing issues. My run times for my shrub and tree zones are 7.5 hours and 5 hours respectively, so one would think averaging would work well! My guess is I’ll be reaching back out about the cal, but either way I’ll provide feedback.
Is there any downside to having more than 6 inches of 1" upstream pipe?
Sorry, one more question @brad or @emil. The plumber coming by in a few hours mentioned using something other than the Sharkbit ball valve that you recommend. He said it would be the same thing but without the ball valve. Should I be concerned? Is there something I should watch for with regards to the part he wants to use instead?
Sorry @azdavidr, behind on my community posts today. You don’t need the ball valve. Curious to see/hear what part he ended up using. Excited to see photos of the installation!
Why do you need a plumber if you’re using the SharkBite fittings? Those are expensive so that you can DIY. If you’re paying for a plumber then have him sweat everything on with copper couplings - much cheaper.
Would I still be able to rotate the unit and would I be able to replace it on my own later? I’m just looking for him to do this install, then I could make a swap later if I had a problem.
@nmstough - I’m not sure the flow meter has copper ends, plus with parts of the flow meter being non-metallic I wouldn’t want the heat from sweating to melt the non-metallic parts if the heat from sweating traveling down the pipe. Additionally, Rachio doesn’t recommend any solvent or glue as that could get on the measurement components or add turbulence to the water flow if any residue projects into the pipe. And as @azdavidr points out, the back side of the flow meter will need to be accessible to change the batteries - either as installed or pivoting around on the Sharkbites, etc.
They’re not copper. Thanks for the input @DLane. I do quite a bit of DIY stuff around the house but I get intimidated when it comes to copper pipes, thus the plumber.
@nmstough - my unit will be underground and I think that would put the transmitter farther underground with more signal attenuation. Plus there is the green light on top that one may need to look at for connectivity or issues. In the above installation, it could probably be positioned where both sides were accessible without the need to rotate the device. If so, then it would come down to aesthetics, i.e. would one want to look at the side or the top or the bottom of the unit the most.
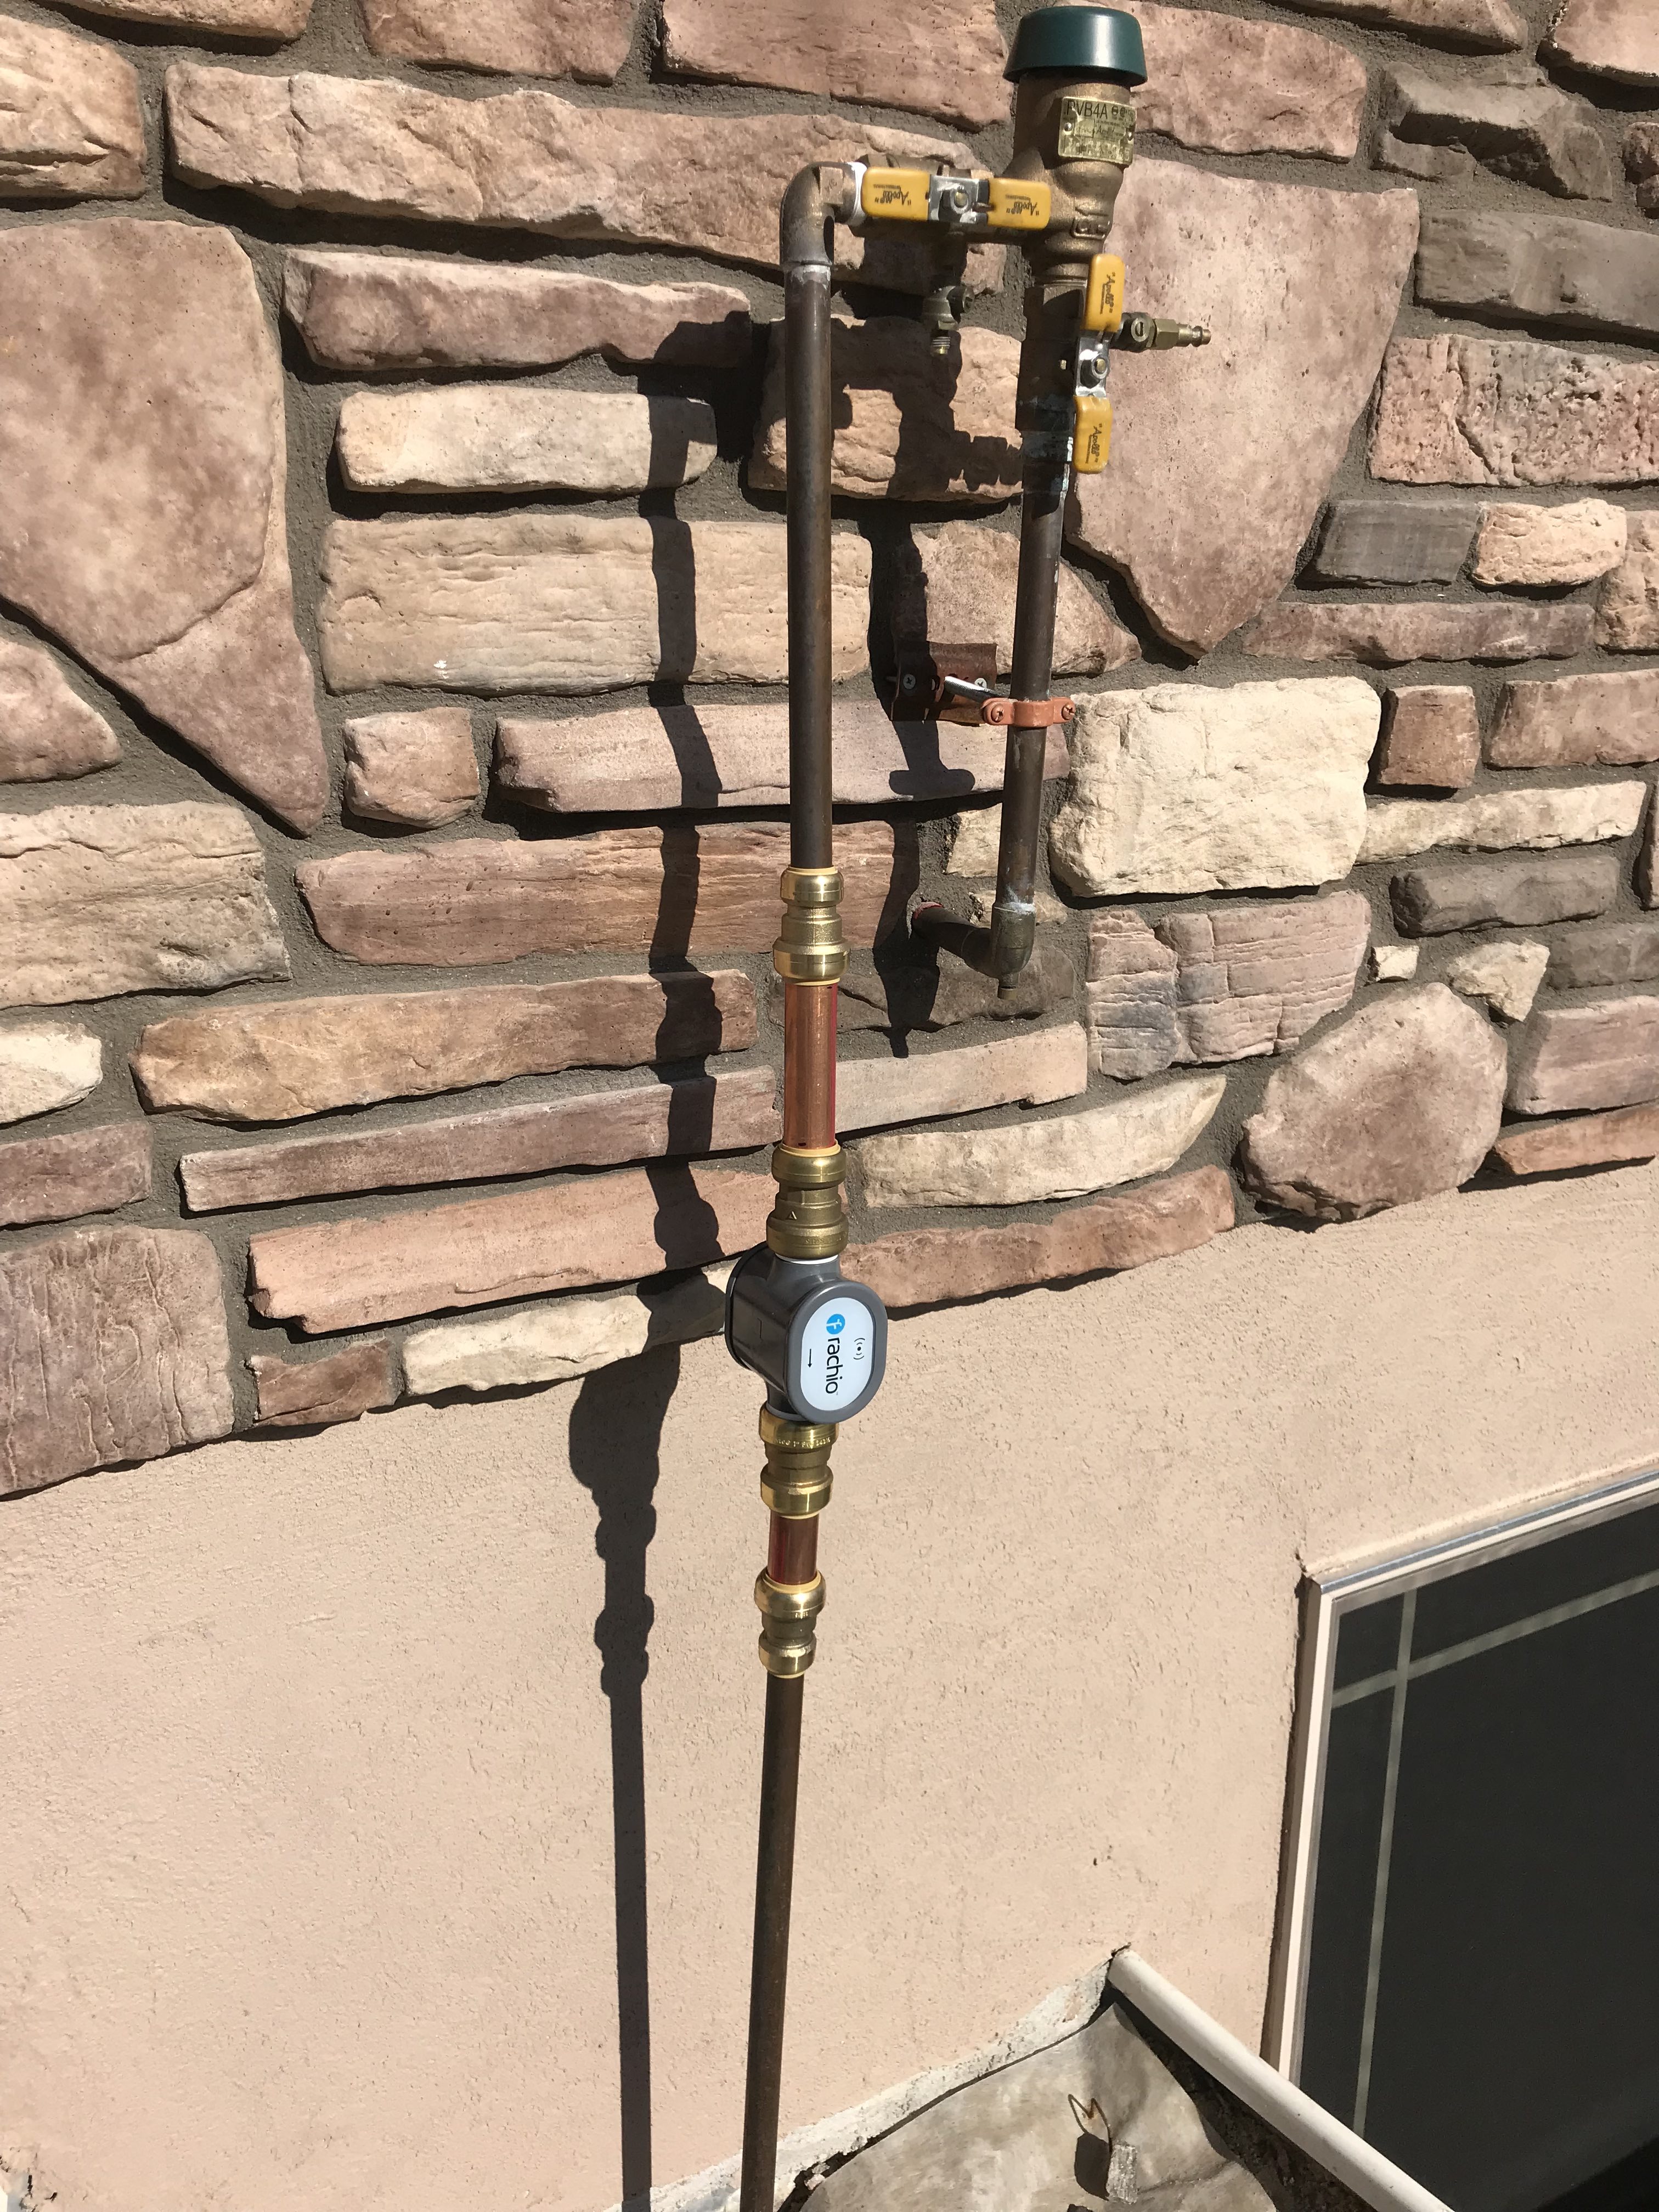
Emil did come out and fix my error. All is working fine now, and will post picture shortly. A massive thanks to Rachio and Emil for great customer support, service and working directly with a customer in the field. We had a great discussion / chat as I am a techy geek as well working for over 30 years in IT, so all keen on any new initiatives based on the user product suggestions going forward I see posted on the community site. WELL DONE KEEP IT UP.