I am trying to replace my old Rain Dial controller to Rachio 3e. There are some wires: thick black wire in 5 and thick white wire in C. Where do those wires go in the rachio?
Hi @koba,
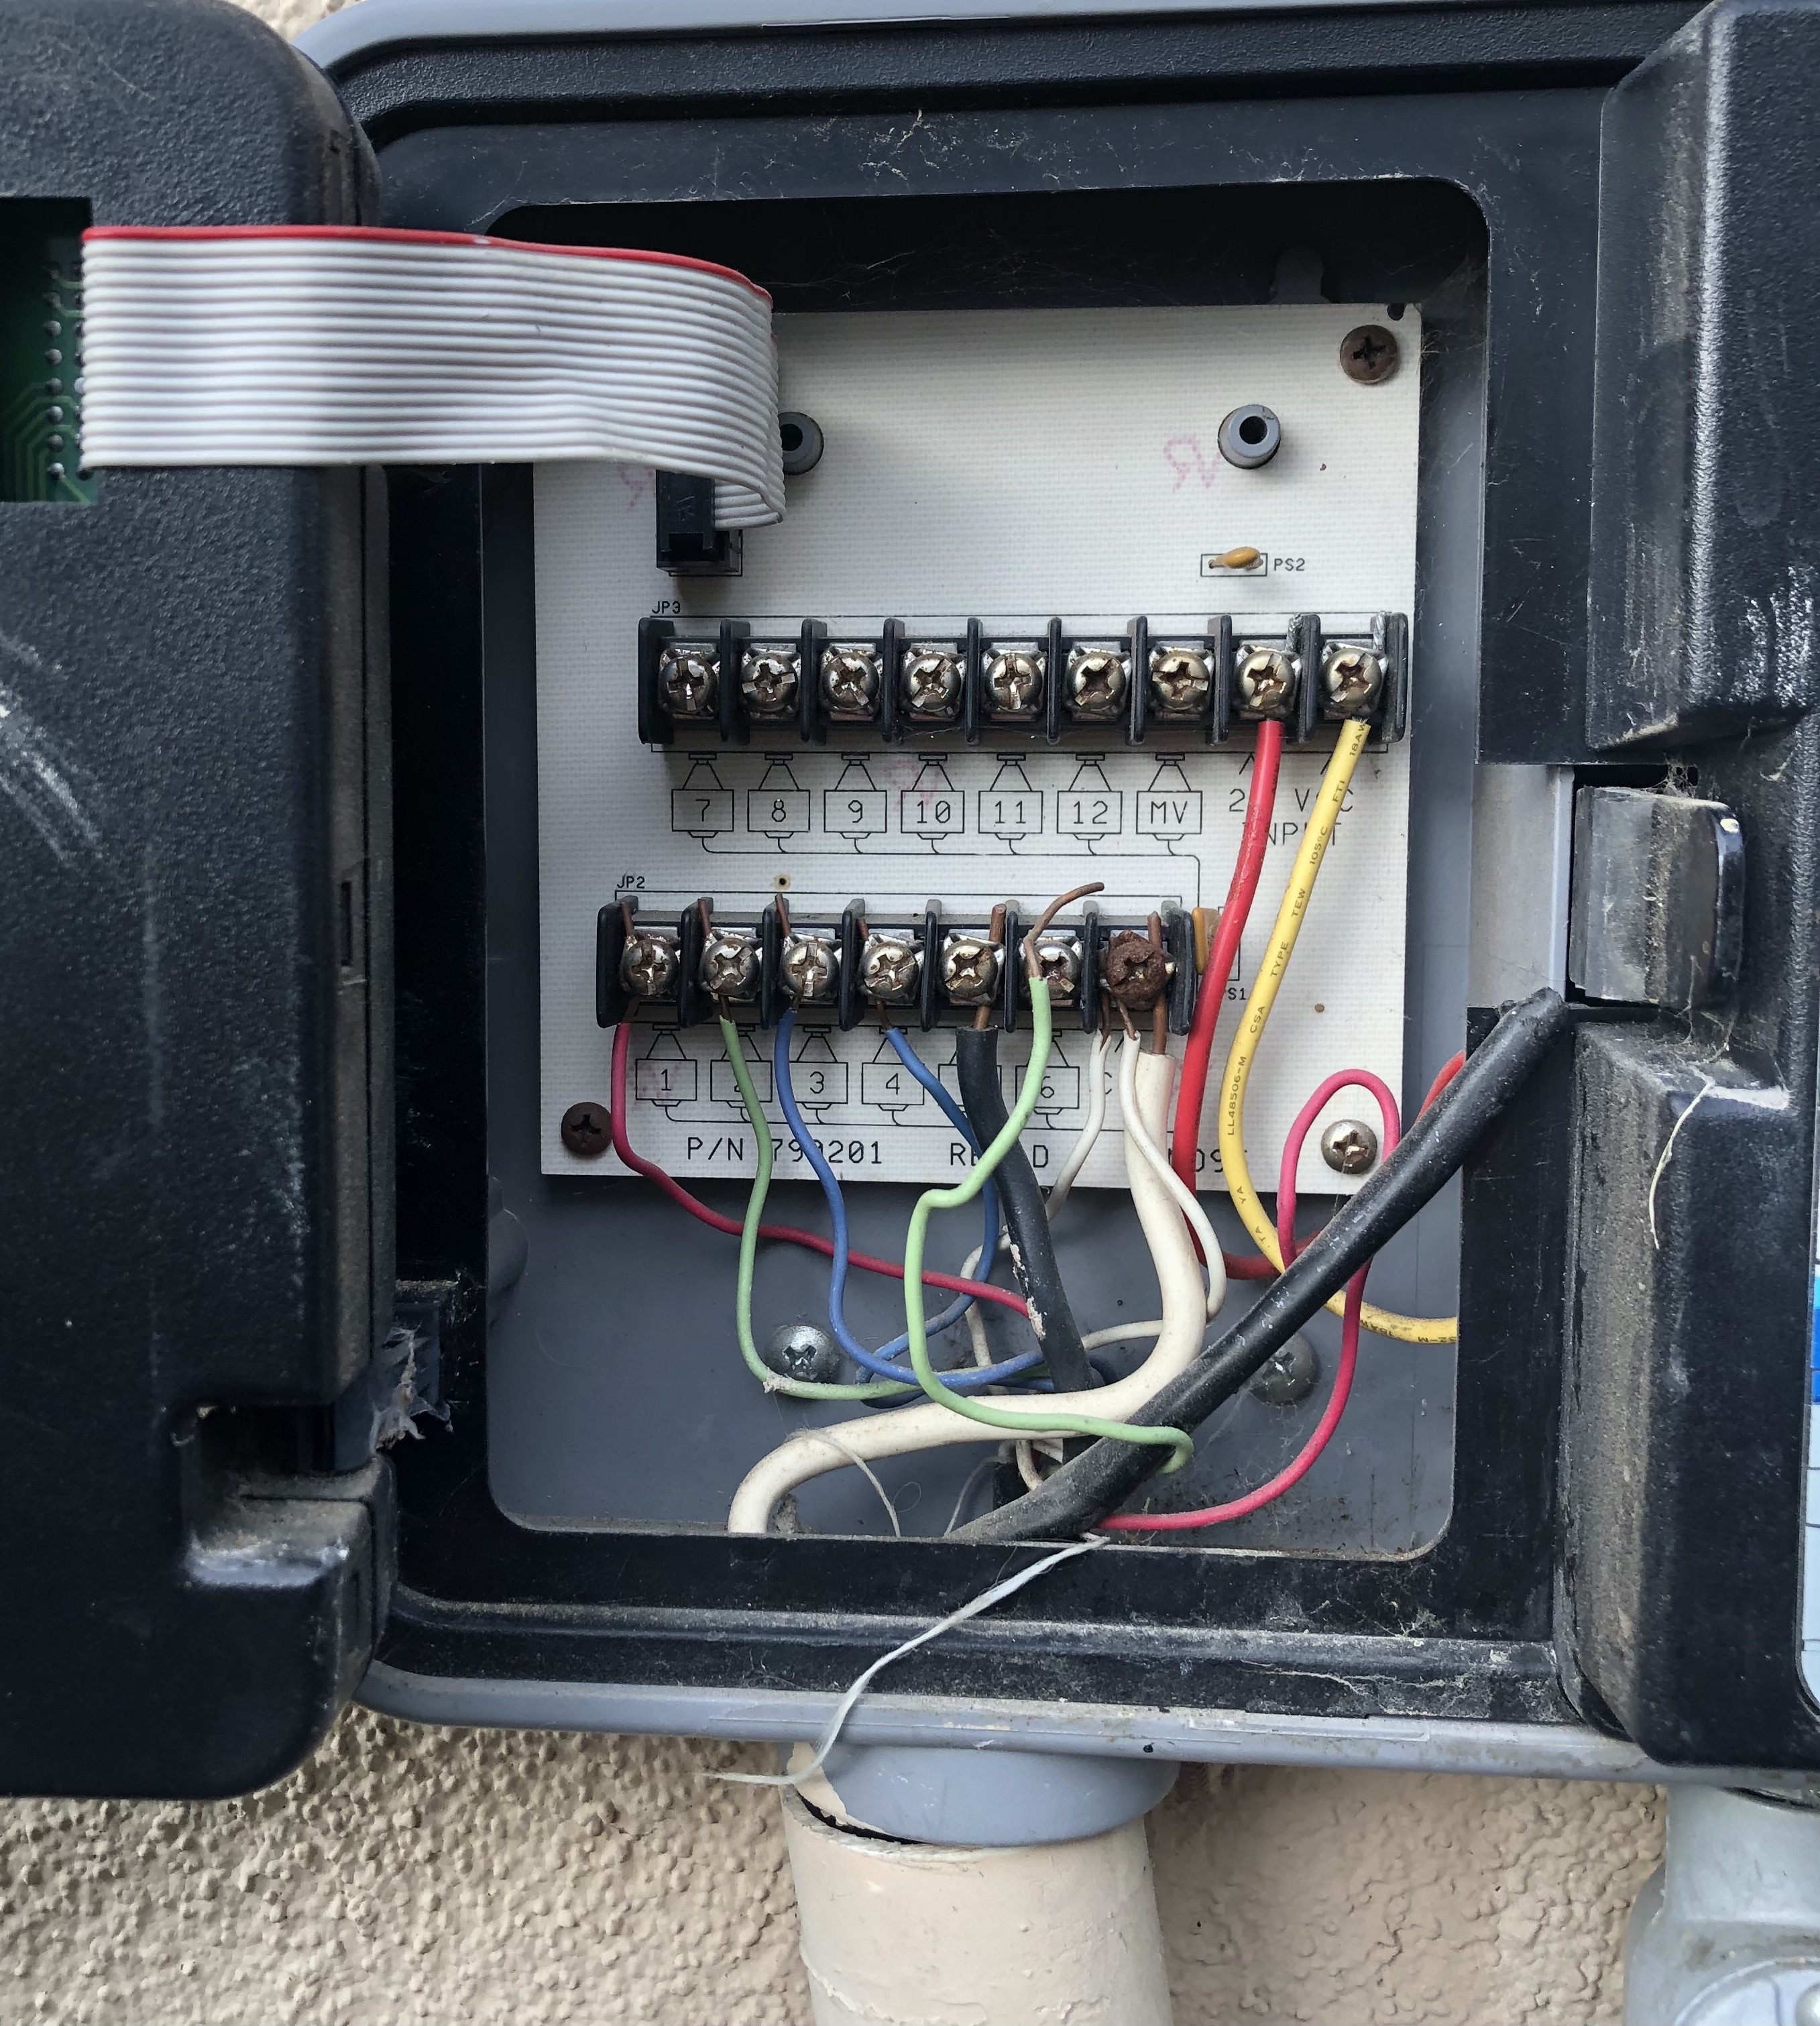
You are looking at pretty straightforward conversion. It looks like you have five (5) zones without the master valve.
Only wires worth worrying about are those connected to terminals labeled 1 though 5 & the C terminal.
Red / Yellow wire connected to 24V terminals are for power of your old controller, Rachio uses it’s own power supply so these wires should NOT be connected to the new controller.
Overall you seem to have three common white wires, though some rust can be seen. They can be connected to individual C terminals on Rachio (they do not need to connect to the same one). In case your new controller comes with only two C terminals, I recommend you find a peace of an unused wire and use wire nut to connect the C wires together with the forth connecting the budle to any of the C terminals on your new controller. For best results you may wish to cut off the part effected by rust & strip away clean wire when connecting to the new controller.
2 Likes
I completely agree with @Gene. Zones 1-5, C, using clean parts of the wires if all possible (without the oxidization), and Rachio’s power supply. My only question might be the green wire that is not connected but in front of zone 6 . . . do you know what that is for, is it just an unused zone?
1 Like
I’m not sure what the green wire that is not connected is…but I’m assuming it is for an unused zone. I will connect the wires to the new controller as instructed and see what happens! One more question…what do I do with the wires that will not be used? Do I just leave it as is without connecting them?
For unused zone wires, I sometimes wrap them around the insulation so it is pretty easy to know where it goes. I have also hooked up the wires to a zone connectors that is disabled within the software if I am likely to use it in the not too distant future.
As to the old power wire, if it is not used and easy to remove and feed wire through, I would probably remove it. If you cannot get the Rachio power wire through, you might want to cut the power wire, solder / wire nut to the existing wires on both ends.
Did I miss any wires?
Take note: Your 120V power connections to the New Rachio 3e is on the opposite side.
Your wires look fairly short, to swap everything over… ( or short enough) a little peeve as I have to do this often . Unless , you end up mounting the new controller lower to accommodate the swap or have extra wire there to pull and swap the conduit or stand pipe over.
Most definitely, I would either get No 4 or No 8 conductor wire and match the red , blue , green white color combination, bush the stand pipe or riser down, and install the newly spliced connections in pull box with a cover plate, tie-in all common wires and testing the additional 18 gauge light green wire as well. Go in the field and see what they are at the valves.
I would verify why you have all those commons in the first place, but there is space to accommodate the separate commons, i.e. say 2 valves, 2 valves and 1 valve with total of 3 commons so you can keep them individual and is great for test the individual banks of valves that are commonly tied together.
Only caveat there is to splice the 14 guage wire to an 18 since the terminal block in the Rachio Console block won’t accept it. Goes for the 14 Ga. Zone wire Black as well…
Sorry @Thomas_Lerman and anyone else; I find the practice of wrapping wires around the insulation is one of the worst practices, when I come on a job with several looms of wire and they are all wrapped in a jumbled mess, twisted around each other… cut shorter than the used leads, and often breakage occurs as well as it’s just plain time consuming and adds to the cost of an installation.
SimpIe and clean, I make pigtails , and when I look at the wiring and I need an extra zone wire it’s available and easy to test or upgrade, zero thinking involved, and no time spent sorting a rats nest out!
Ideally, your looking for a clean installation, which keeps things simple, as well as not damaging the terminal blocks on your new unit.
You’ll see what I mean when you remove your old RD, olr match it up before you pull it. You always want to have wiring flexibility, as everything moves and is in constant flux.
- you do need to install the Rachio Outdoor box to put your unit in,
do you have that?
No need to apologize, any practice (wrapping unused wire, making pigtails, leaving wires hanging loose, not routing neatly, splicing, dicing, etc.) in my opinion can be a jumbled mess / rats nest if care is not taken. I also know others do not like to hook up the extra wire to a controller as they feel like it gives the false sense that it is hooked somewhere to a valve that is not working or may cause a short if turned on and accidentally is touching something. Thank you for posting your experience.