I removed a Rain Bird ESP-SMT and installed a new Rachio 3. I’m using an extension cord but I want to use the enclosure’s hard wiring bay instead:
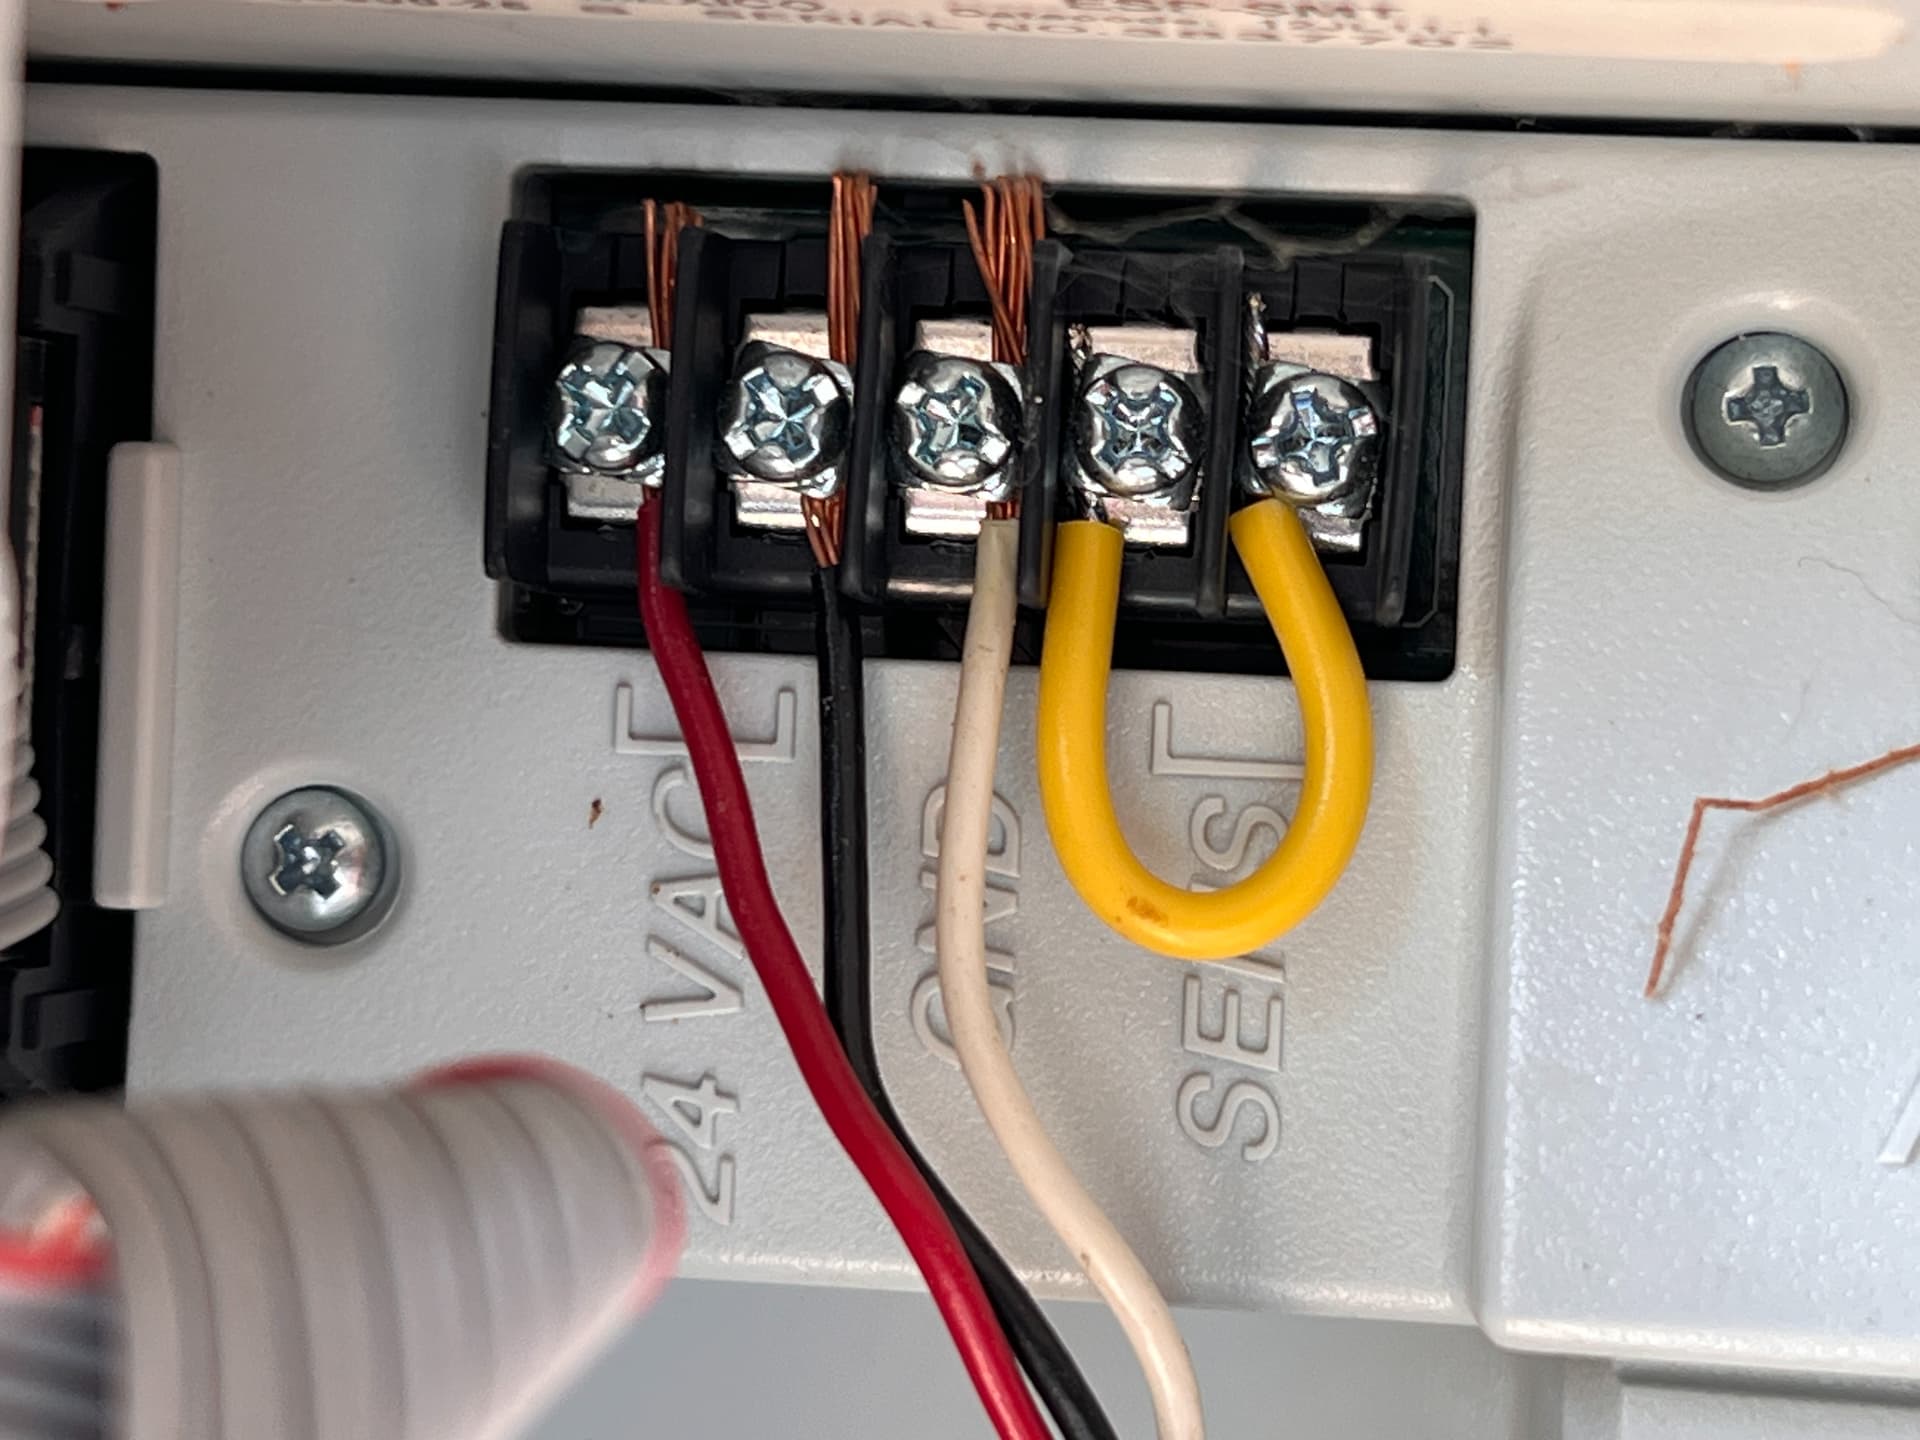
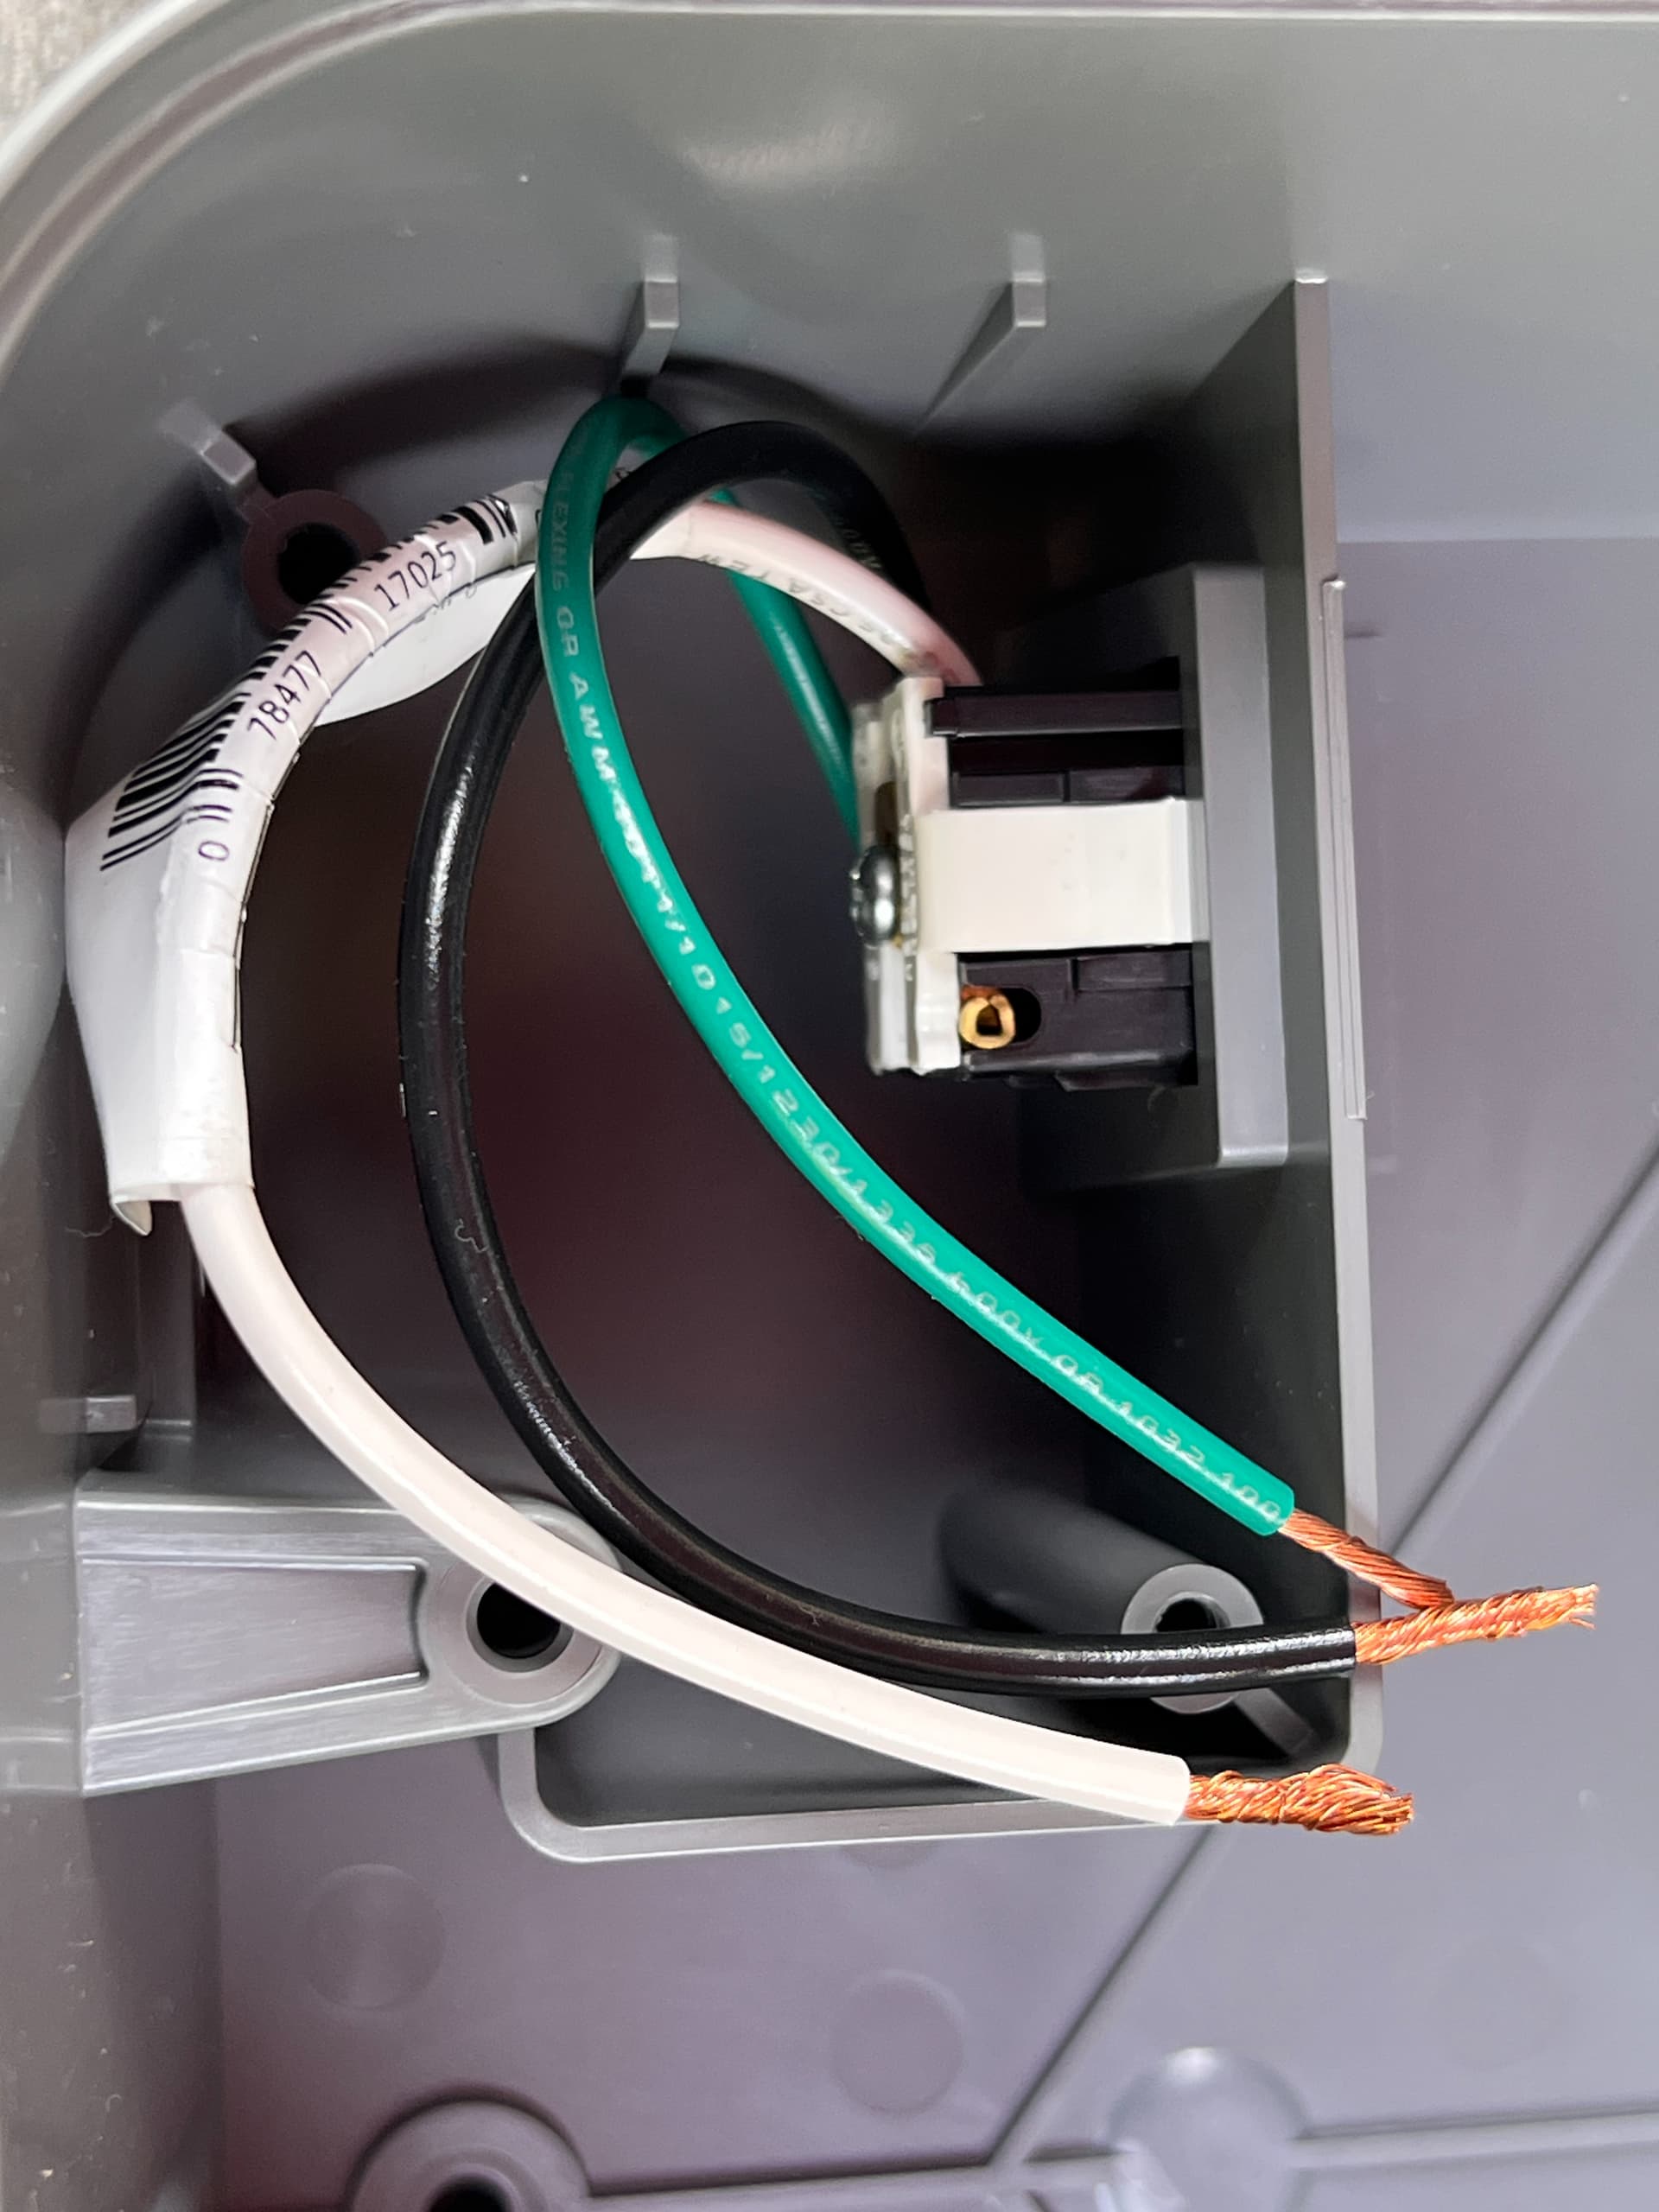
Question) My existing Rain Bird power was hard wired (pictured 1) with red, black, and white wires. , Which wires do I connect to the hardwiring bay’s white, black, green wires (pictured 2)?
The help video says to connect:
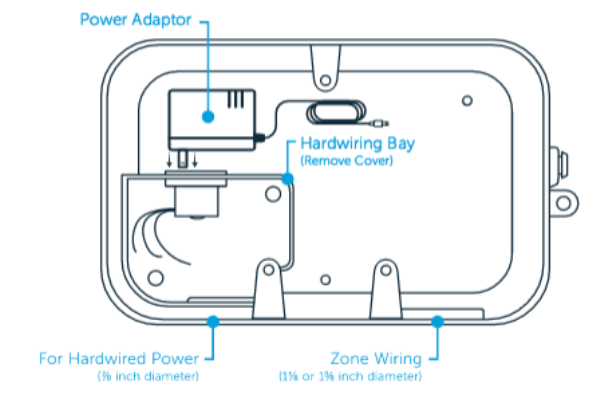
As you notice, those wires are 24 VAC. The Rachio enclosure is meant for 120 VAC which the supplied transformer plugs into and then connect to the actual controller with the barrel connector. Is the transformer in the Rainbird enclosure? If so, the other end should be 120 VAC and that is what connects to the Rachio enclosure.
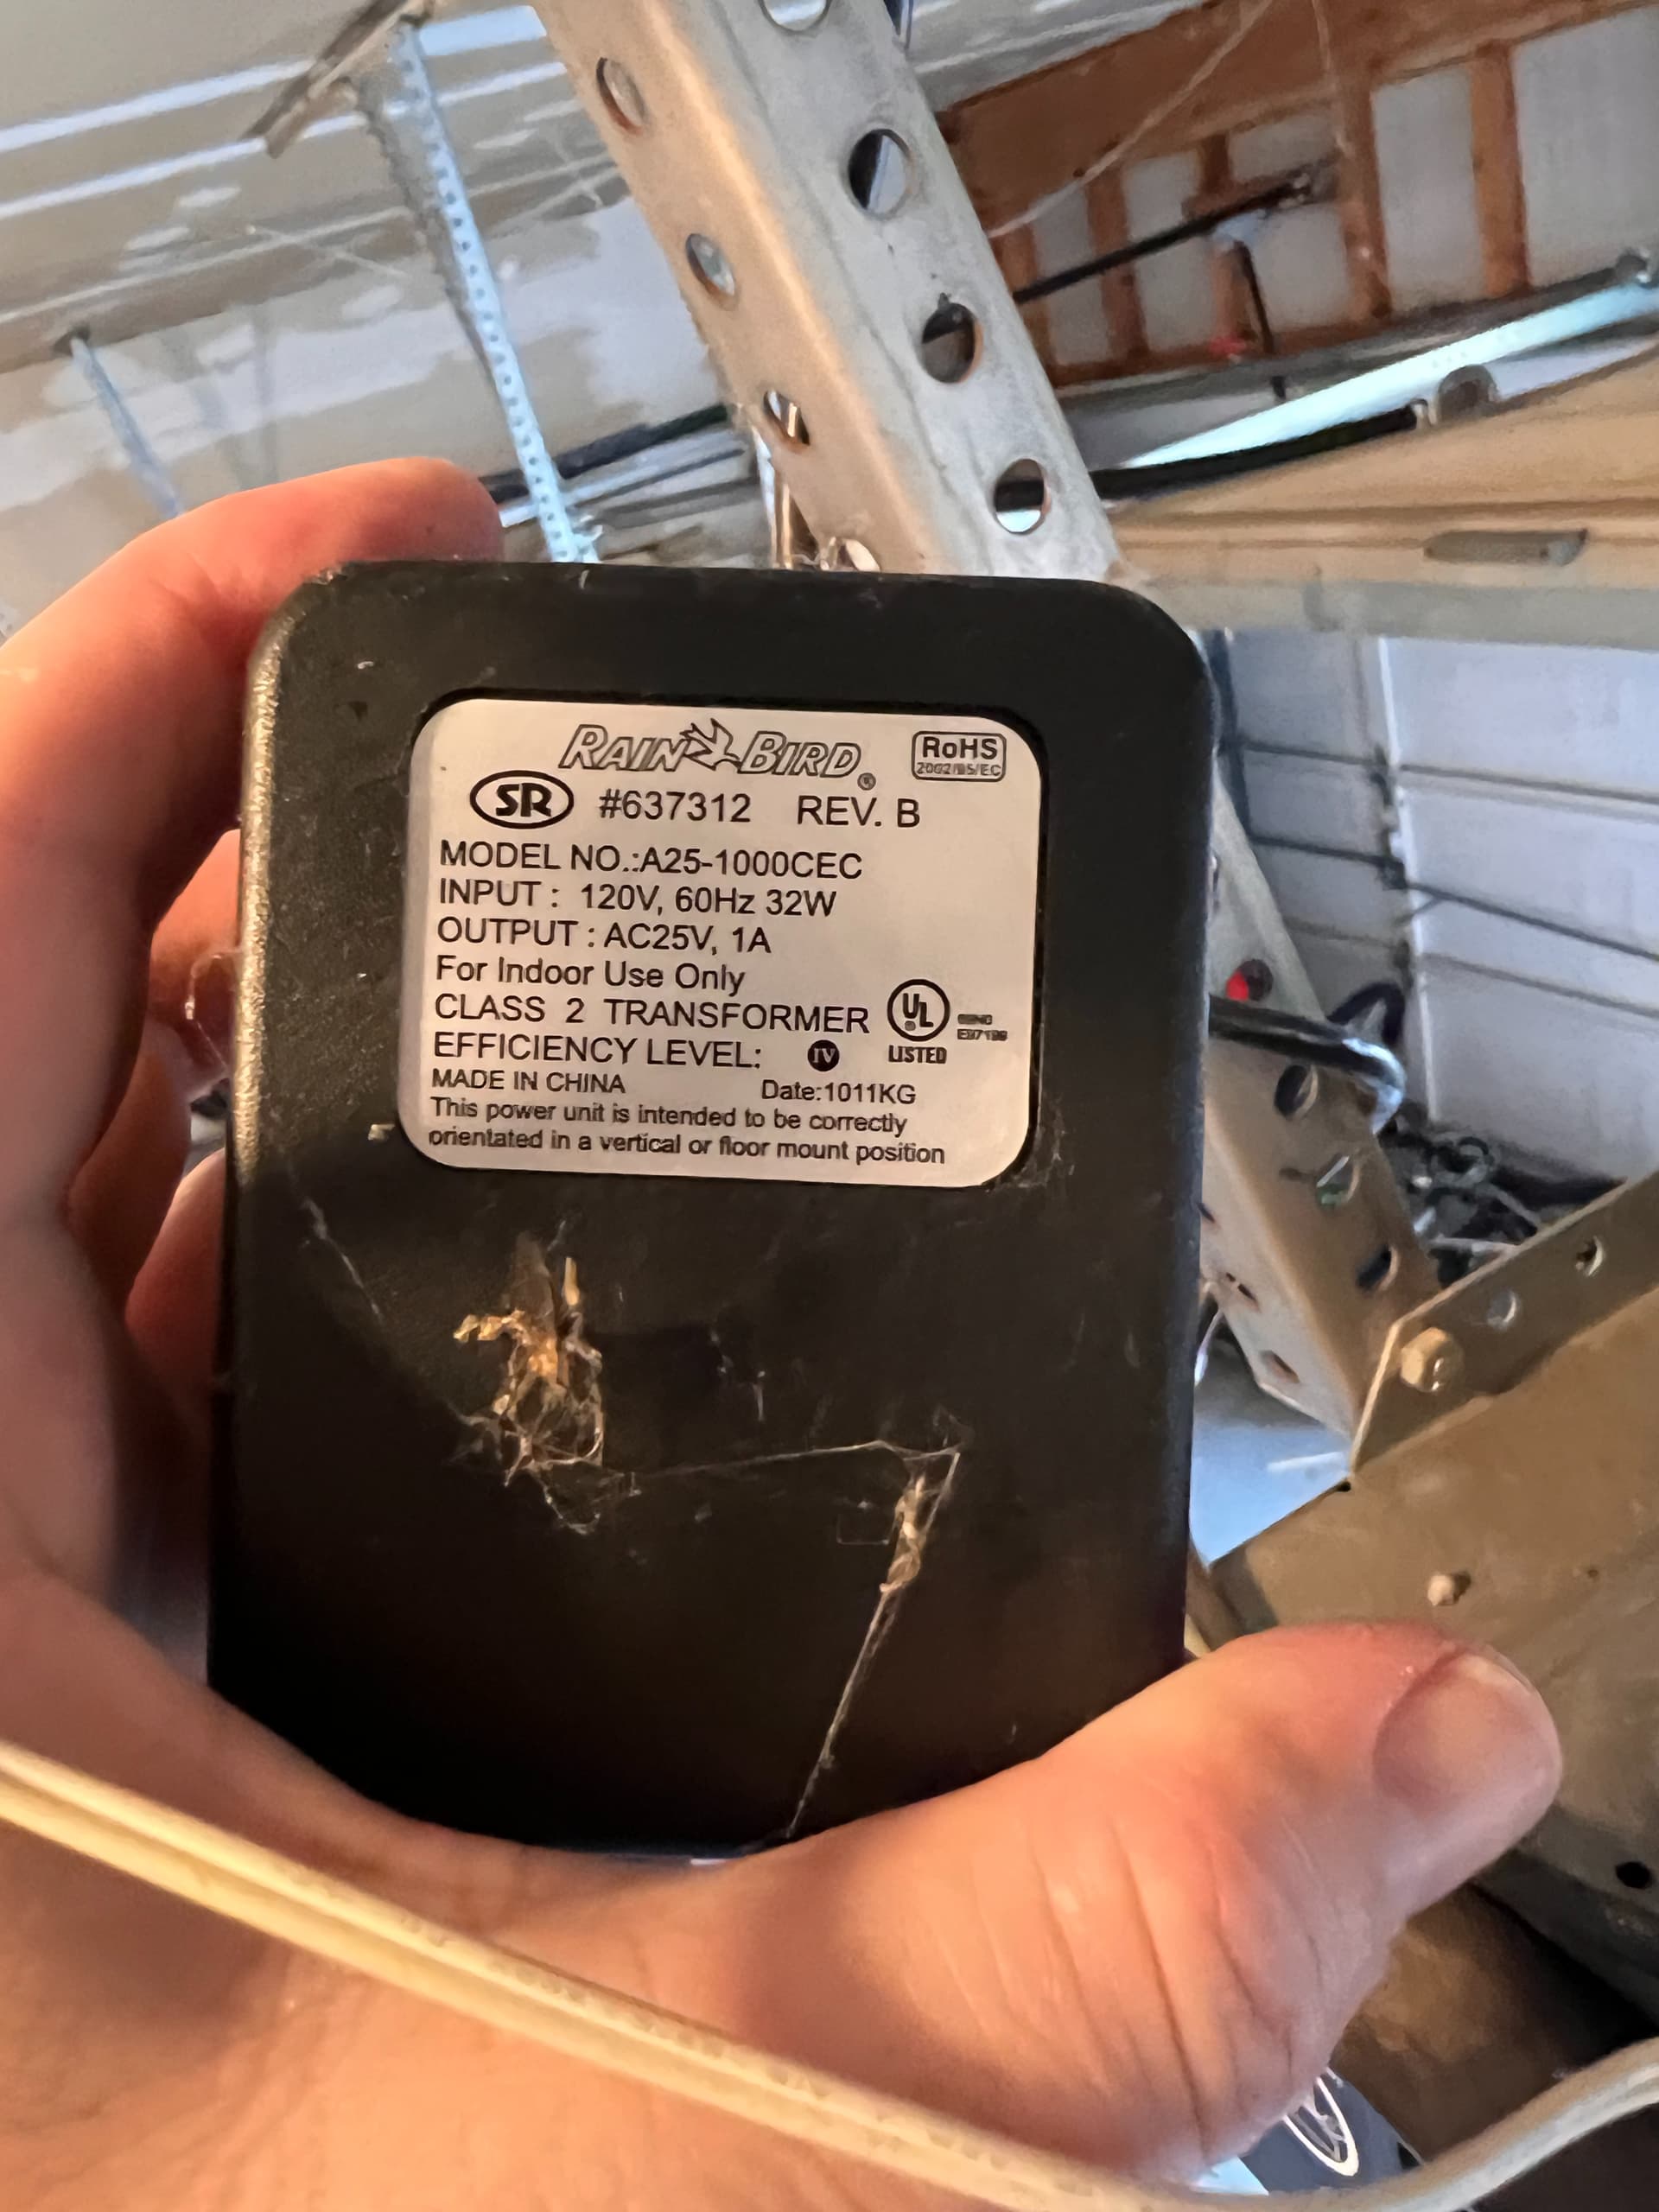
The Rain Bird transformer is plugged into an outlet. The end of the wire is the red, black, white wires that you can see were hard wired into the Rain Bird 24 VAC.
I’d like to wire these red, black, white wires to the hardwiring bay in the new Rachio enclosure (white, black, green pictured) to power the bay. The Rachio transformer then plugs into the bay.
Are you saying I cannot reuse the Rain Bird wires because they only supply 24 VAC? If that’s the case then I think I have my answer.
You have 120 VAC coming through your extension cord to your Rainbird transformer with 24 VAC coming out. If you connected that to your Rachio enclosure outlet, the Rachio transformer would be supplied with 24 VAC (instead of 120 VAC) and trying to convert that to 24 VAC. It just would not work. If you continue to use the extension cord, which @DLane mentioned is against code but not sure who would catch you, why not plug the Rachio transformer directly into that?
The Rachio transformer is currently plugged into the extension cord. I was hoping to plug it into the internal bay of the enclosure and remove the extension cord from the equation. Looks like I need a different wire to power the enclosure. Thanks!
Great, at least you are up and running. If you can have 120 VAC running to the enclosure, you can use the outlet in the enclosure. Might want to get an electrician for that.
FYSA, here’s the existing power source that I wanted to use (the other end is the black, white, red). It plugs into a ceiling outlet in the garage and the wires run to the old Rain Bird controller.
Interesting that it is 25 VAC. Most run on 24 VAC, but I believe it is within tolerances of everything. It would be nice to be able to tie into that outlet and run an outlet by and inside your Rachio. That probably would require access in the attic of the garage and probably running wire through the sheetrock on the walls.
Run 120 VAC to the black, white and green wires in the Raciho external enclosure and plug the Rachio transformer into the associated plug. Ideally, using a permanent wiring solution instead of an extension cord.
Plug the Rachio transformer into where the Rain Bird transformer was located in the garage, cut the Rachio transformer outlet cable and splice in the cable going to the external enclosure. At the Rachio external enclosure connect the Rachio pigtail to the cable and plug it into the Rachio controller. There will only be two wires in the Rachio cable, so use the Red and Black. If you want to maintain the same cable polarity (not required), then use a volt meter to see which wire is carrying the current from the Rachio controller - test wire to a ground or neutral wire.
I say this simply because you are obviously unfamiliar with the types of wires being used and I wouldn’t want you to do something that could create a fire hazard.
The wires from the rain bird are totally useless in this situation. There is no safe way for you to simply use them. An electrician can properly provide a power source (maybe off the plug your rainbird was plugged into) via conduit to your rachio enclosure and wire up the plug inside it.
The only other option would be to splice in the rachio power supply and connector into the rainbird wires on either end. That would be ok as well, but the transformer would be tossed and you wouldn’t be plugging anything in the enclosure. But you’d need to make sure your splices are inside not outside and properly done.
Either way an electrician or someone who’s knowledgeable on these things who can go to your house and help you is what you should do.
I agree with you. The DIY talks about a simple pigtail that plugs into the wall outlet and then wires to the hardwire bay. Like This. I have no issue buying this but I’d somehow need to extend it 20 feet to reach the nearest outlet.
You could, and I have done this type of thing in the past, but know that it isn’t up to code…if you go to sell your house, an inspector is going to pop you on that installation all day.
Sorry, I thought you were running this indoors into your garage. If it is running indoors, no, it would not be code. If it is running outdoors to a GFCI protected outlet, then sure…