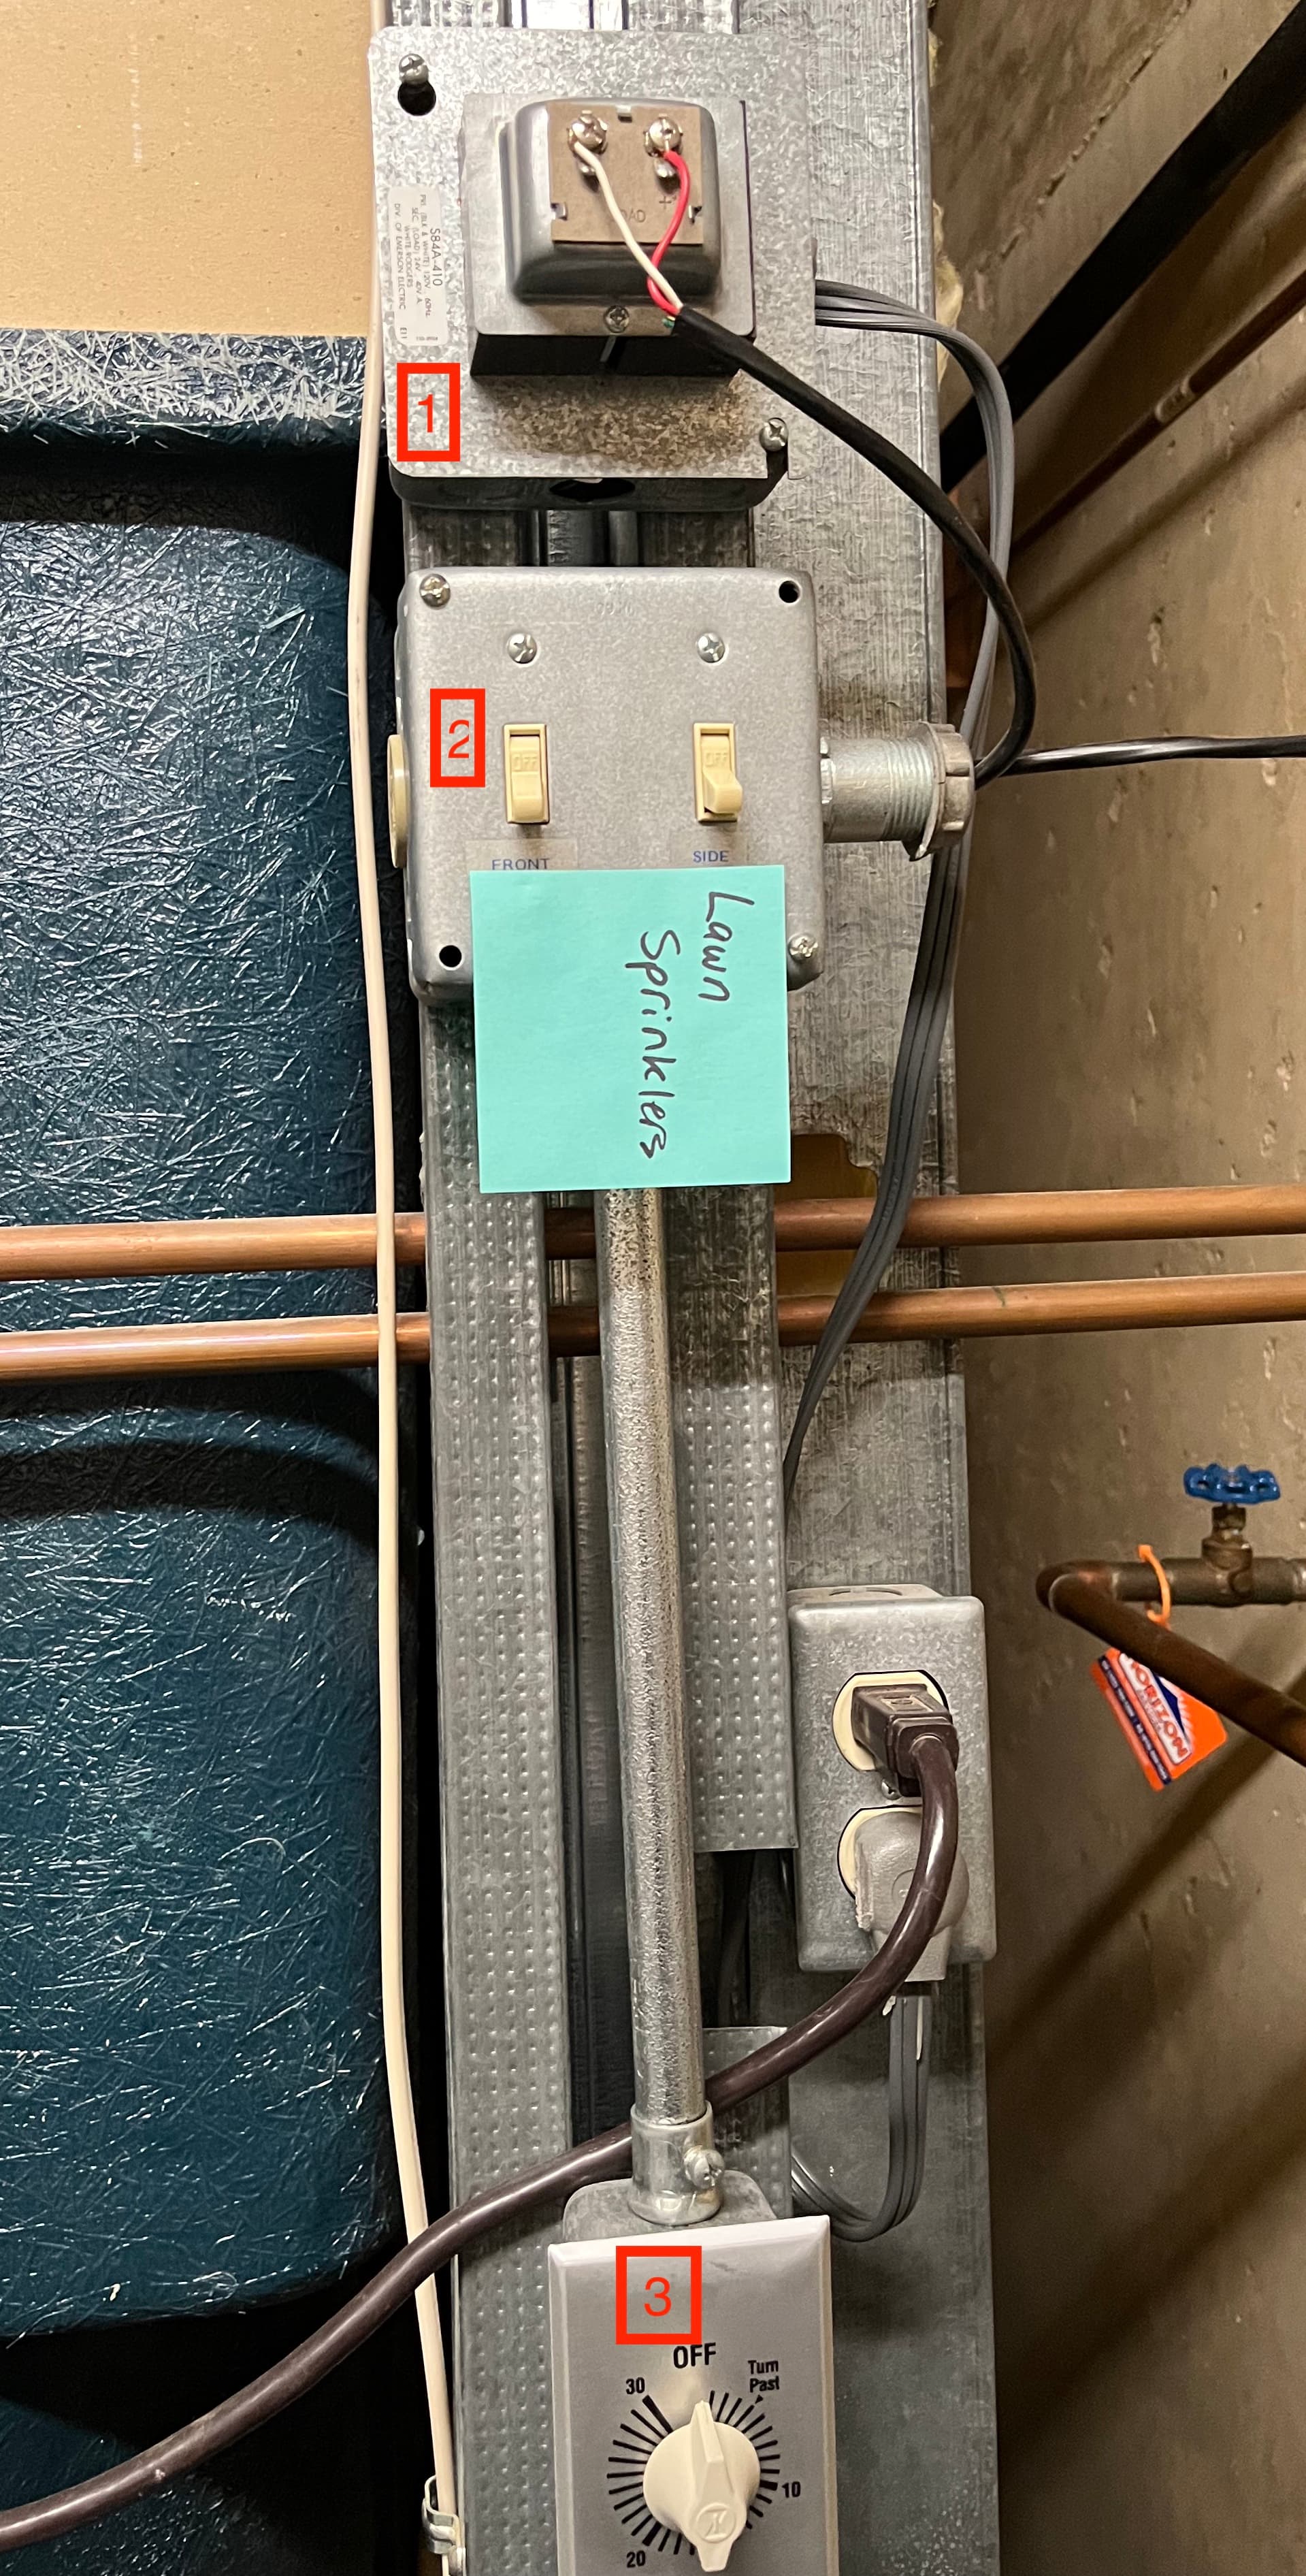
I am thinking of using Rachio 3. My existing system has 2 zones, with a hand-cranked timer. I have done some reading and watched some videos but can’t quite find an example that is like mine. I have attached a photo with the three parts of the setup marked 1/2/3 in red in hope that someone can guide me.
This looks like a solinoid – it says 24V on it
These two are the switches for the two zones that I have. I have unscrewed this to find that the wire that comes from the sprinkler line has one red and one blue which goes to each.
#1 is a transformer. Does it by chance say AC or DC? If not, do you have a multimeter to test with?
This seems rather unique and simple. I see the low voltage going to the box with switches. Would it be possible for you to draw where the wires are going to the switches and timers please?
If the transformer is AC, I think it will be an easy conversation, but want to make sure. If DC, almost as easy to more difficult. Can you provide brand& model of the valves and/or pictures please?
and the first page shows all 24VAC. It does not hurt to double check, but I would guess you are good.
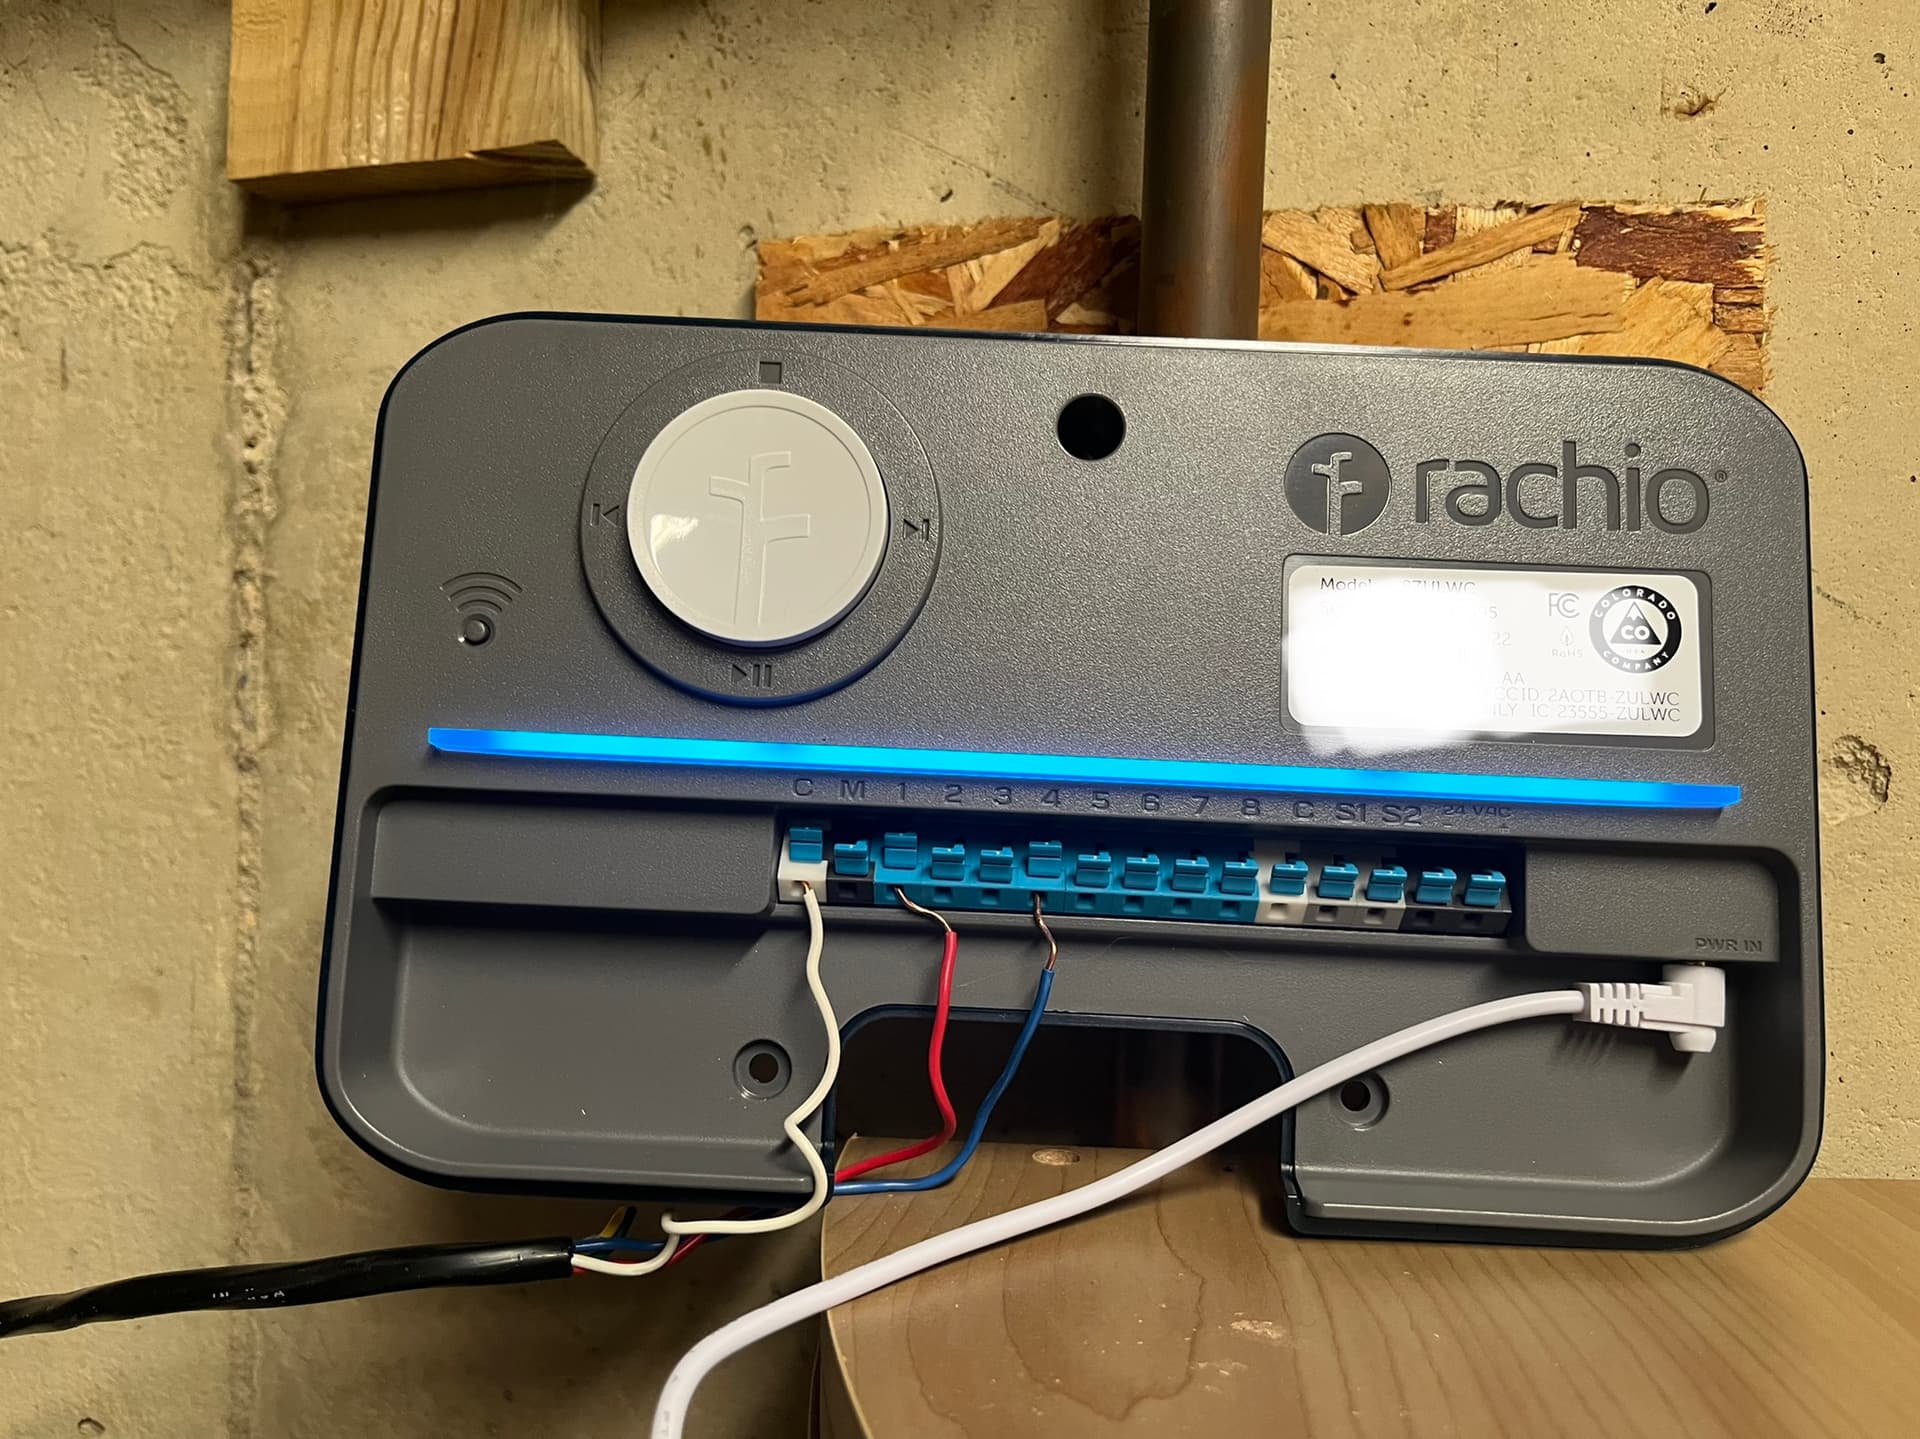
Just for my own sake, I will transcribe what I see in the wiring picture:
Transformer:
White goes to valves’ white, which is Common (‘C’ on Rachio)
Red goes to the timer’s black with the opposite end of the timer going to one leg of both switches
Valve wires
White already mentioned
Red & blue are the connected value wires: one would go to ‘1’ and the other would go to ‘2’ on Rachio
Yellow & green are not connected and appear to be unused zone wires
The only other thing left is power to the Rachio. Hopefully you have an outlet nearby which you can plug the Rachio supplied power supply into and connect the barrel connector on the other end into the Rachio. Do not connect any other power wires to the Rachio. In the worst cast, you or an electrician should be able to replace the transformer with an outlet.
Your transcription of the wiring is correct. Power supply is not a problem. In the first picture I posted, you can see a 2 gang outlet. One is supplying the transformer, the other is taken, but actually is the plug for a power strip.
So this is what I want to do (correct where I am wrong please):
Connect Rachio supplied power supply to the power strip nearby
Connect red and blue wire from valve to two of the zones on Rachio
Connect white wire from valve to C on Rachio
Any other connections needed ?
Pardon my ignorance, do we then not need the transformer anymore ?
Correct. The only things you need from the old system is the outlet and the sprinkler wires. So, you do not need the transformer, switches, or timer. I think some building codes say to only use a power strip or extension code for temporary things, but I do not believe that should be a problem as long as the power strip is not overloaded. Thank you for all the pictures and description. I must say that it is of my opinion that the old way was pretty clever of a setup.
Thanks so much again. The person who fixed some of our broken sprinkler heads commented the same (clever setup). I need something for when you are away for a couple of weeks. I’ll report back if I am successful in setting this up.
@ins0mniac - it sounds like the Flex Daily schedule builder was chosen. This schedule is very sensitive to data input, so GIGO (Garbage In, Garbage Out). An incorrect soil type or precipitation rate on the sprinklers can cause over or underwatering. The system will also assume the water table is completely empty when starting, that is why the long run time today. There is a way to manually fill the water table if it has recently rained.
Watch the results and fine tune. Once dialed in, many people are happy with a Flex Daily schedule, but it does require some work at the beginning.
@ins0mniac - on the app, choose irrigation, then the schedule to change. If it is Flex Daily it will have a soil moisture bar, tap on the soil moisture and there will be a Fill and Empty button. If there is no soil moisture data, then it is not a Flex Daily schedule.


 . I was surprised to see it chose a schedule of watering for close to 2 hours today and then in a week!!
