I bought a Rachio Gen 3 back in February, but haven’t had the time to set it up. I finally had some time to get it done today. I’m replacing a Rainbird ESP-Me controller. There is also a SMRT-Y Soil Moisture Sensor in place. The previous controller was working fine before installation, but I wanted to upgrade to a smart controller. I matched the wiring based on how it was setup previously, but it does not appear to set up properly. I’m not entirely clear on what I did wrong. I tried to test the zones after install and nothing happens. It says the zone is running but no sprinklers turn on. Any help is appreciated!
I would suggest starting off with the zones and valve commons hooked up, in other words, without the sensor. Many people do not use sensors as they find it not needed. I would also have to do research as to how to hook that sensor up anyway.
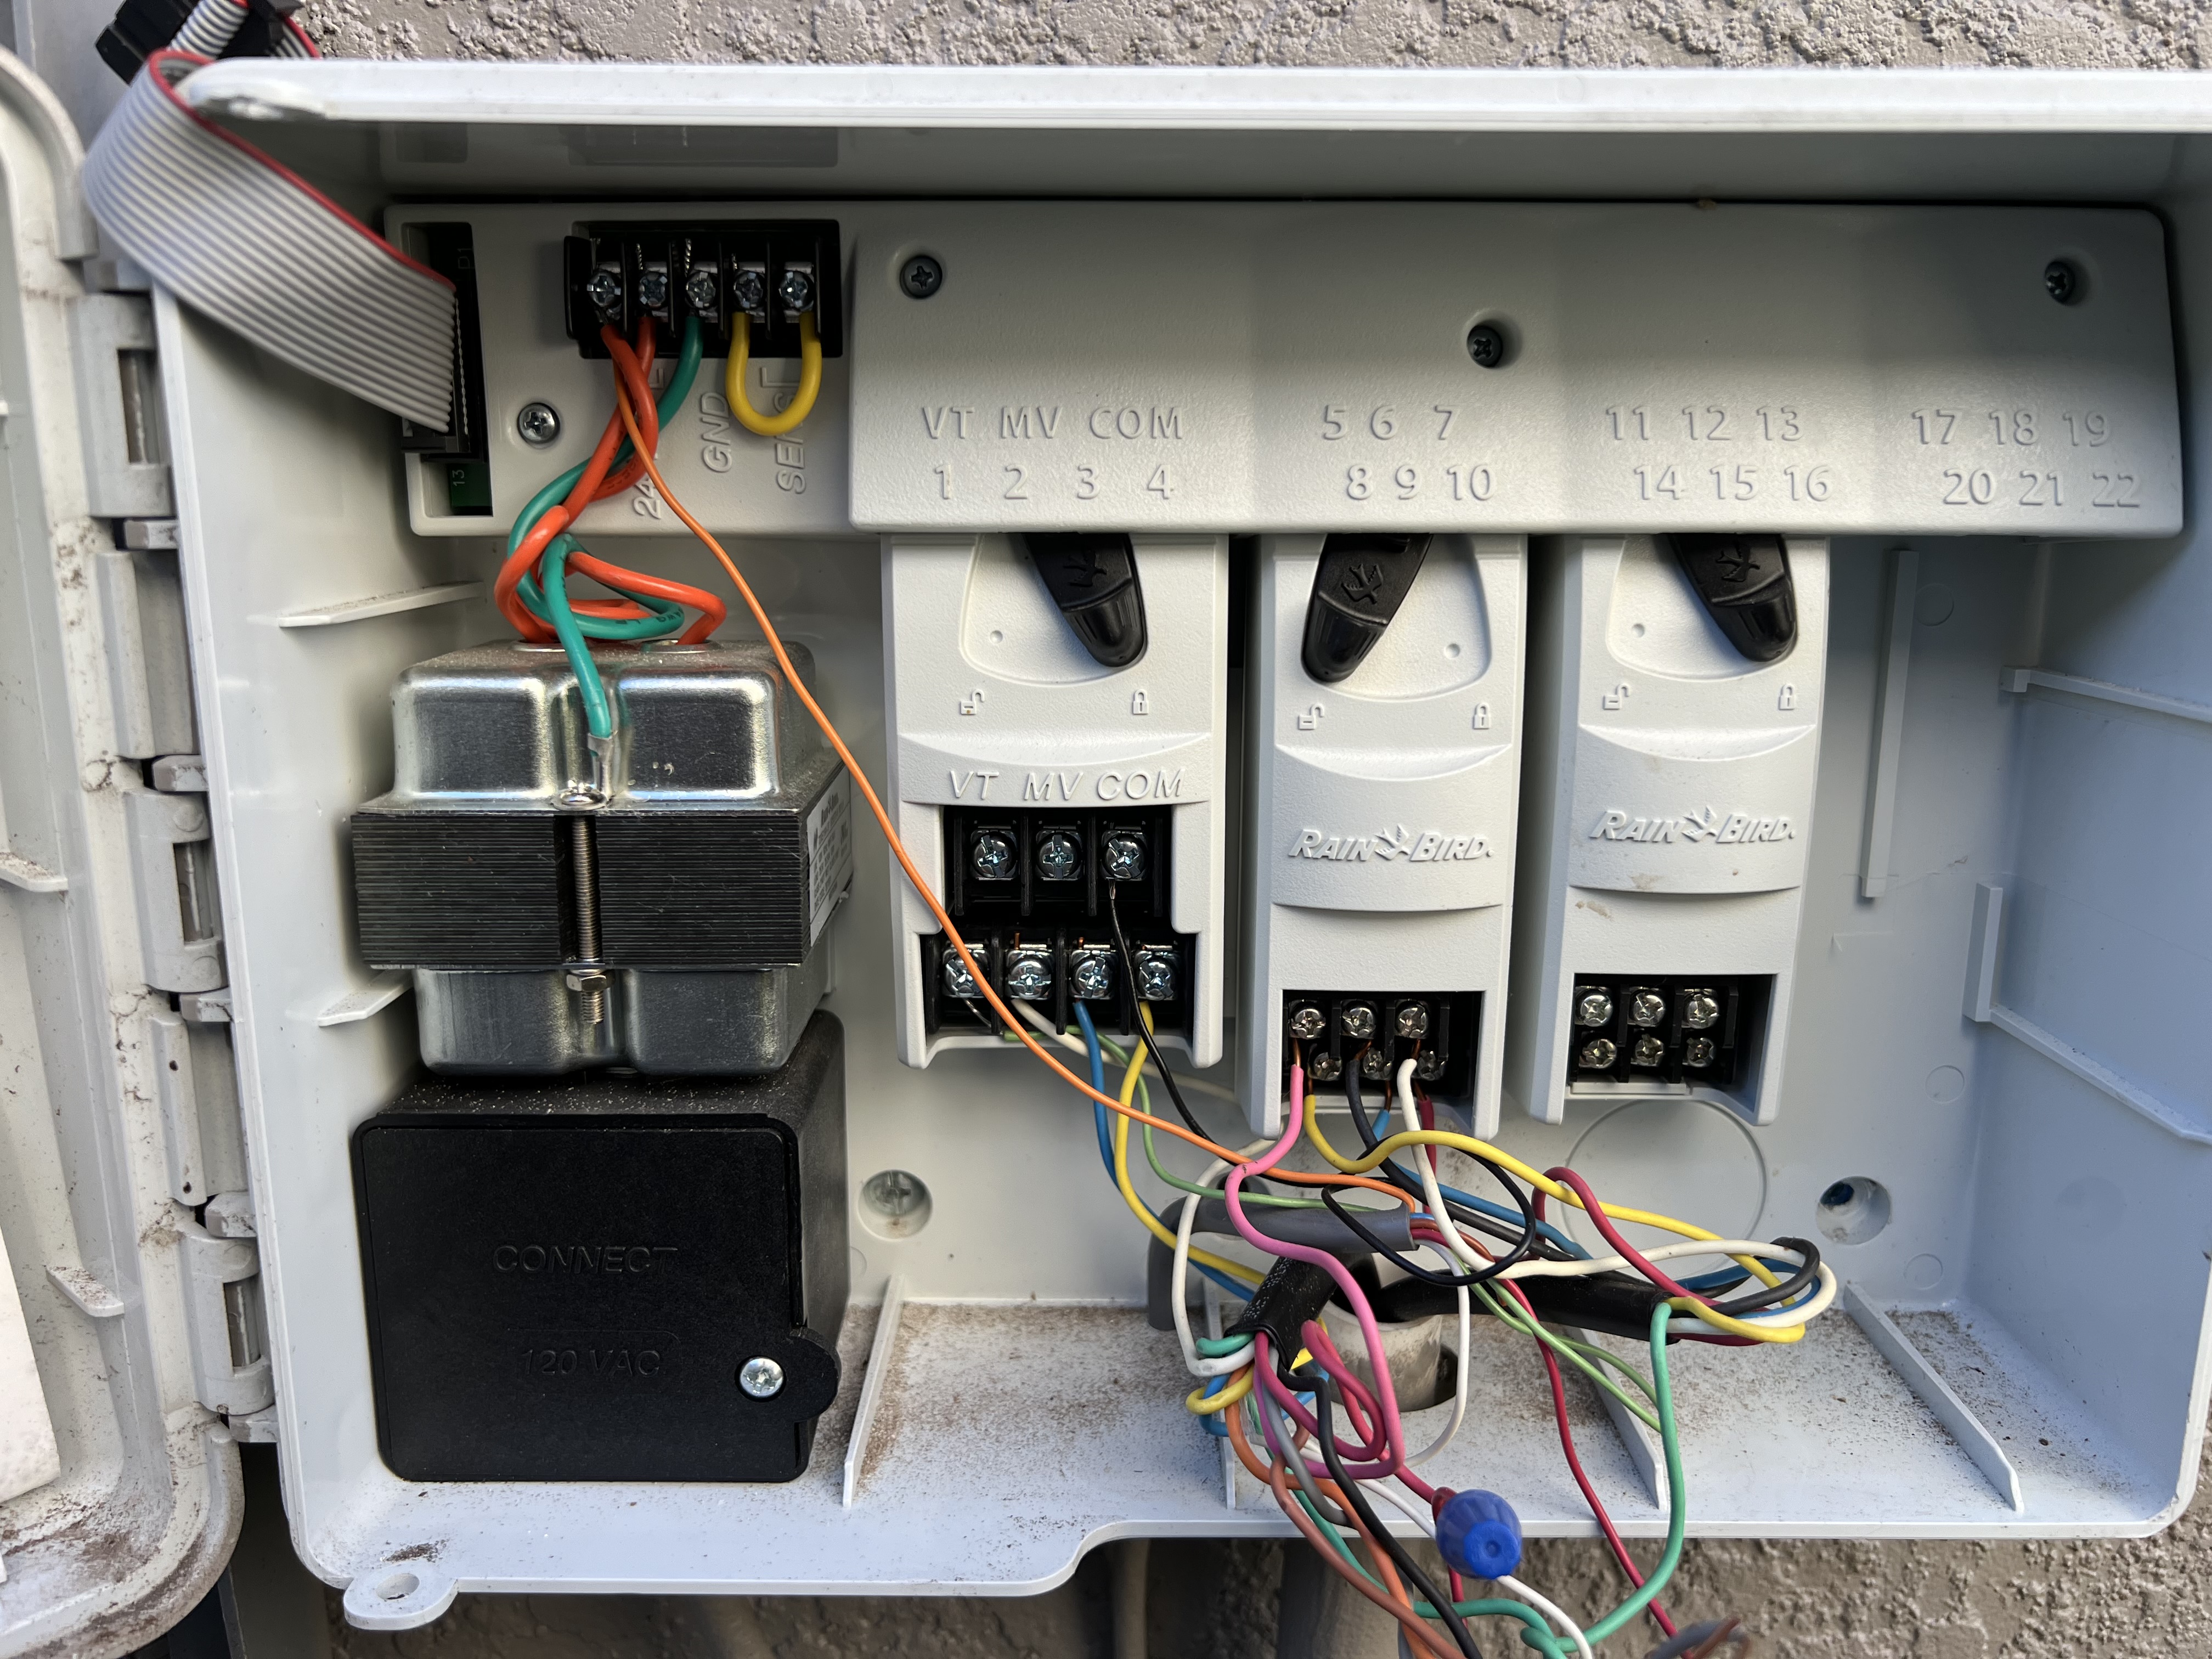
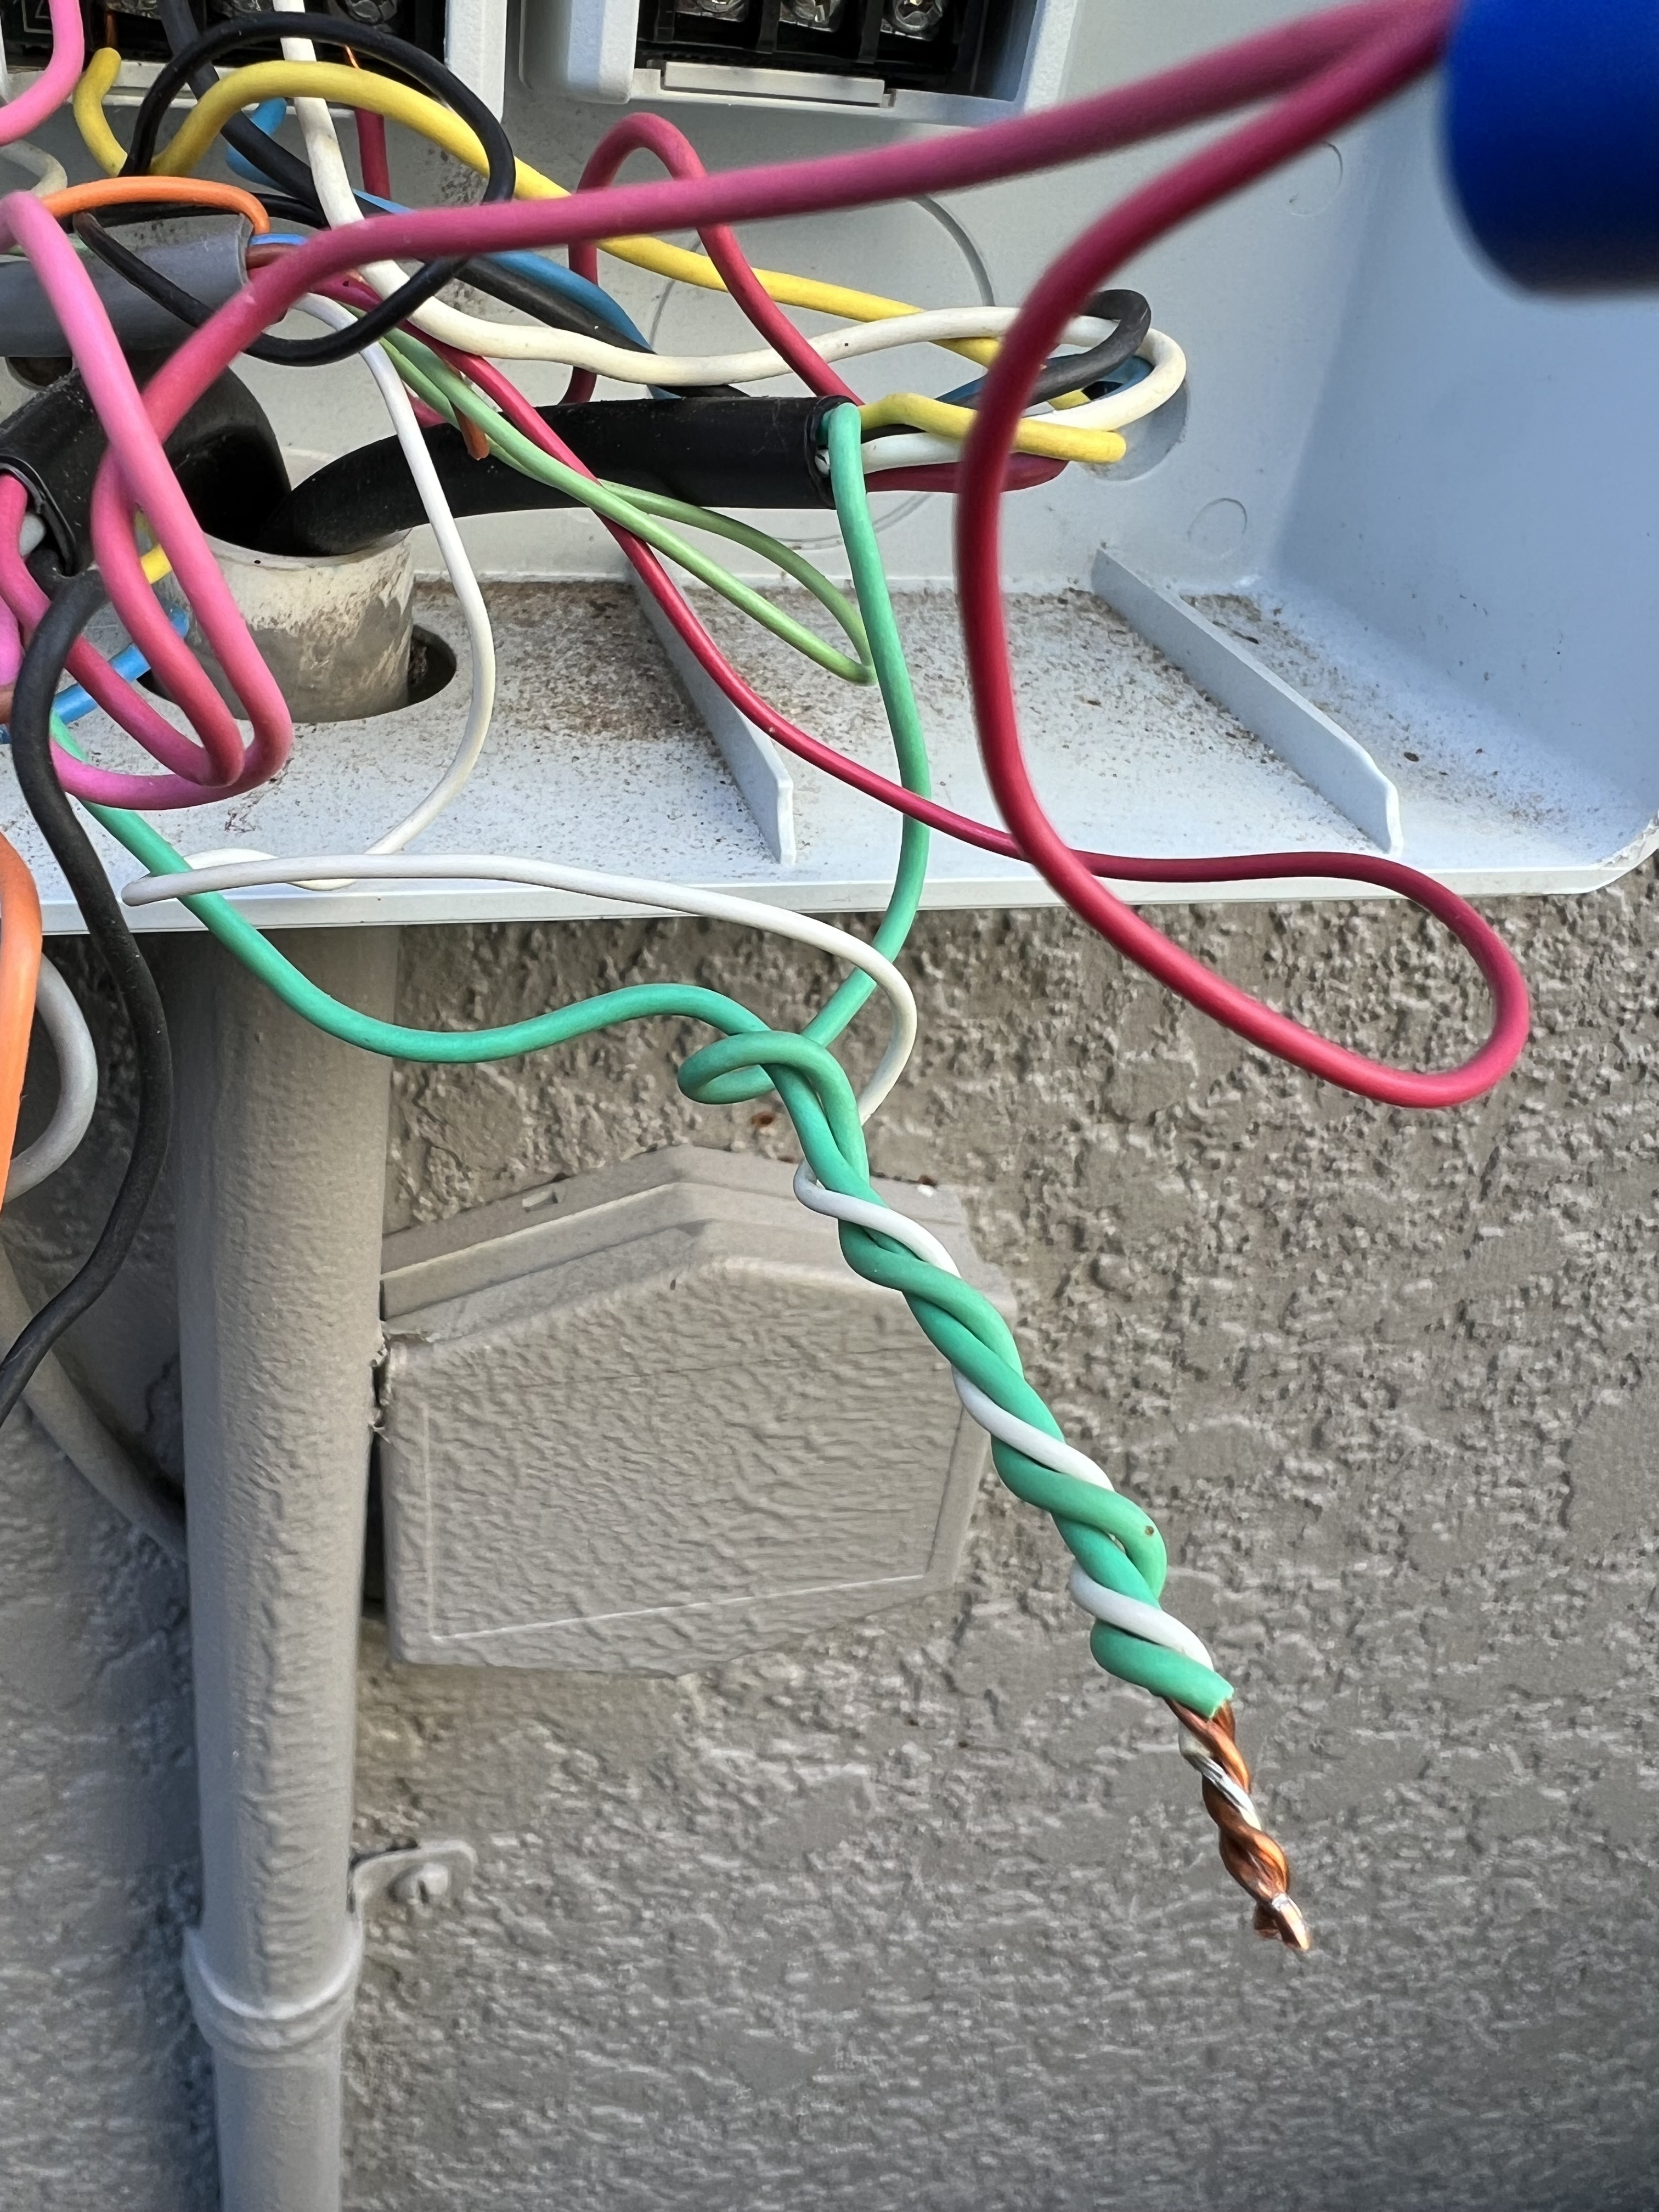
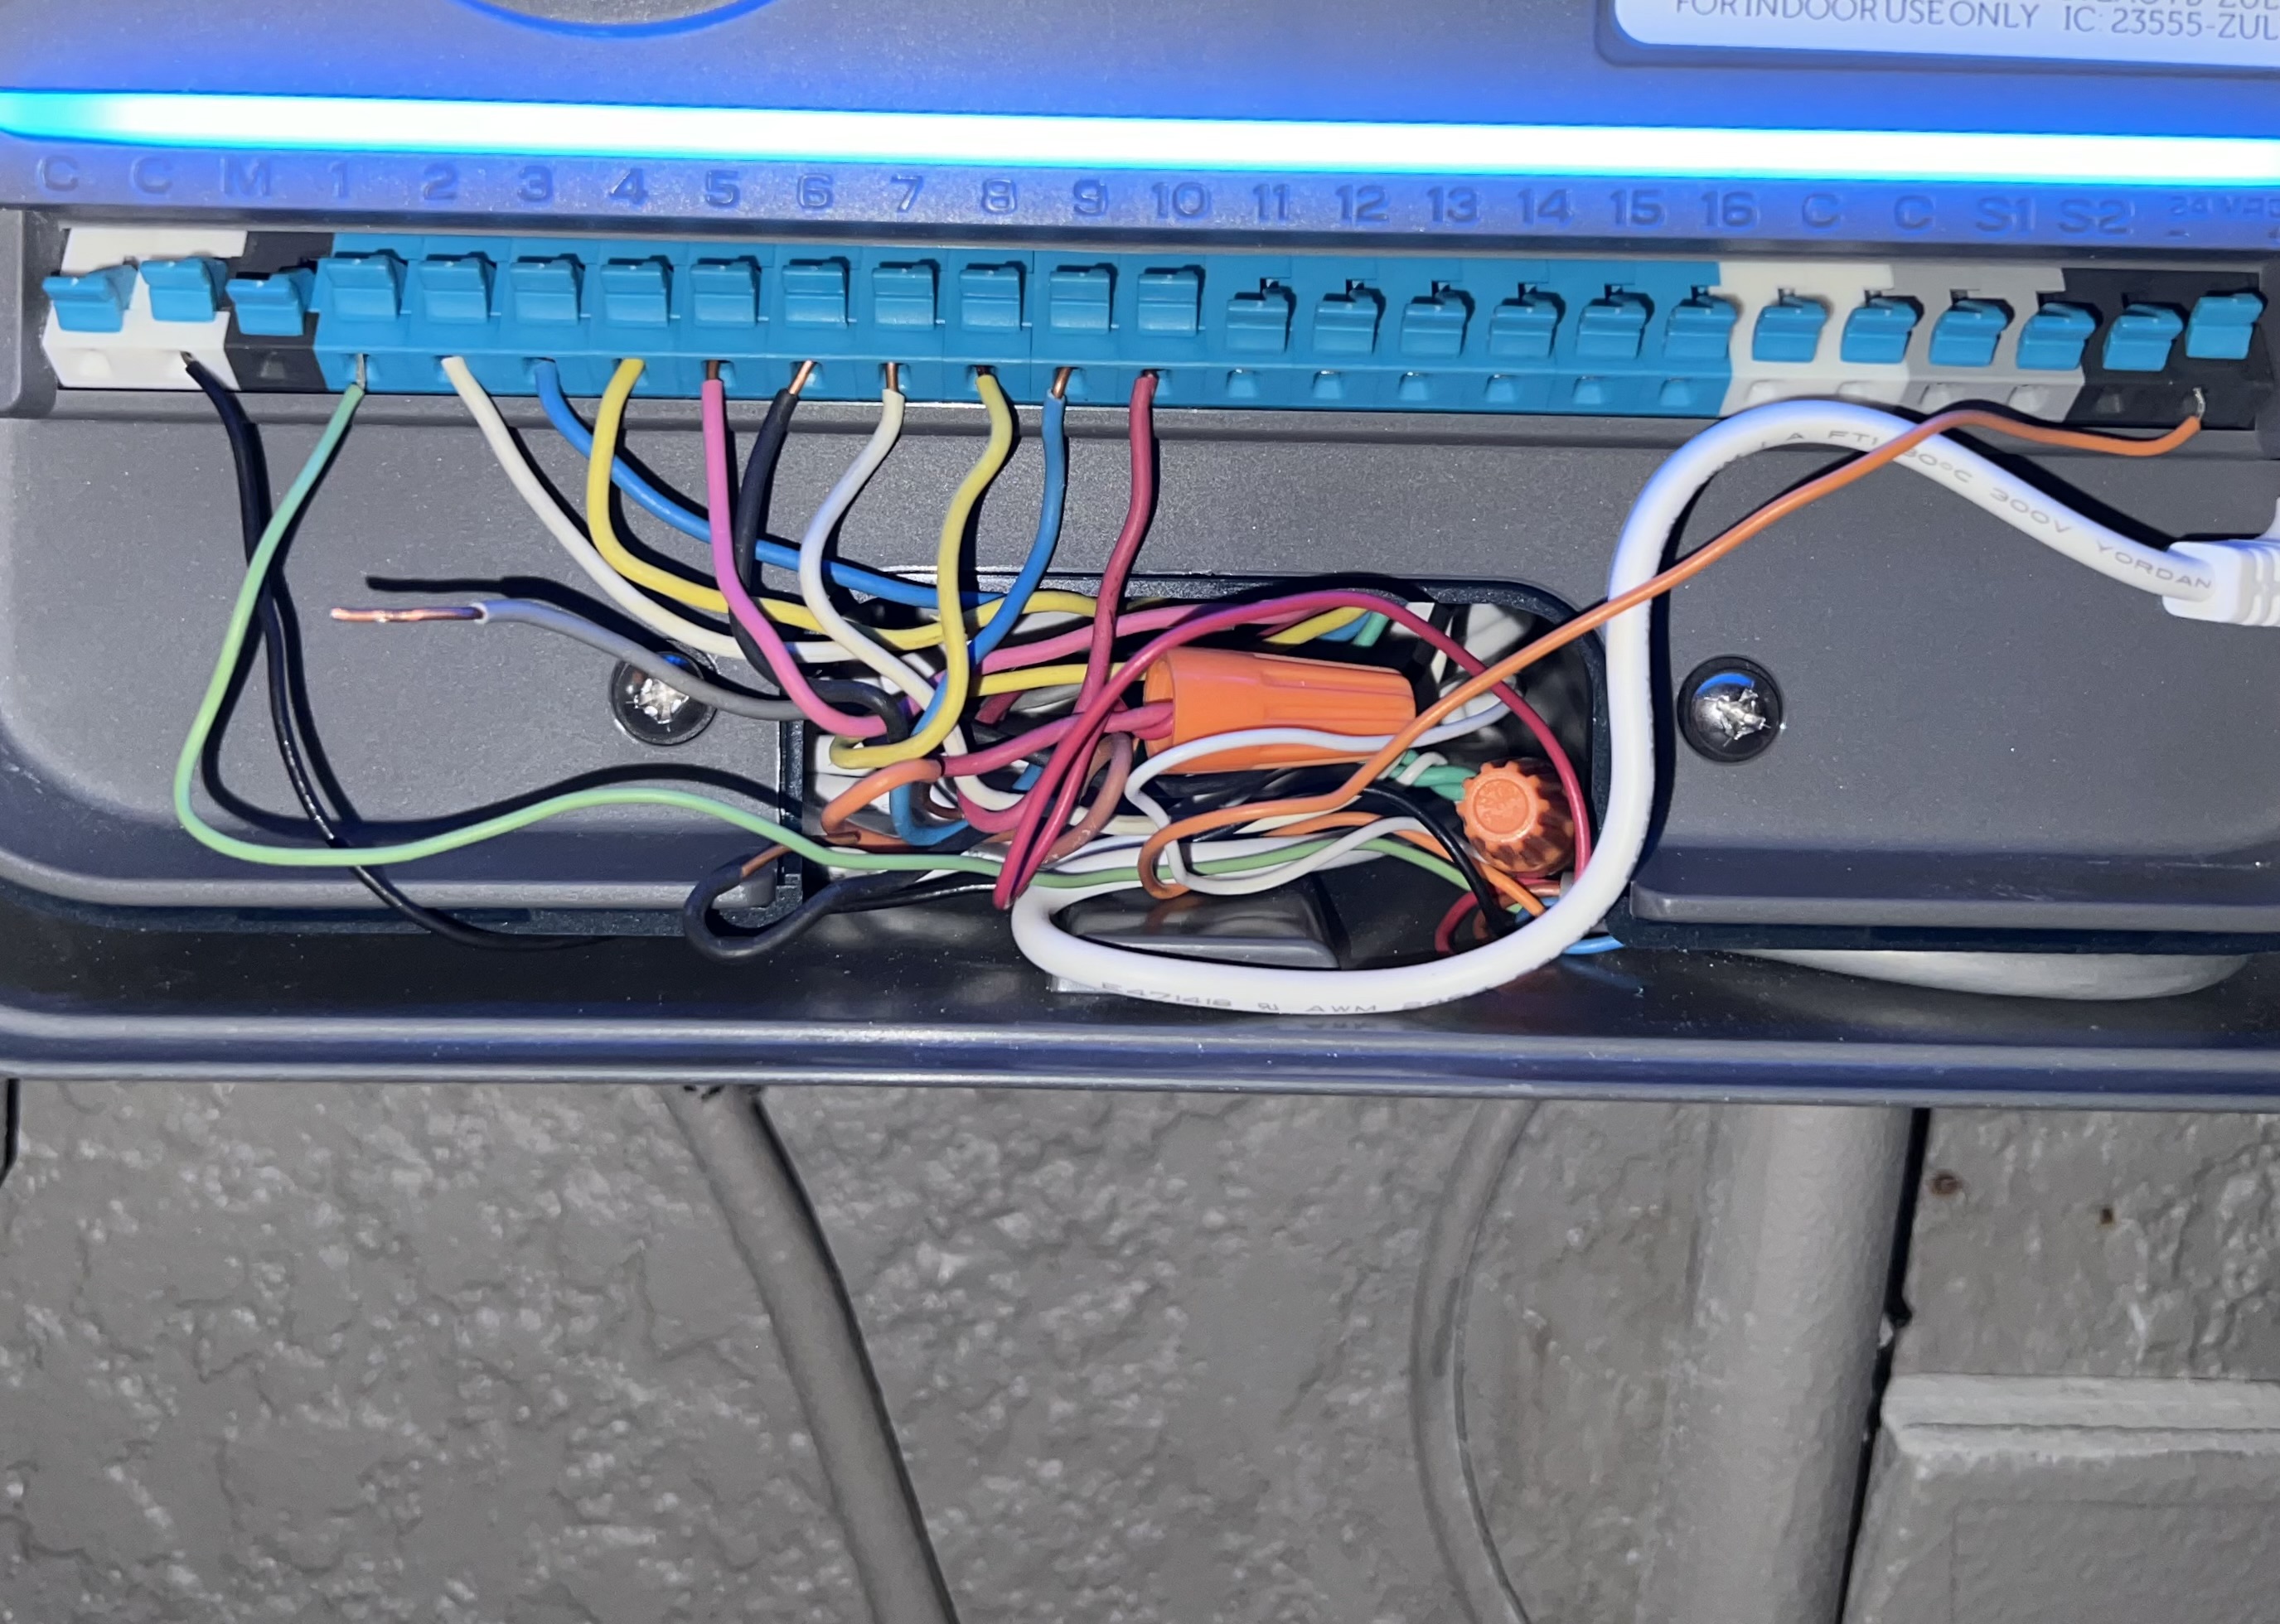
It is a little hard to tell where each wire goes, but I see the orangish wire going to, I believe 24+ VAC which goes into a gray shielded set of wires. I believe that same bundle has a black wire going to common (the only one). If this is correct, it tells me that the sensor keeps all zones from turning on by cutting the common wire to the zones. It gets fuzzier to me, but it looks like the white from the sensor goes to the two greens in each black zone bundles. These seem like the common for each set of spinklers. I am not sure what the red is for that looks like it comes from the sensor, Oh, I just found a manual, 177656,2009_MAY05_28, wireDiaEN-Front.ai (rainbird.com). It appears the red is a “zone” wire. Wow, this sensor is kind of complicated.
To remove the sensor, at least for now, disconnect all of the sensor wires. Hook the two greens, if I got them correct, to common. We can try to figure the sensor out later if desired.
Here is an article about that sensor. I still would suggest getting it working without the sensor. Read Rachio compatibility with RAIN BIRD SMRT-Y Soil Moisture Sensor, and if it is not required by your location, decide if you really want it. We are glad to try to help.
Thank you soo much for the help! Bypassing the sensor seems to have done the trick.
I am running into an issue where some of the zones that worked with the previous controller aren’t working now. My system should have a total of 10 zones, but there are 15 wires. I wasn’t sure which wire controlled which area, so I plugged in all 15 to try and identify them. I’ve run some quick runs and confirmed some of the zones aren’t watering even with all wires connected.
It is a bit hard to tell for sure. Which zones work and which do not seem to work? Is seems like you might have more than one set of wires coming in. If so, which are from which set?
Hey! Sorry for the delay, it’s been a hectic couple of weeks.
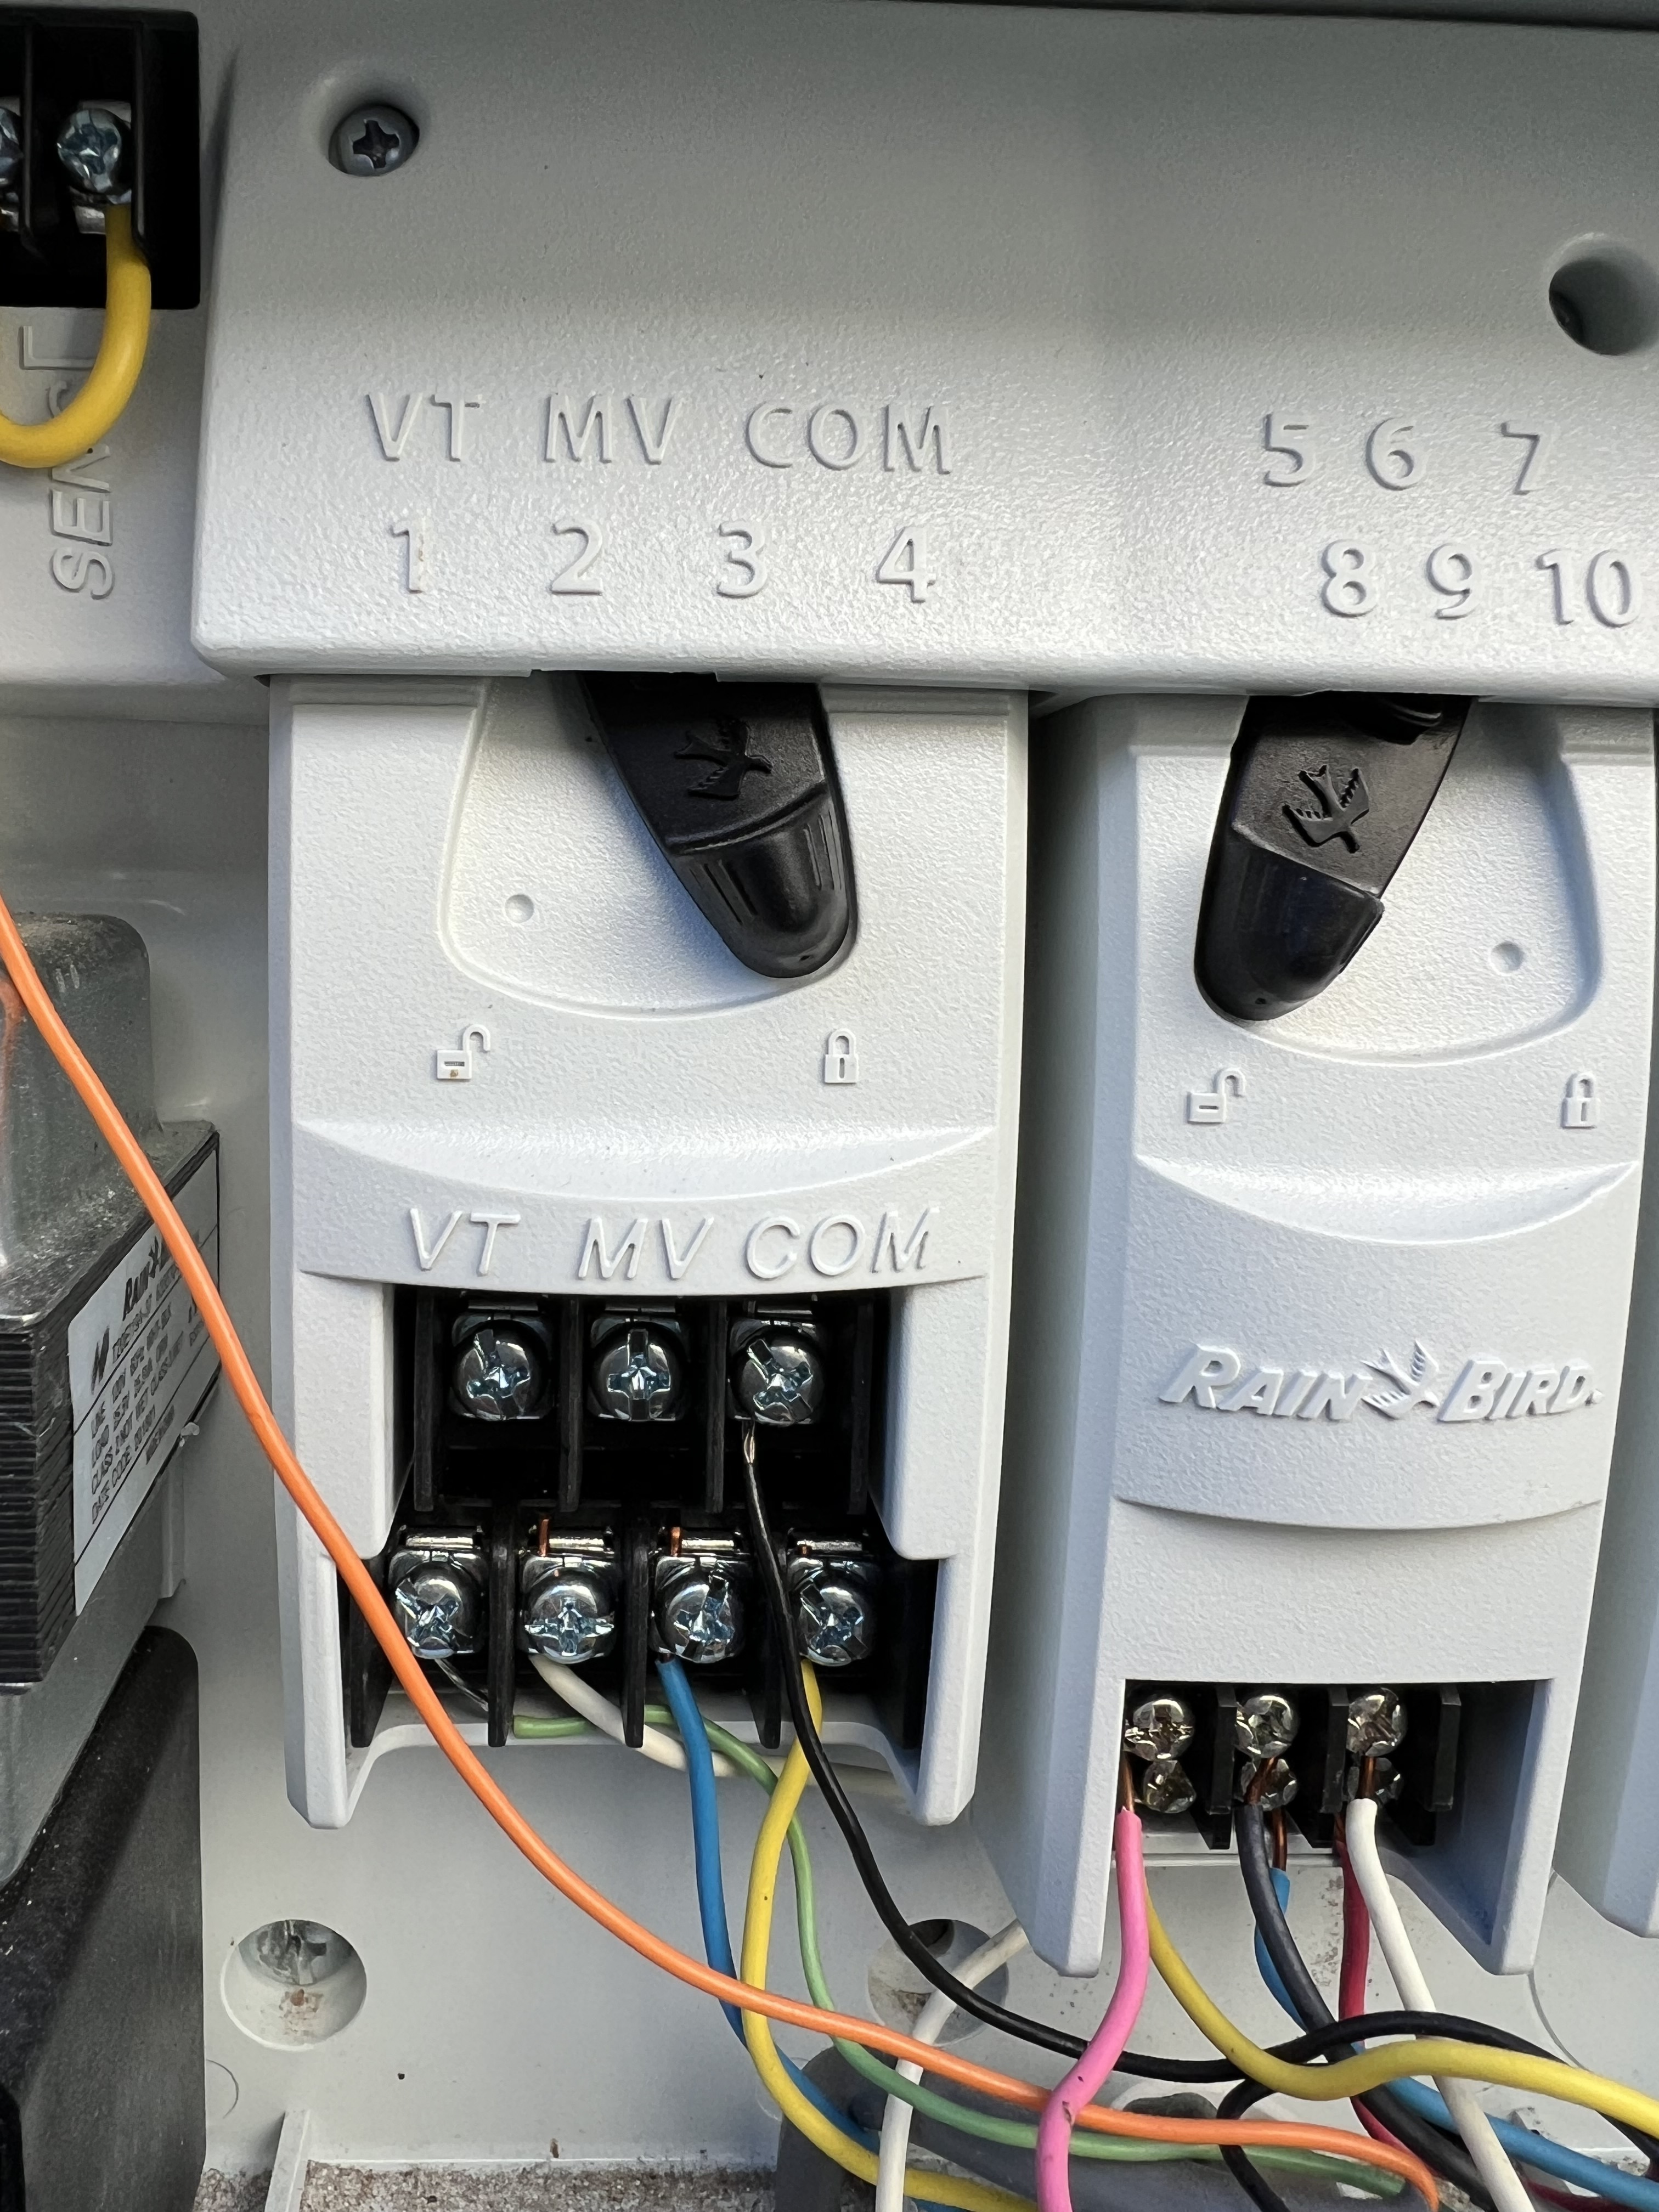
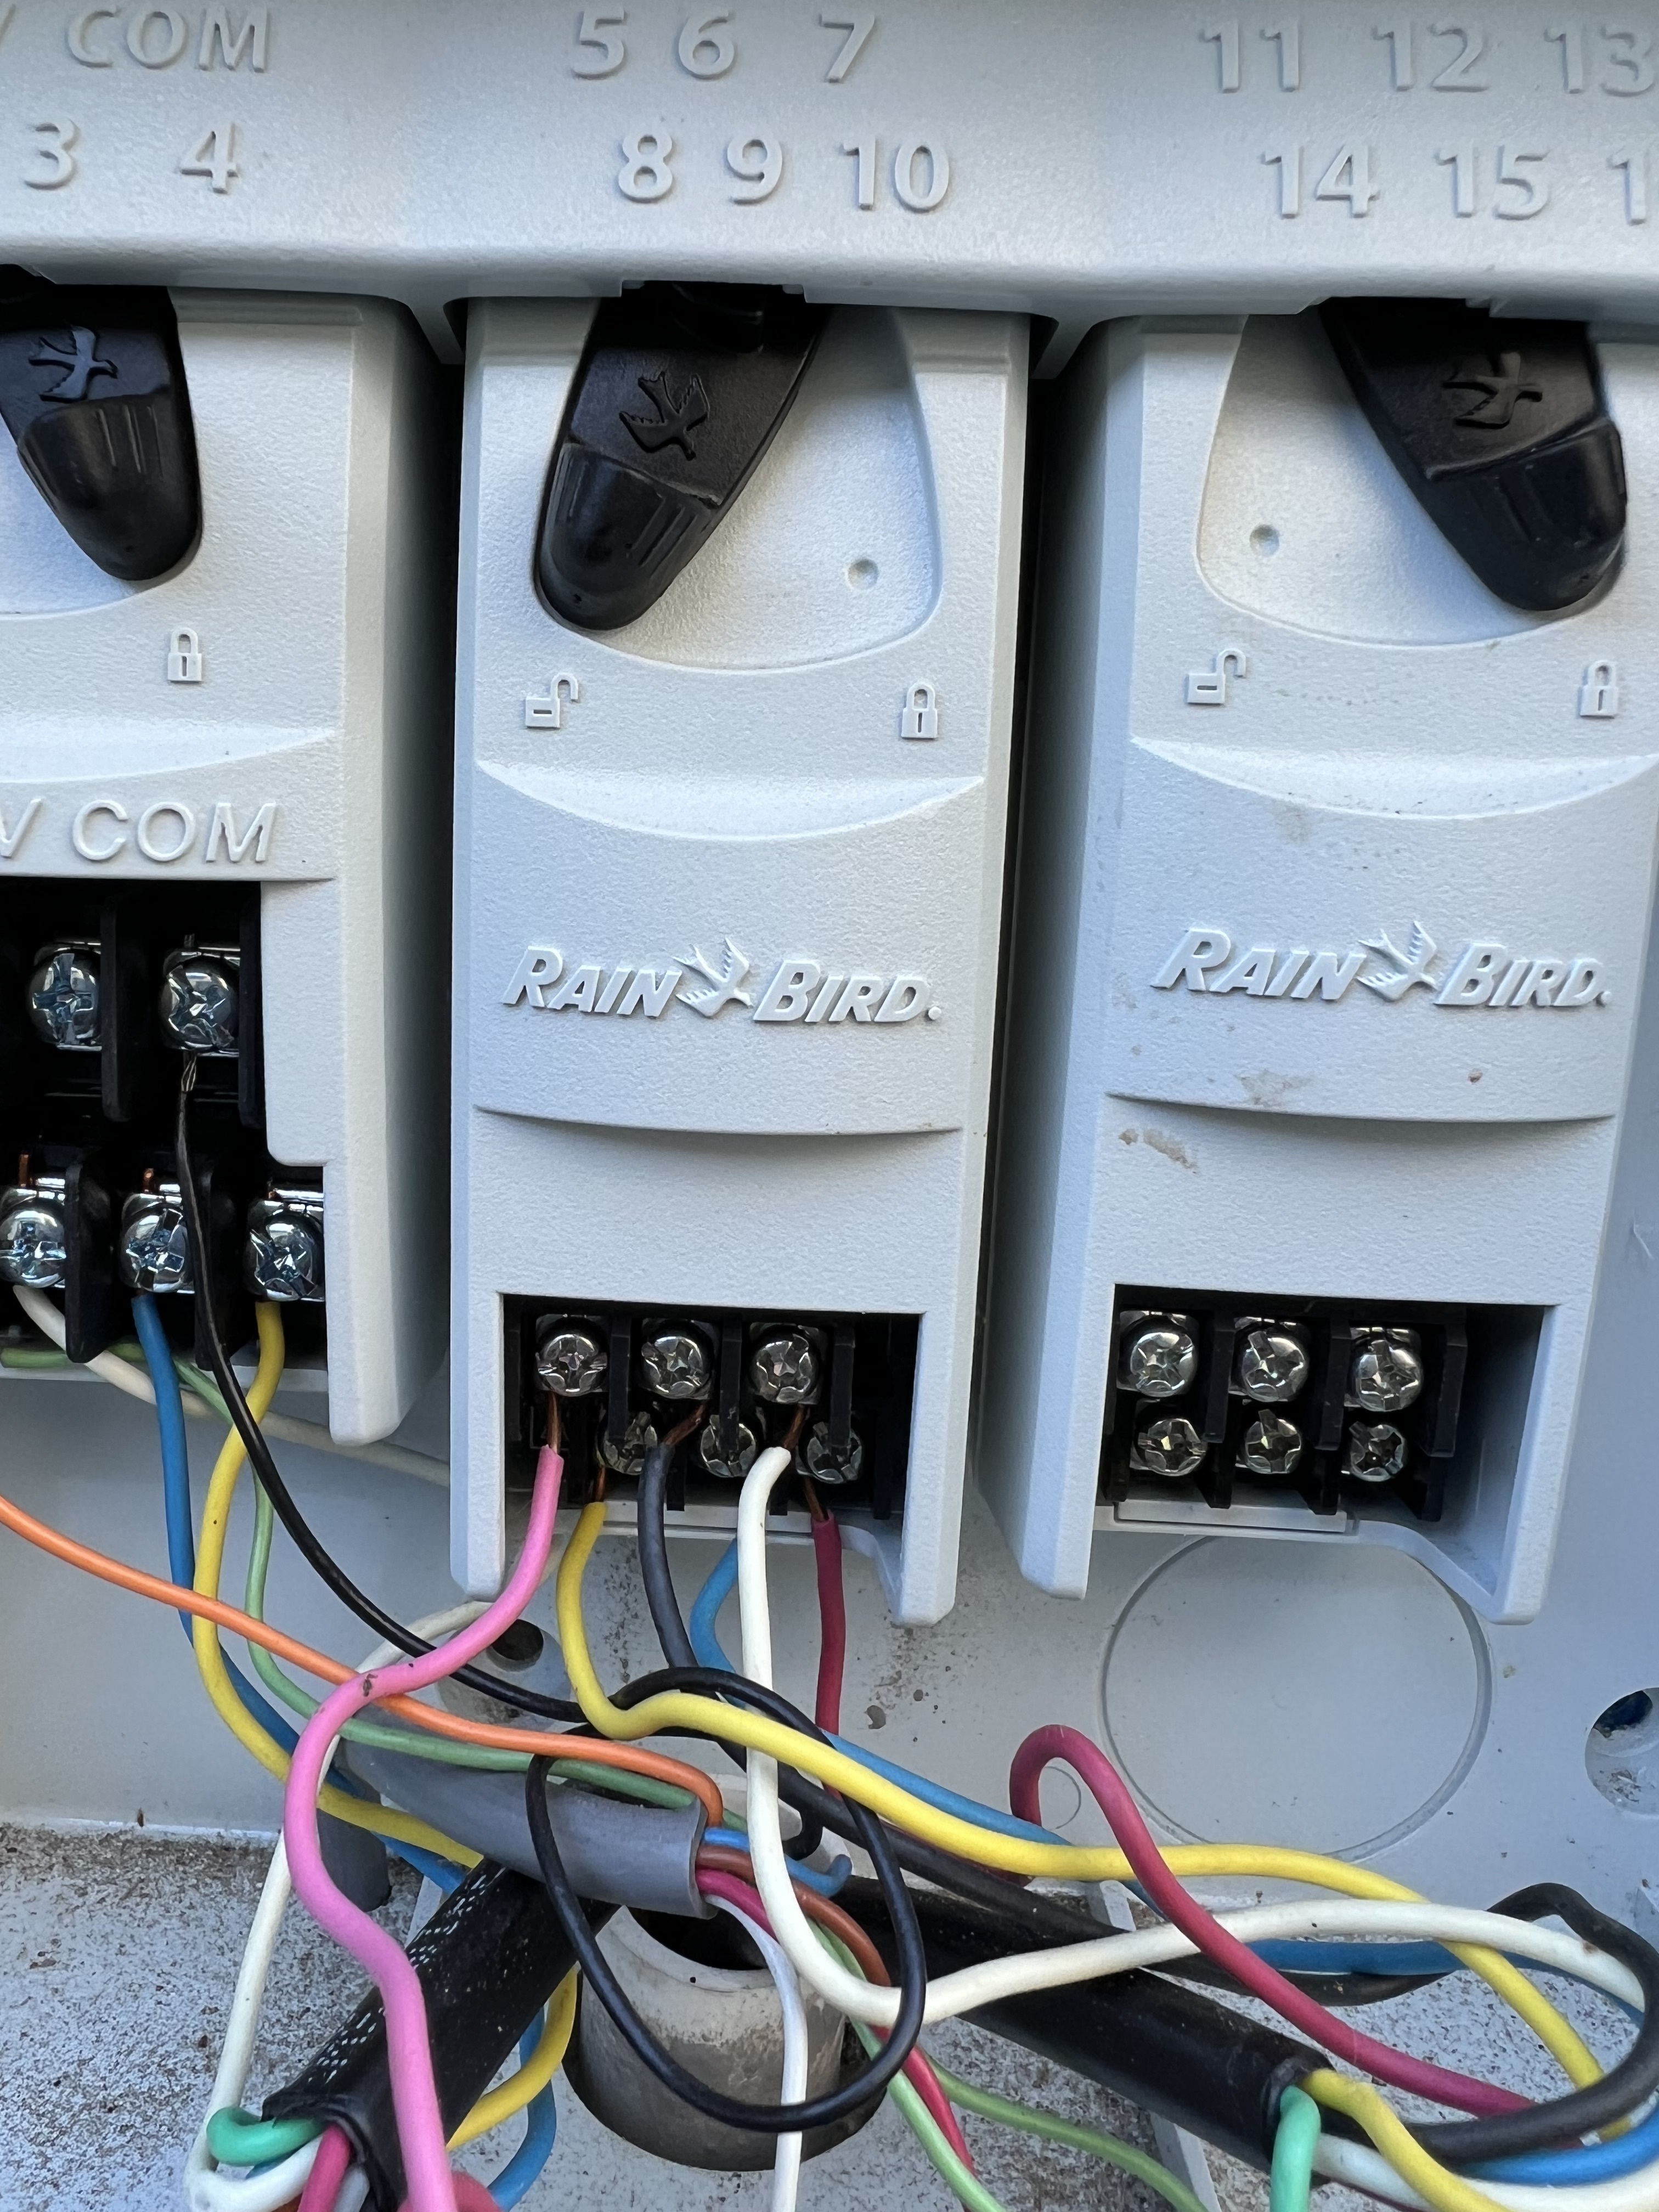
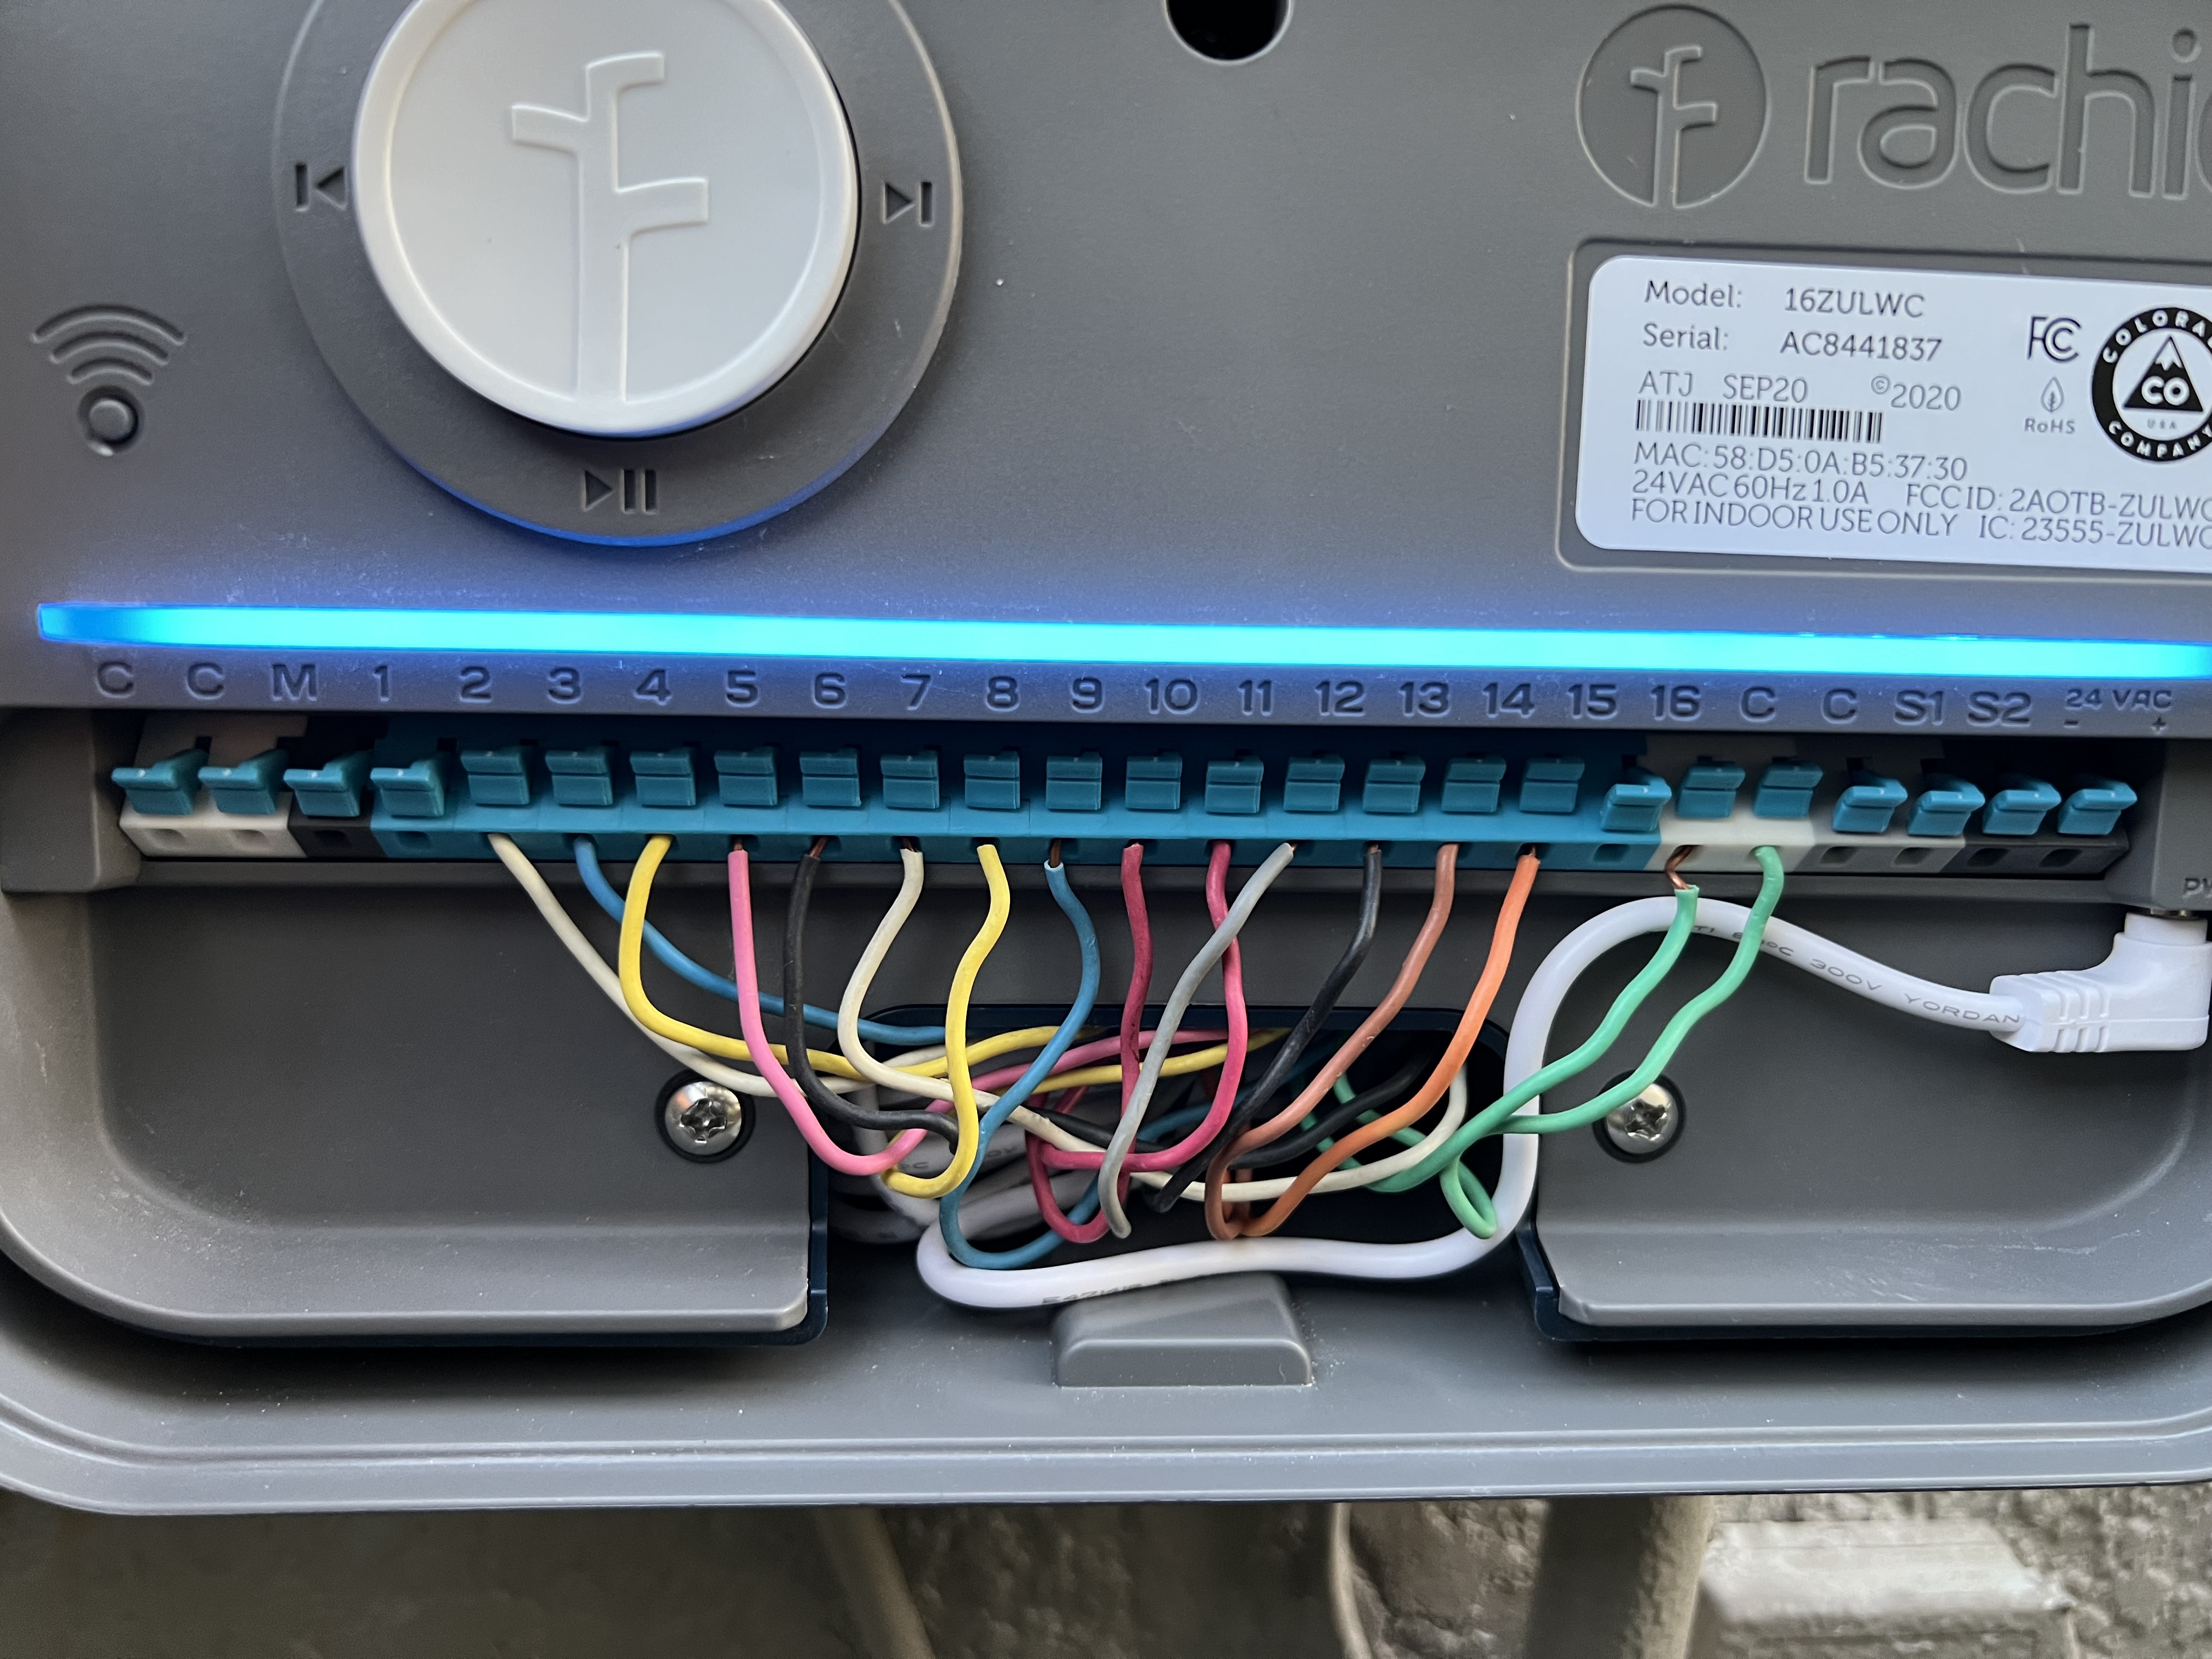
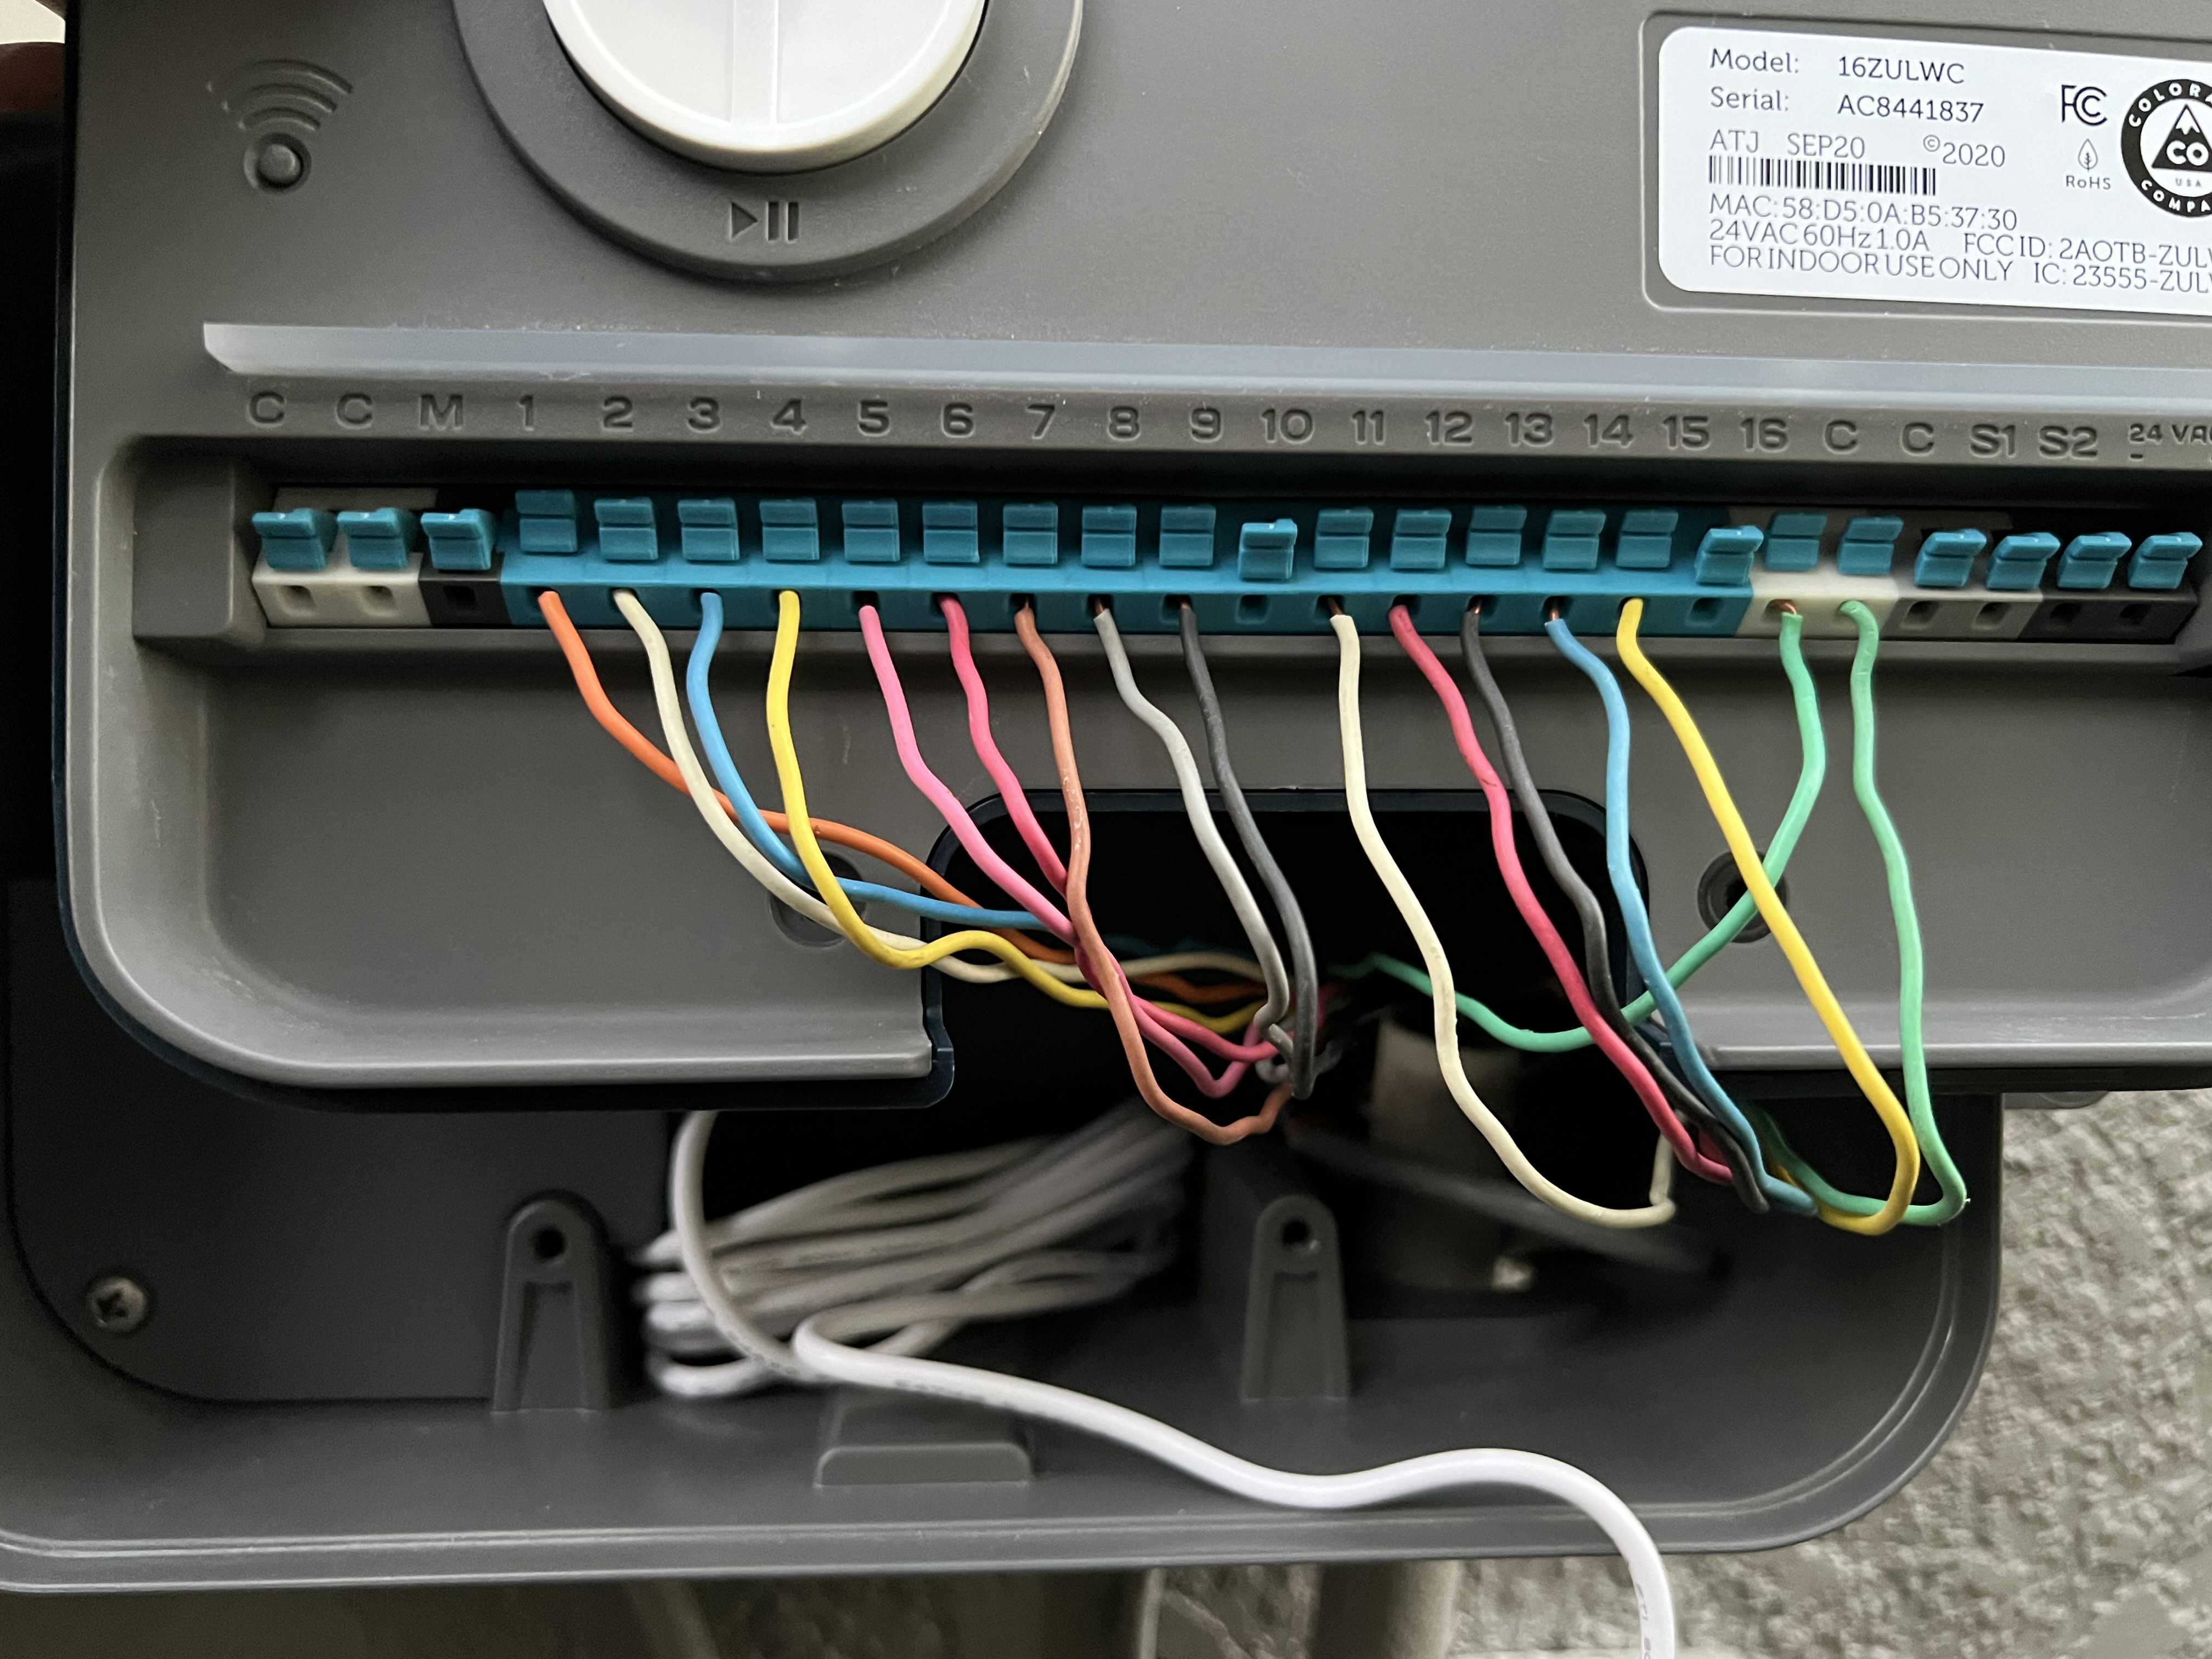
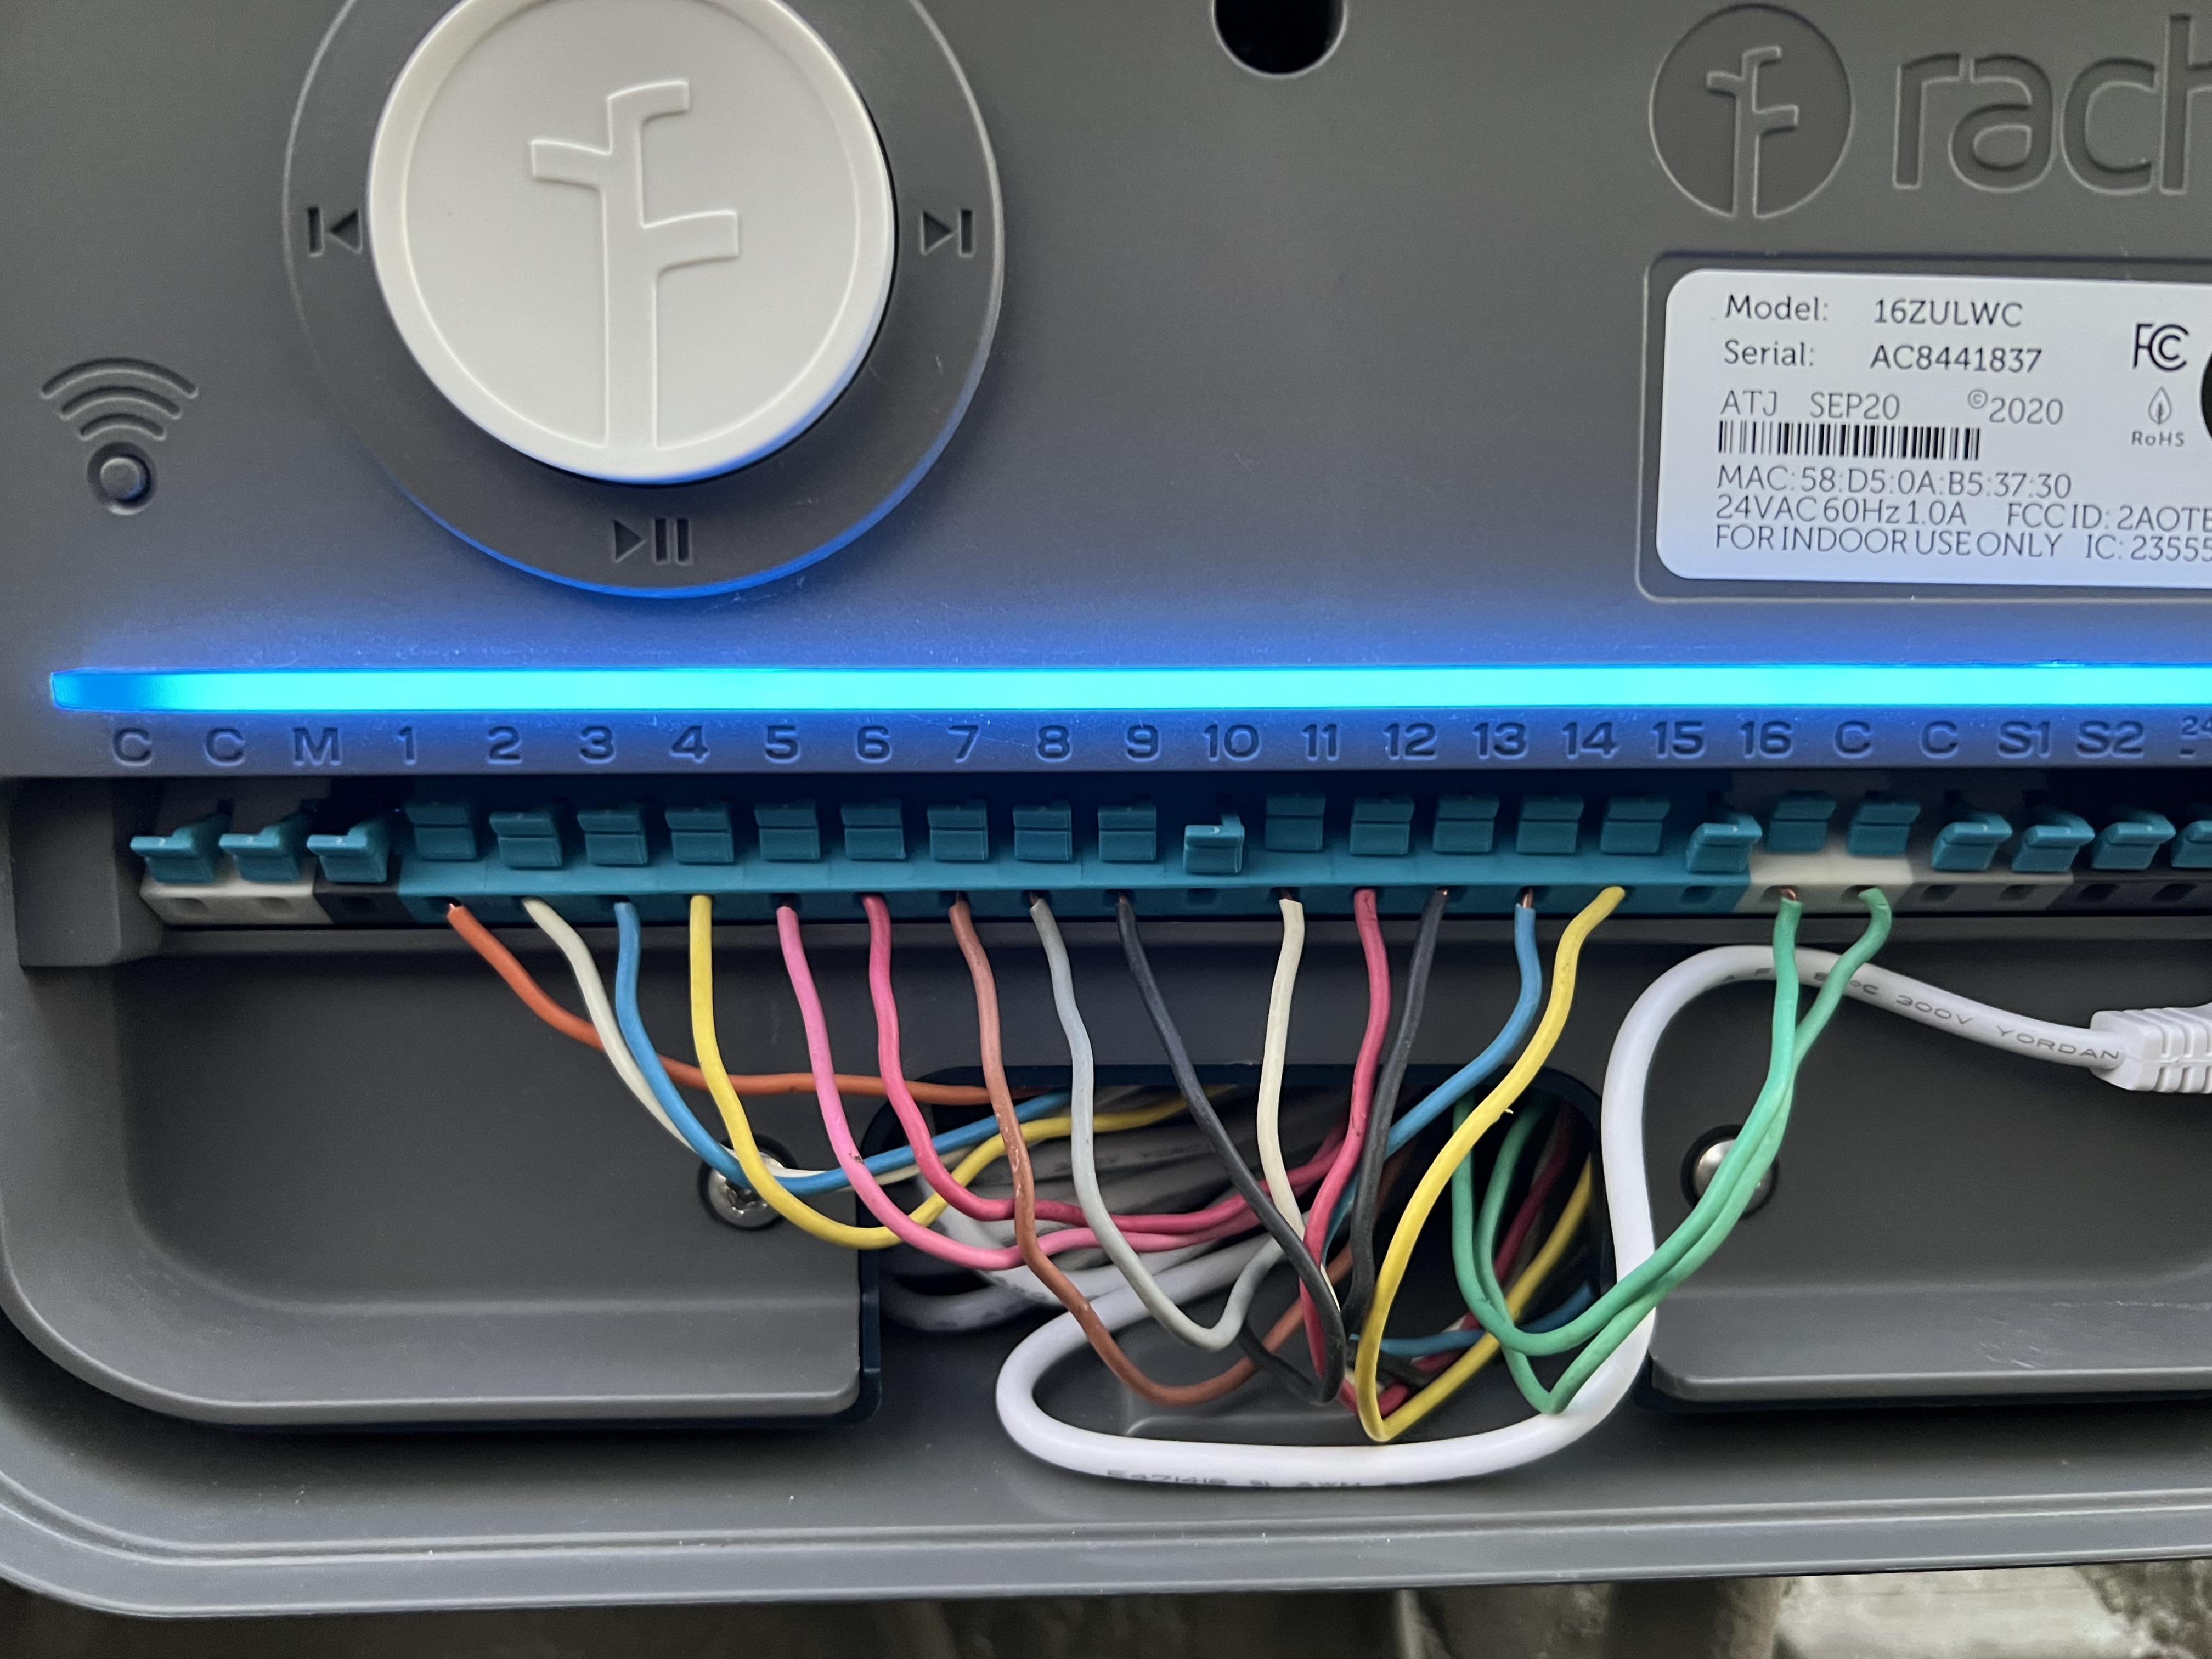
Yes, there are 2 separate bundles of wires. I’ve added some pictures below. Bundle 1 wires are plugged into 1-9 and bundle 2 are plugged into 11-15. I went through and tested the zones that are functional and those that aren’t. The following zones work properly: 2,3,4,5,11,12,13,14,15. The following don’t: 1,6,7,8,9. Admittedly, I don’t believe wires 7,8, and 9 were connected when I look at the original photos, but I’m not entirely sure. As I walk around my property, there are 2 areas I’ve noticed not working and I think those are wires 1 & 6, but again I’m not positive. Thanks for the continued help!