I bought a rachio 3 system and am looking to install but my current wiring is complex and confusing to map to rachio. Can anyone please help .
We will see what we can do. I looked at the Hunter Pro C manual at:
It does not quite seem to match though.
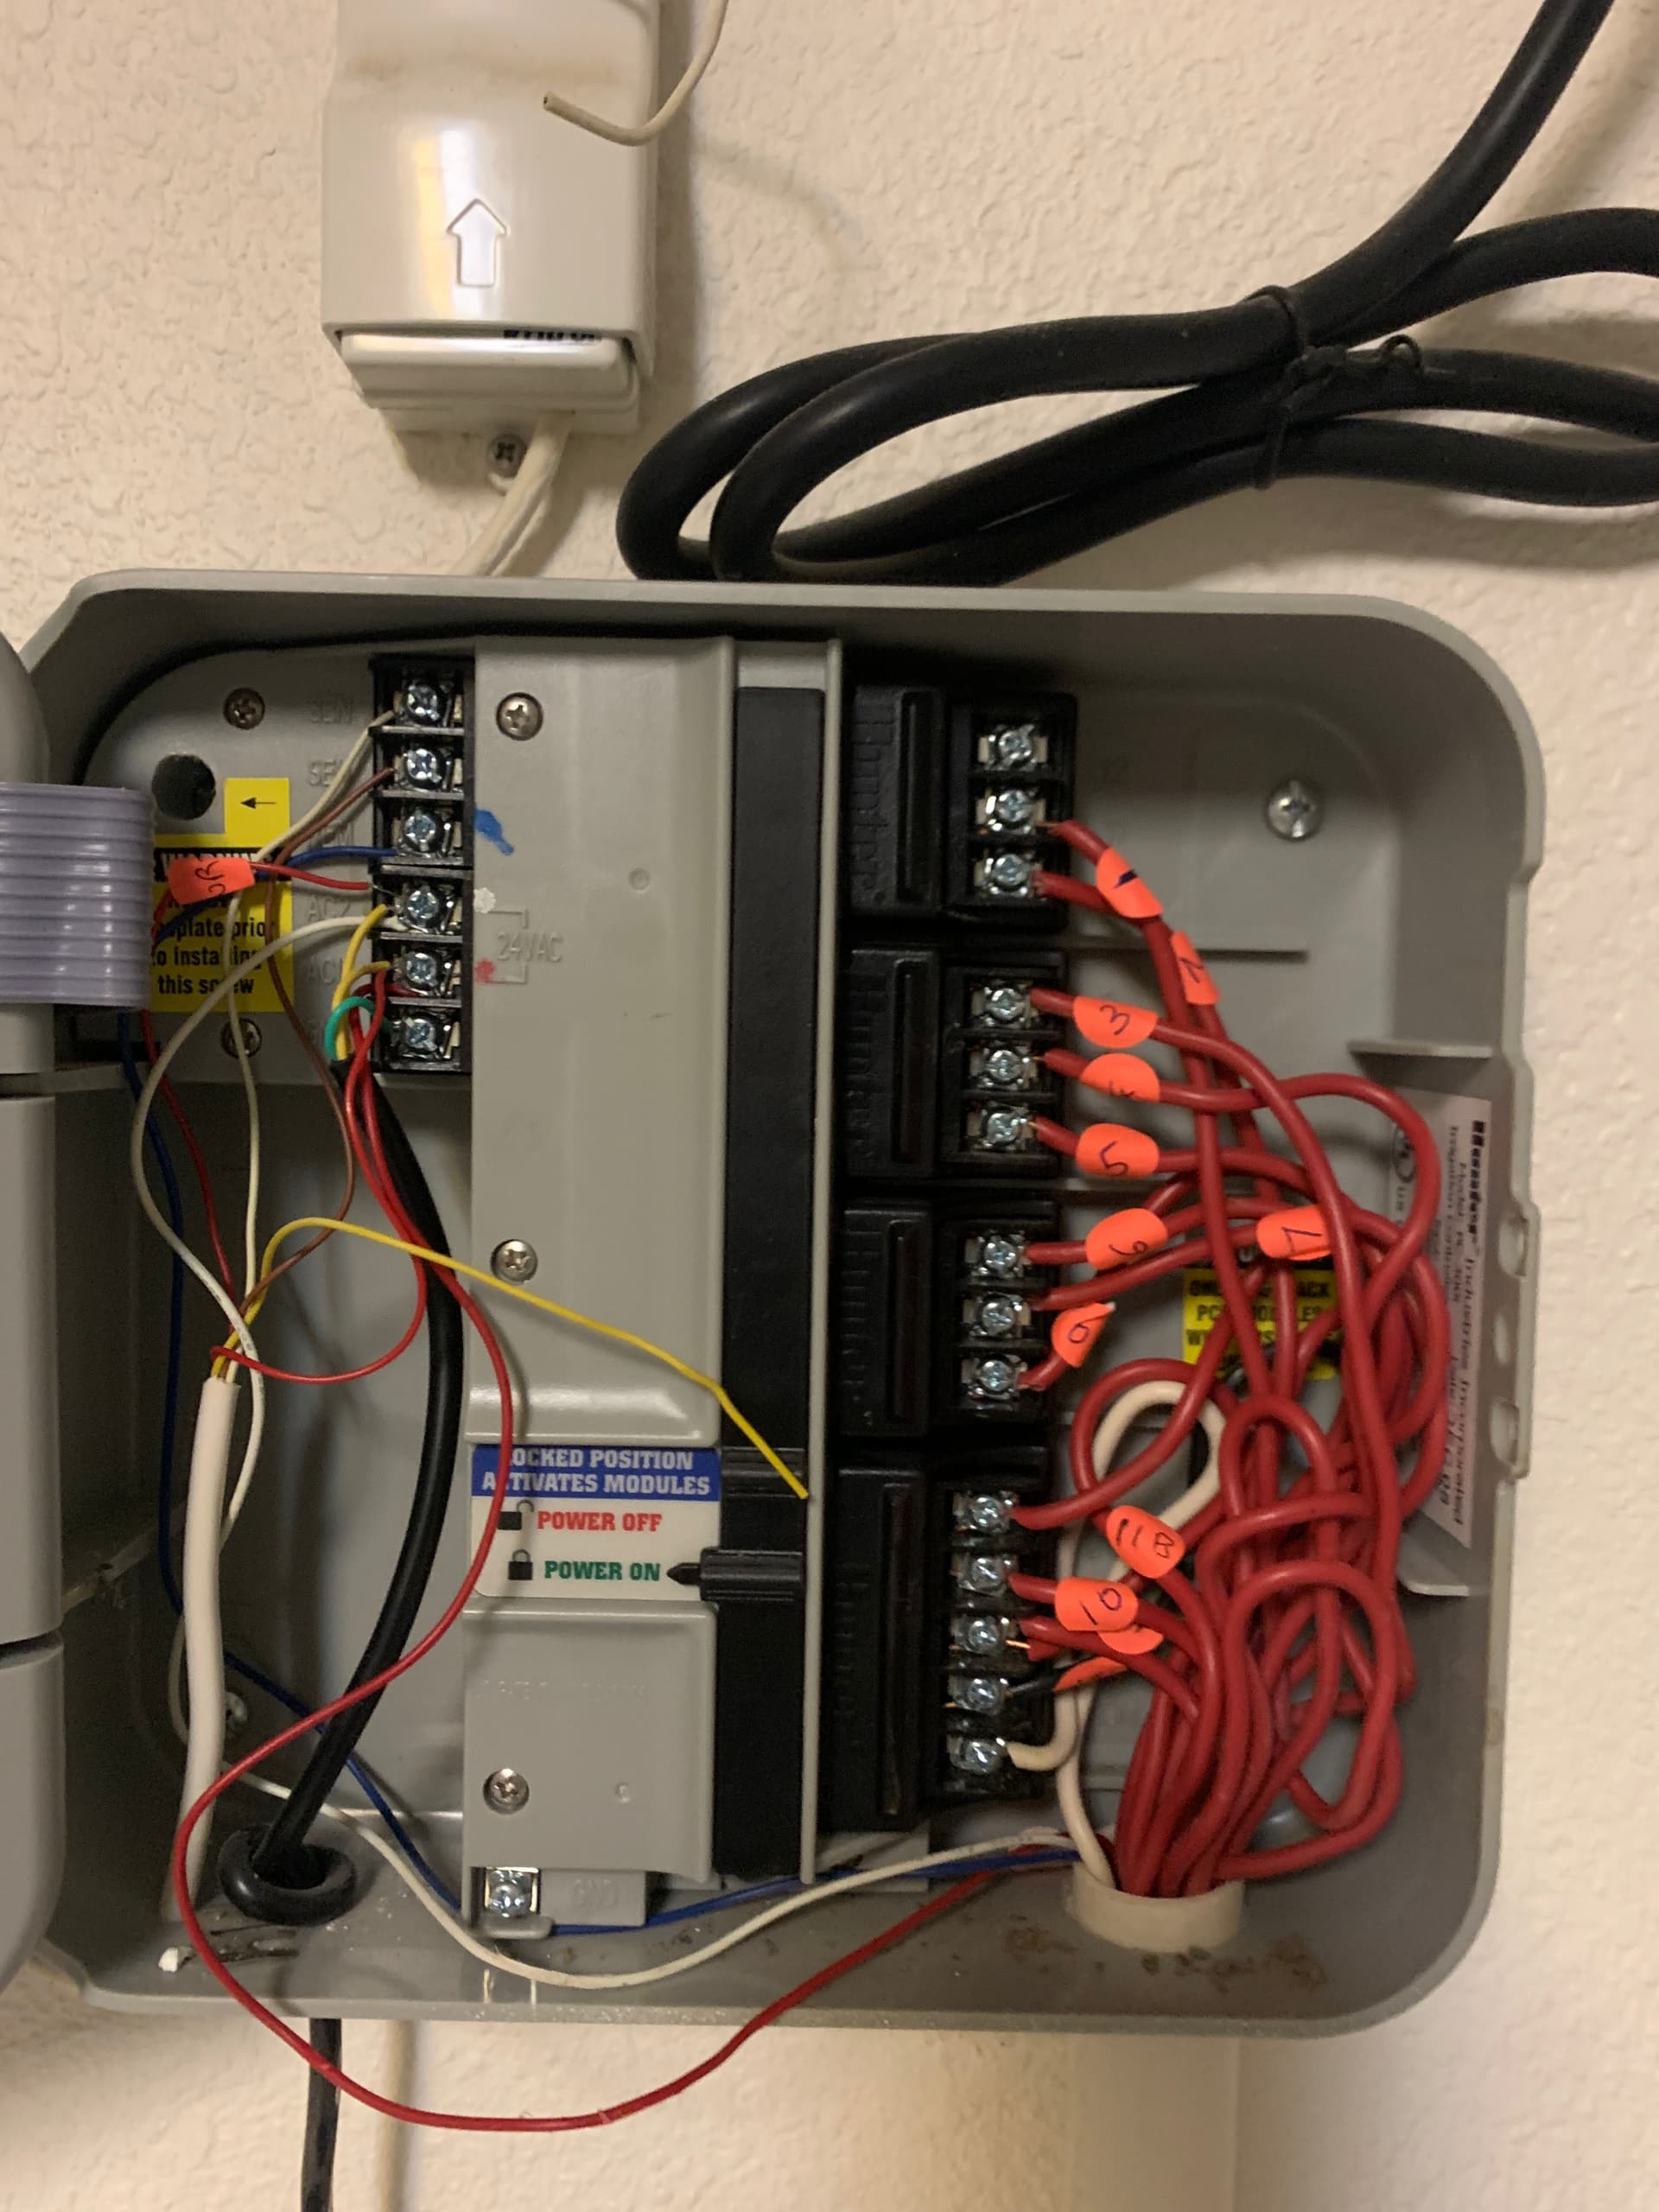
Along the left side and going from top to bottom, it looks like (some are harder to the read with the wire in front of them and some shadows:
- SEN: I personally would want to know more information about the sensor you have hooked up and possibly not hooking it up for now
- SEN
- REM: I think this is what it says, but not sure. If so, this probably is a remote and does not get hooked to Rachio. Your smart phone is your remote.
- AC2: Do not use or hook up to the Rachio. You would use the Rachio supplied power supply to an outlet and the barrel connector end to the Rachio.
- AC1
- GND
Looking at the cables on the left, it appears:
- White sheath (looks like whatever sensor you have)
- Red to AC2 (4)
- White to SEN (1)
- Brown to SEN (2)
- Yellow not connected
- Red to AC1 (5)
- Black sheath (looks like power supply)
- Yellow to AC2 (4)
- Tan to AC1 (5)
- Green to GND (6)
As mentioned, I personally would not hook up the sensor yet and definitely not the power.
Now for the right side, again top to bottom. I think I can see the markings next to the block and definitely see at many labels on the wires, so I will list what I think I see.
- Block 1
- Zone 12: nothing attached
- Zone 11: Wire 1
- Zone 10: Wire 2
- Block 2
- Zone 9: Wire 3
- Zone 8: Wire 4
- Zone 7: Wire 5
- Block 3
- Zone 6: Wire 6
- Zone 5: Wire 7
- Zone 4: Wire 8
- Block 4
- Zone 3: Wire 9
- Zone 2: Wire 10
- Zone 1: Wires 11a & 11b
- ???: Black wire. I am guessing this is P/MV (Pump or Master Valve)
- COM: White wire
You can hook them up to Rachio according the zone number that you took them from on the Hunter or the number on the wire. You might be able to separate the 11a & 11b wires into separate zones (not sure why it was done the way it is). The black wire goes to ‘M’ on the Rachio and this needs to be enabled within the app. The white wire goes to ‘C’ on the Rachio.
I also see a set of thin wires going from the right side to the left. This appears to be for the remote, which does not get hooked up to the Rachio as already mentioned:
- Red to AC1
- White to AC2
- Blue to REM
Okay, I think I covered anything. Please let us know if I missed anything, have further questions, or how it goes.
Thank you for the response.
- Okay the senor & the remote wires go away
- Yes the black wire is the Master Valve
- I don’t know either why Zone 1 has 2 wires connected (11a & b) that’s confusing. Not sure of the ramifications if I separate them. Worth a try to separate them and create a new zone
Good question on the 11a & b wires. Maybe the one unused zone was bad within the Hunter controller? Maybe took much pressure for those two zones if ran separately, but other ways exist for lowering the pressure. Some use a sensor with the Rachio and I would guess most do not. It certainly can be added later if you so desire.