Stumped on Retrofit

Leaving the controller on during the manual override will not effect anything, simply leave it in the idle state (no need to run any zones or your pump). That said, if you wish to turn it off during this process (just in case), feel free to do so.

As far as the dirt in the valve box, it has likely gotten in from the bottom (as water level rises during the rain, it brings in dirt with it). Alas, any cleanup you will do will likely be only temporary. Ideally valves will rest on the drainage rocks, here is an example (link), as these will be a barrier from water bringing in dirt whenever it gets into the box.

Do keep in mind that dirt should not, in itself, be a reason for concern. Plastic valves should continue working berried as they are. Simply clean up only when it is needed to fix an individual valve. At this point this will be faster / cheaper than redoing your valve box.

Cheers,
Gene

1 Like

I’m not sure what’s going on here.

I did find the directions originally taped to the Orbit controller:

This is the valve in reference:

It’s turned on and the sprinkler hose attached to it is functional.

Also keep in mind the relay, compressor etc. where hooked up to the system with these directions attached.

The compressor looks to be attached in line as the pipes from the irrigation control to directly to it:

My assumption is that the piping goes under the shed to reach the irrigation control?

The manual override looks like it has a coarse and fine adjust. They appeared to be turned left already, or at least the coarse adjust.

I can’t get water out of any sprinkler heads after fiddling with them a while.

However the ground in the irrigation control box did get a bit wet.

I feel even more stumped than in the beginning.

I suppose it’s not possible to use a hose in an attempt to get water into the system?

Is there a broken pipe perhaps?

I don’t know what to think at this point.

It is unlikely that the directions were referring to the valve you’ve shown as it seems to be between an underground water source and the spigot connected to the hose. In other words the that valve does not control the water flowing into the ground, but rather water coming from the ground. Take another look around the shed, are there any more valves and / or in ground valve boxes, such as the one which has your valves?

As far as the pump, it is unclear what the purpose of running it in your setup is trying to accomplish, by the indexing valve after the pump makes it unlikely that it has anything to do with the valves in the ground.

At this point the best option we have is to find the valve referenced in the instructions. It is likely connected to the same underground source as the known valve for the hose.

If you can take a wide area pictures of the sides of the shed, we’ll help to look for something that may not be as obvious.

@Gene , how is this going to help his indexing/valve problems? :joy:

:cheers:

3 Likes

@Franz, I believe @Gene meant to type “wide area”. Since edited.

3 Likes

Wow! Even I forgot what I meant to write, but @DLane is absolutely right!!!

2 Likes

Here’s a shot.

There’s literally nothing on the west side of the shed, or any other valves or pvc that I can see on any other side of the shed.

Is the irrigation routed under the shed or pavers? That seems like a silly thing for anyone to do as it would heavily complicate any kind of service.

What other shots can I provide?

What exactly am I looking for here?

What is your guess as to what might be going on?

Are pumps only used for well water sprinklers?

Personally my guess has not changed. We are still looking for a way to turn on the water on the west side of the shed. Can you take some pictures further out from the shed, the valve may be berried in the ground, similar to how your valves are.

For the sanity check, as you’ve mentioned that your valve has leaked when you’ve unscrewed the solenoid, see if you can open it more than you’ve done before and see if there is a steady / persistent leak with and/or without the pump running.

1 Like

I found something that looks like this:

It says irrigation control valve on the round cover.

But had no lever just a square nut on a cap inside like this:

Is this what I’m looking for? How do I proceed?

Edit:

It’s on the south side of the shed, but since I’ve been able to find literally nothing on the west side I’m hoping it’s a typo or else I might have to go digging.

Also I’ve noticed various valve tracking devices out there. Could something like that help? Does it work the same way as a wire tracker?

1 Like

@Holemaker - I think that is progress. It looks like that cover is removable. Could you send a picture of what is under that cover?

1 Like

3 Likes

Looks promising :slight_smile: Probably who ever wrote the instructions forgot to check their compass …

The photo from your last post seems to show a type of valve which would require a key, have a quick look in a shed for a T looking metal peace with a square opening on the end, something like this (link).

If you don’t find it, no worries, you can simply use a pair of pliers or a wrench if you can get it in there to turn the valve. Only a quarter turn should be needed to turn on the water fully. Good news is that after it is ON, you can probably leave it on indefinitely as your main irrigation valves should be rated for a continuous pressure exposure.

In case everything works and you wish to consider leaving the valve ON all the time, we will need to have a discussion about the backflow preventers as I am unsure if your system has one. This is a topic for another time.

As far as the other question in your last post, the valve finding solutions out there, as far as I know, work on the types of valves you already have control over, meaning your irrigation valves, not a dumb water valve. To find such valve one would either put a high voltage on the wire and detect EM fields or ‘chatter’ the valve (turn it on and off quickly) in order to make an clicking noise you could look for. I guess you could get a metal detector, but valves today have less and less metal in them, preferring plastics instead.

Well, the plot thickens!

Found the key, but this thing isn’t budging.

So close, yet so far away!

WD40 maybe?

Edit:
Even tried a hammer on the key handle to knock it loose and didn’t budge.

Maybe I need something more extreme?

Can I replace that cap in the future with something less likely to get this jammed?

The saga continues…

@Holemaker - I assume you tried both directions. Yes, WD-40 or similar break free spray is what I’d try. If the valve is under dirt or close to it, I might dig some dirt out from around the valve.

1 Like

I’m with @DLane, try both directions, wiggling is your friend. Don’t worry about breaking the valve as much, in the future, you may want to replace it with the master valve (controllable by Rachio) in any case.

Just in case, as unlikely as it is, make sure you identify the main supply valve from the city. It should be located near the water meter. Should worse come to it, you want to be prepared to turn off water while you get a replacement valve from the local supply store.

To help with the valve you may also want to try finding a pipe that would fit over the handle. A longer lever arm will do wonders to amplify the torque you are applying.

Ok after a long hiatus (wow, longer than I thought! Other renovations took precedence.) I’m back at it.

In the interim I’ve tried a lot of the suggestions and have done some factfinding.

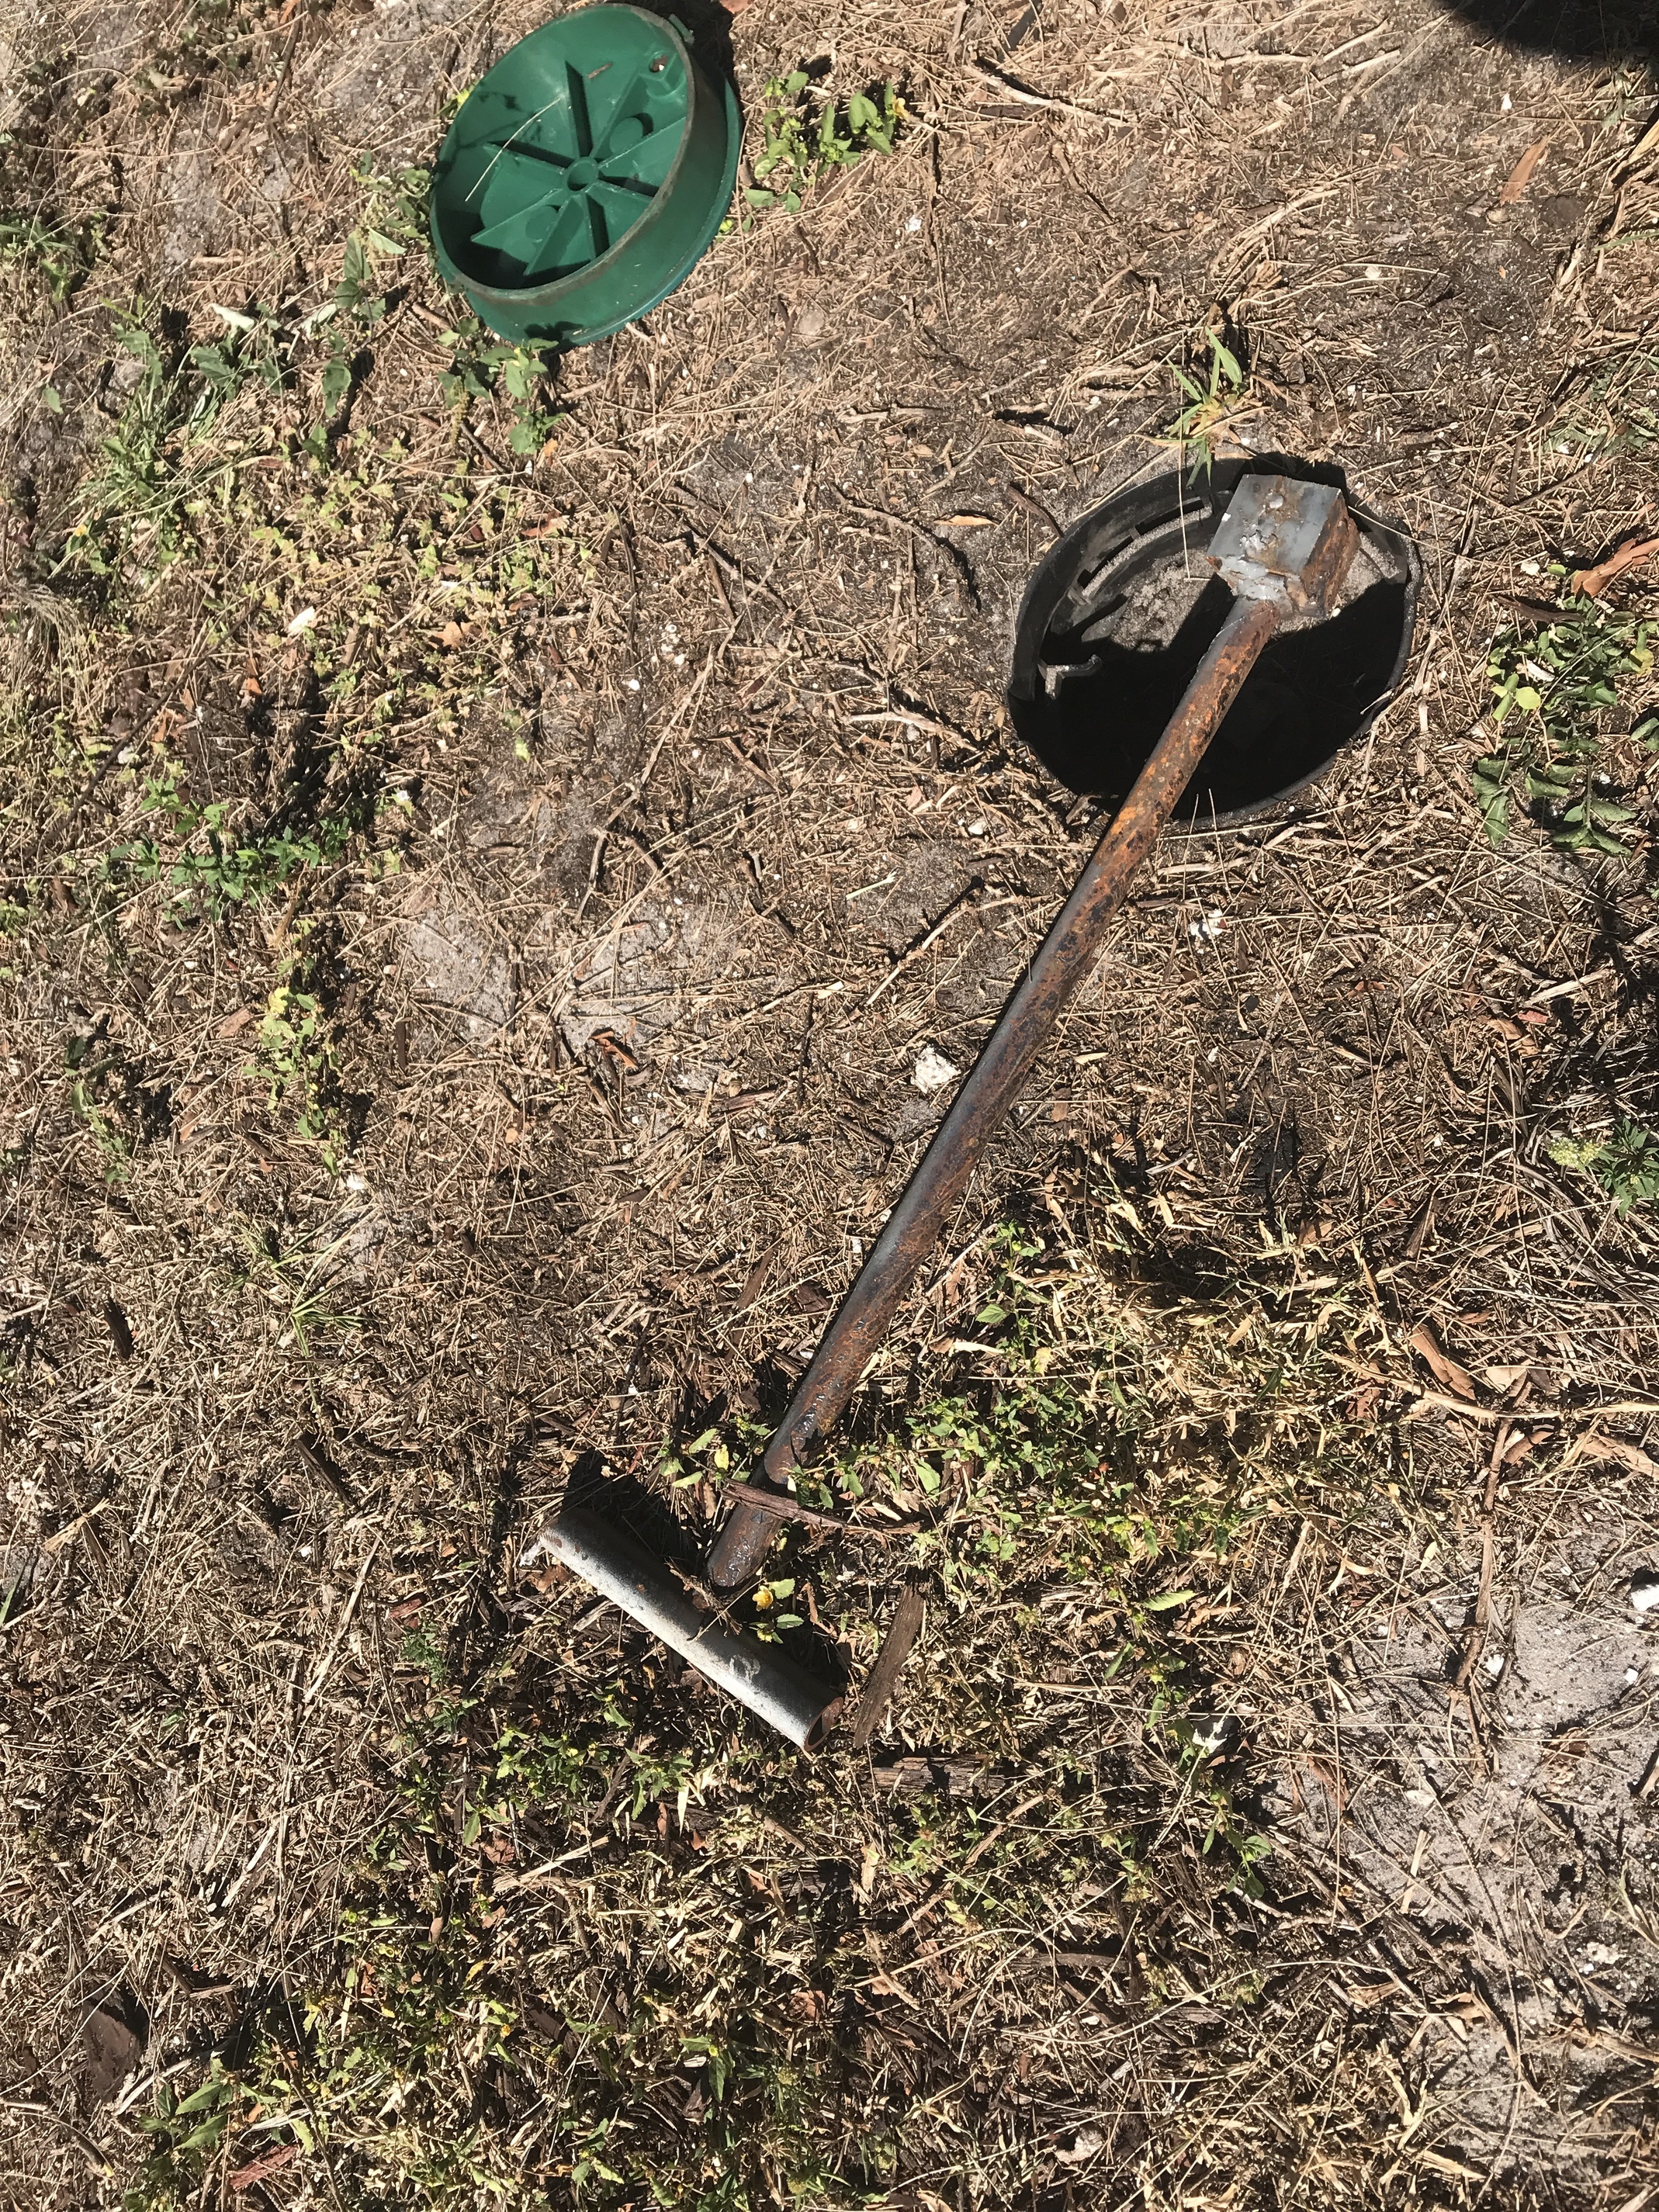
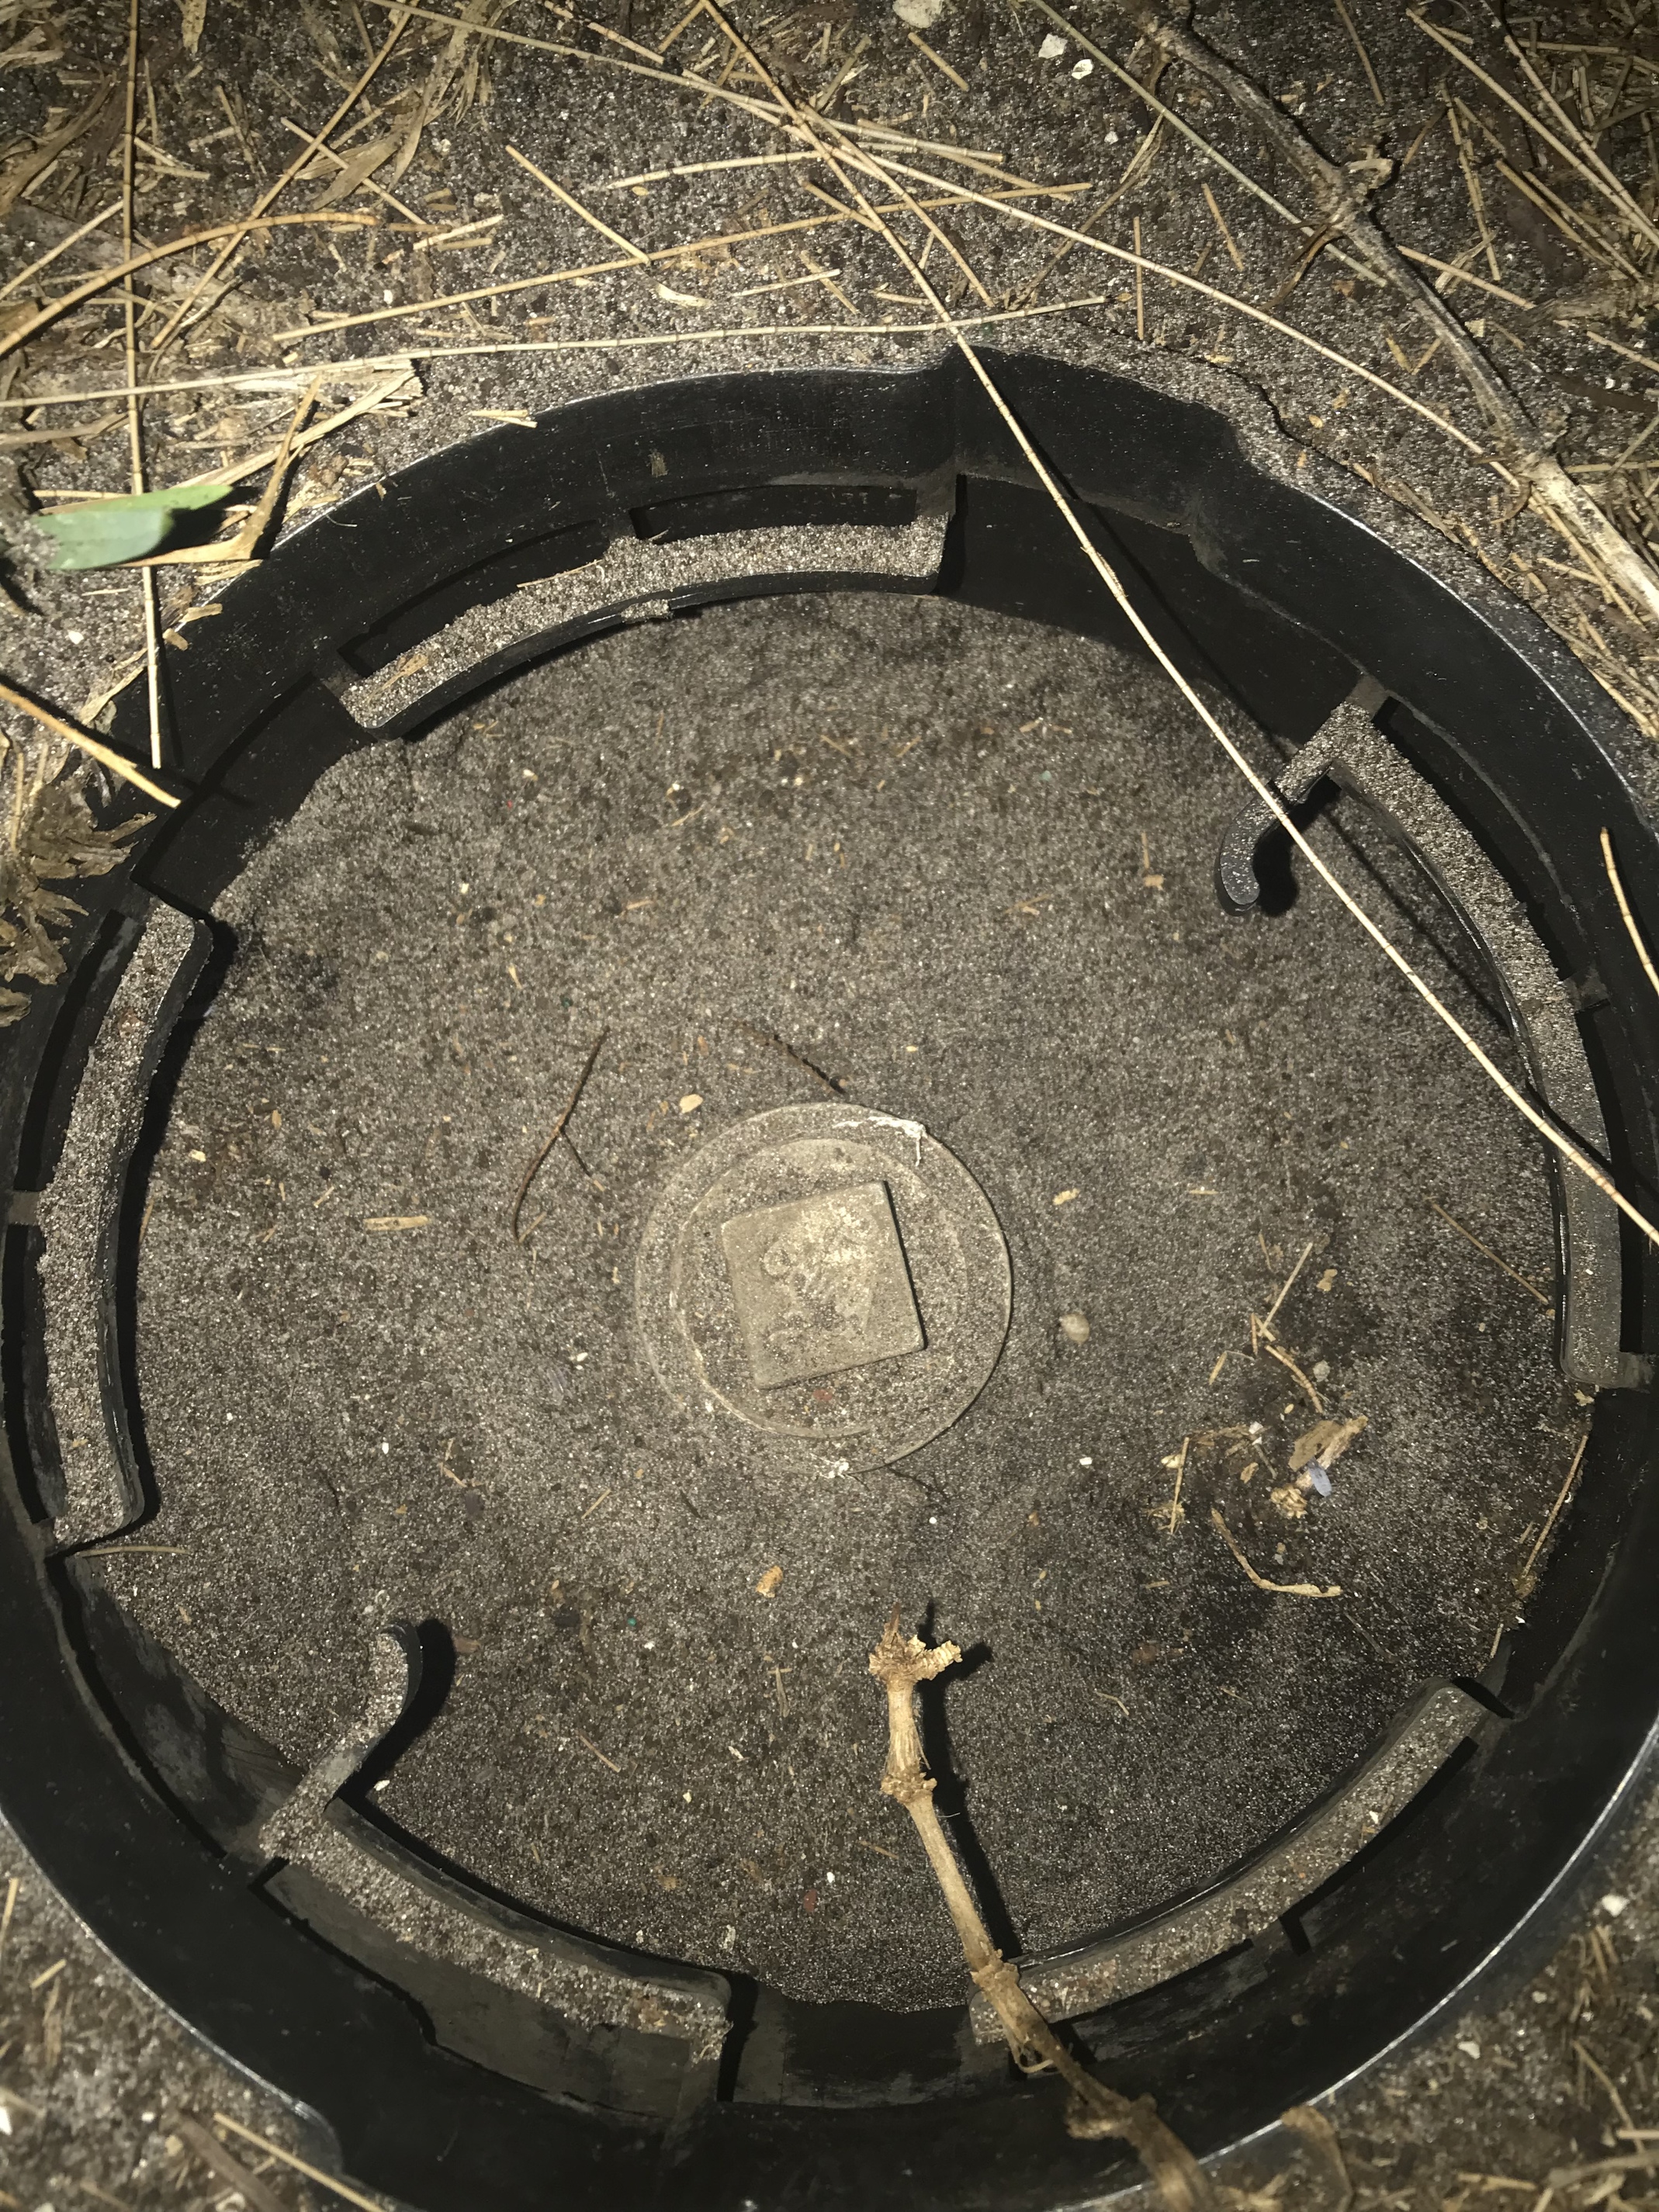
The PVC cap I was trying to open is not a valve, but clean out access for a well.

Still having an issue opening it. It was suggested I dig it out completely and use a heavy duty plumbing wrench and a blowtorch.

Nonetheless, I was able to “patch” water in through the pump priming faucet inlet and get sprinklers to activate. So, water came out! That’s good!

Here’s where things get strange:

I have:

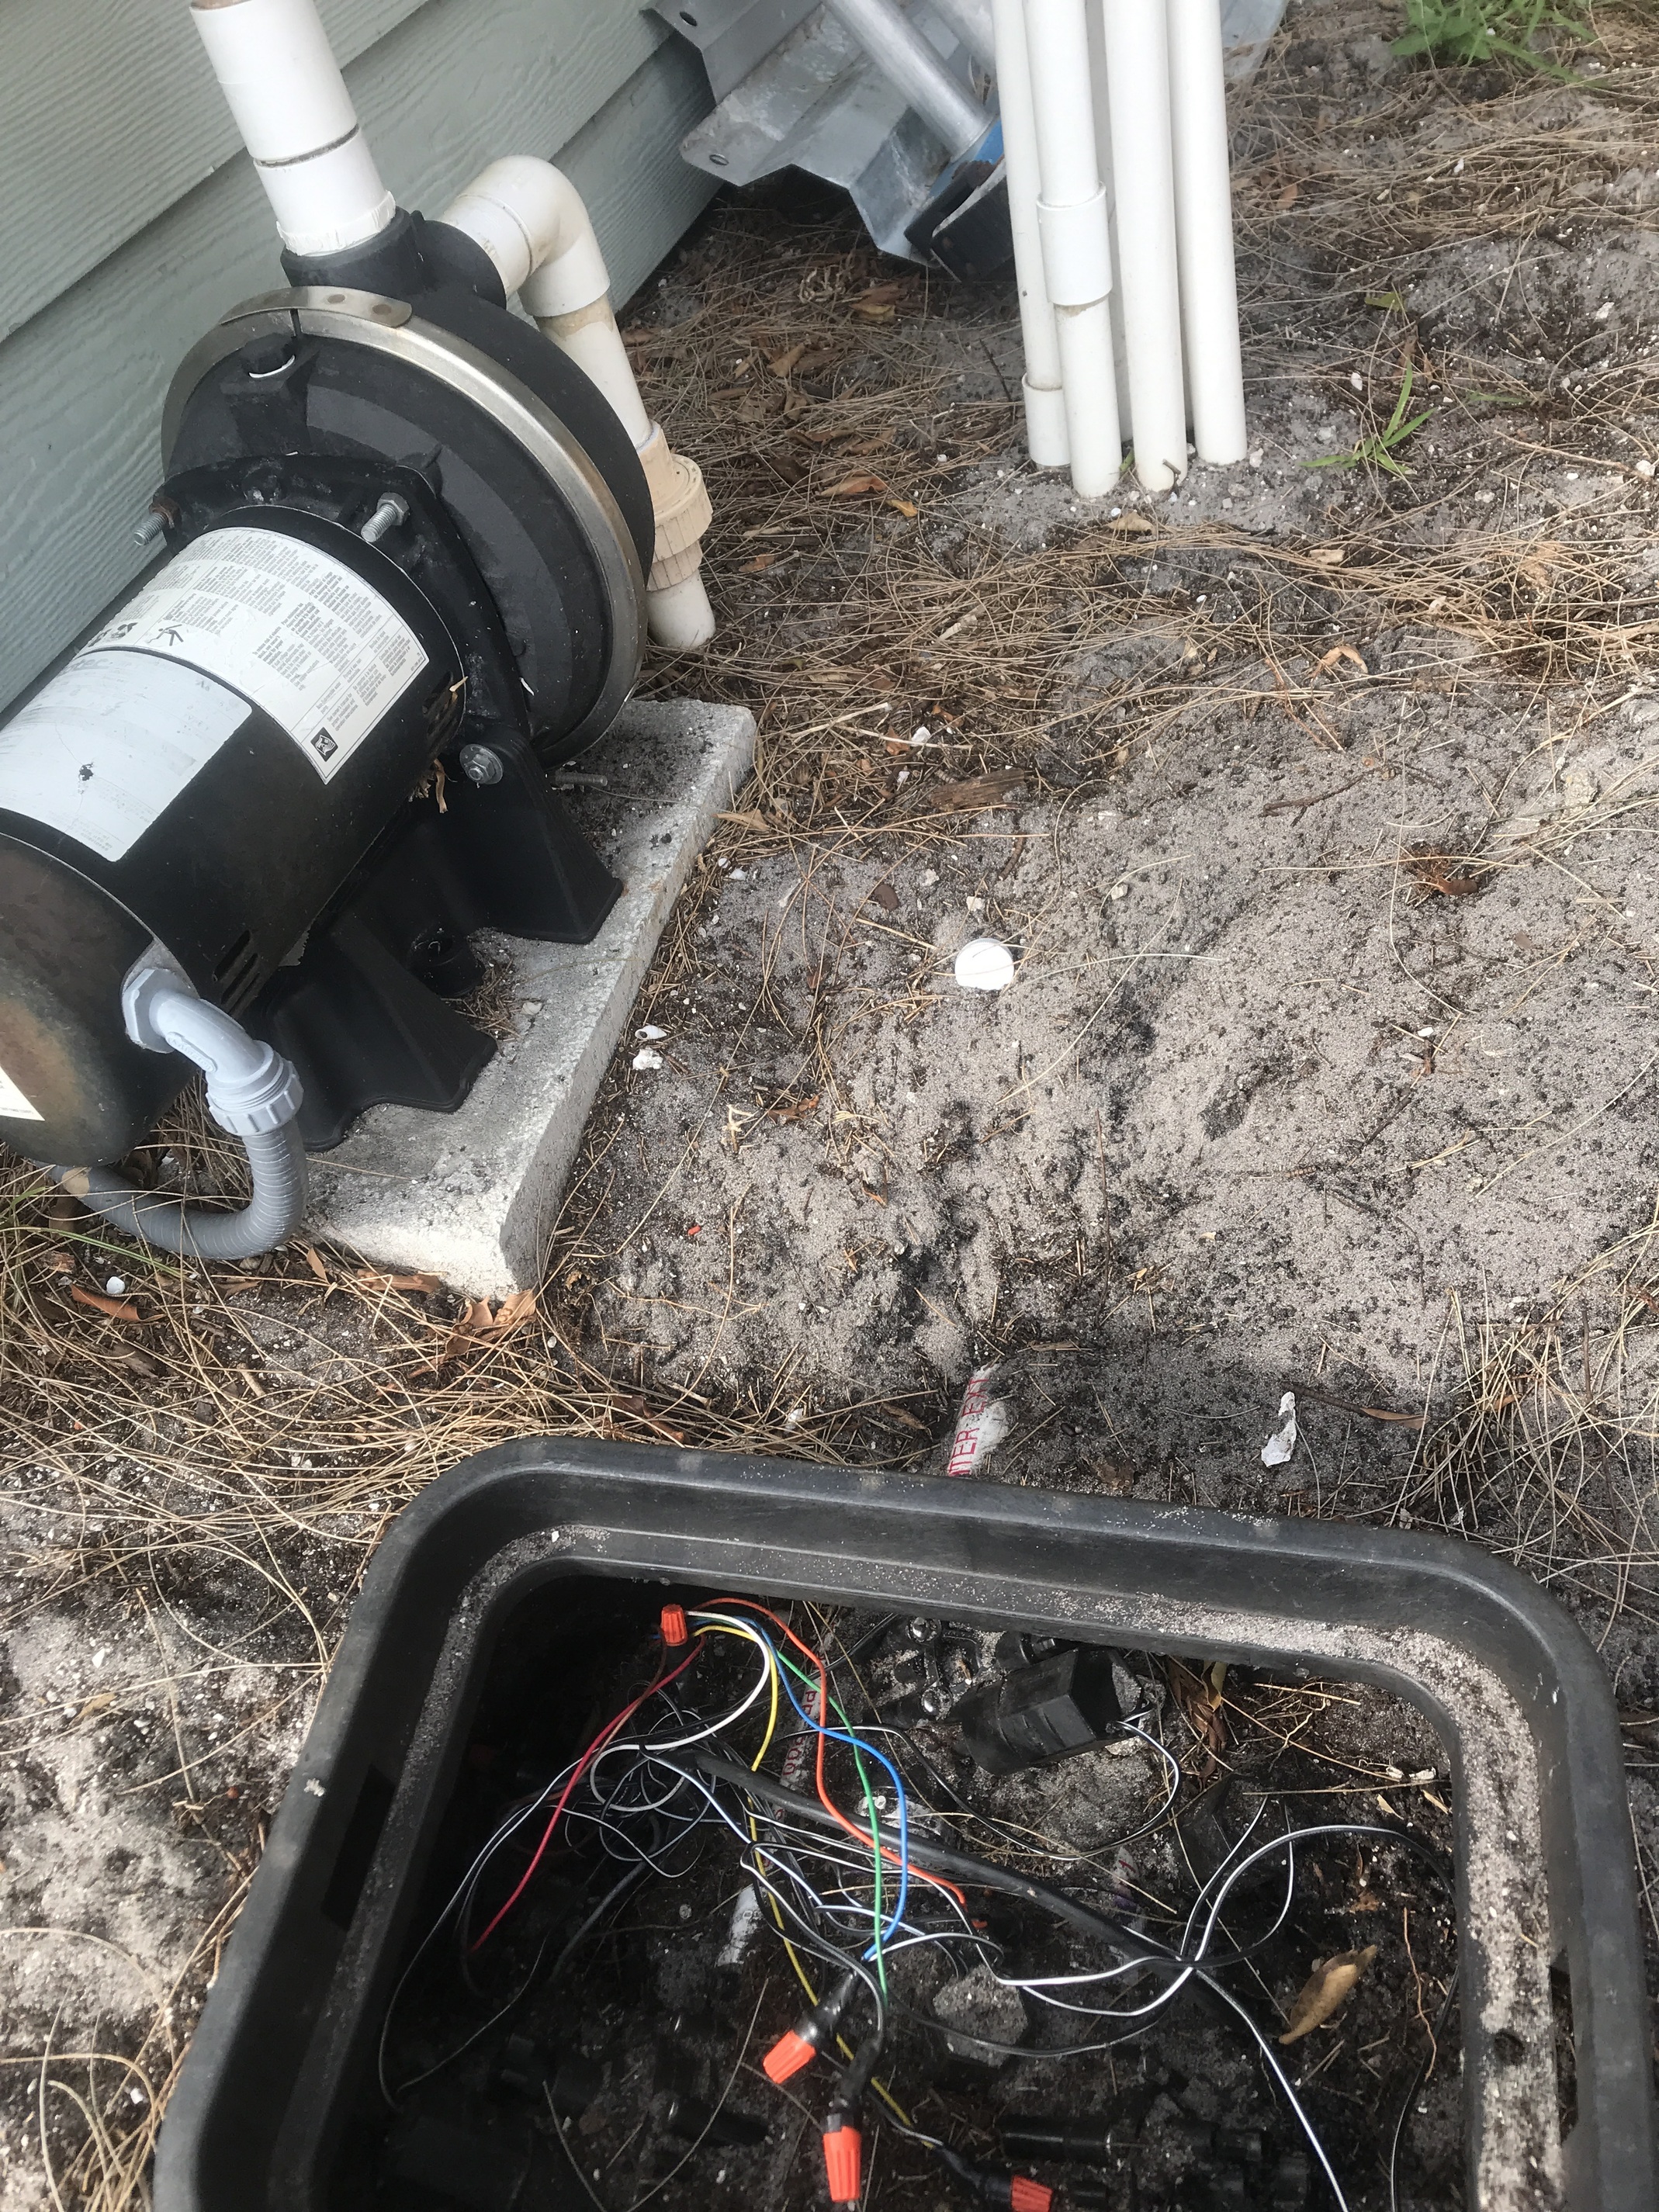
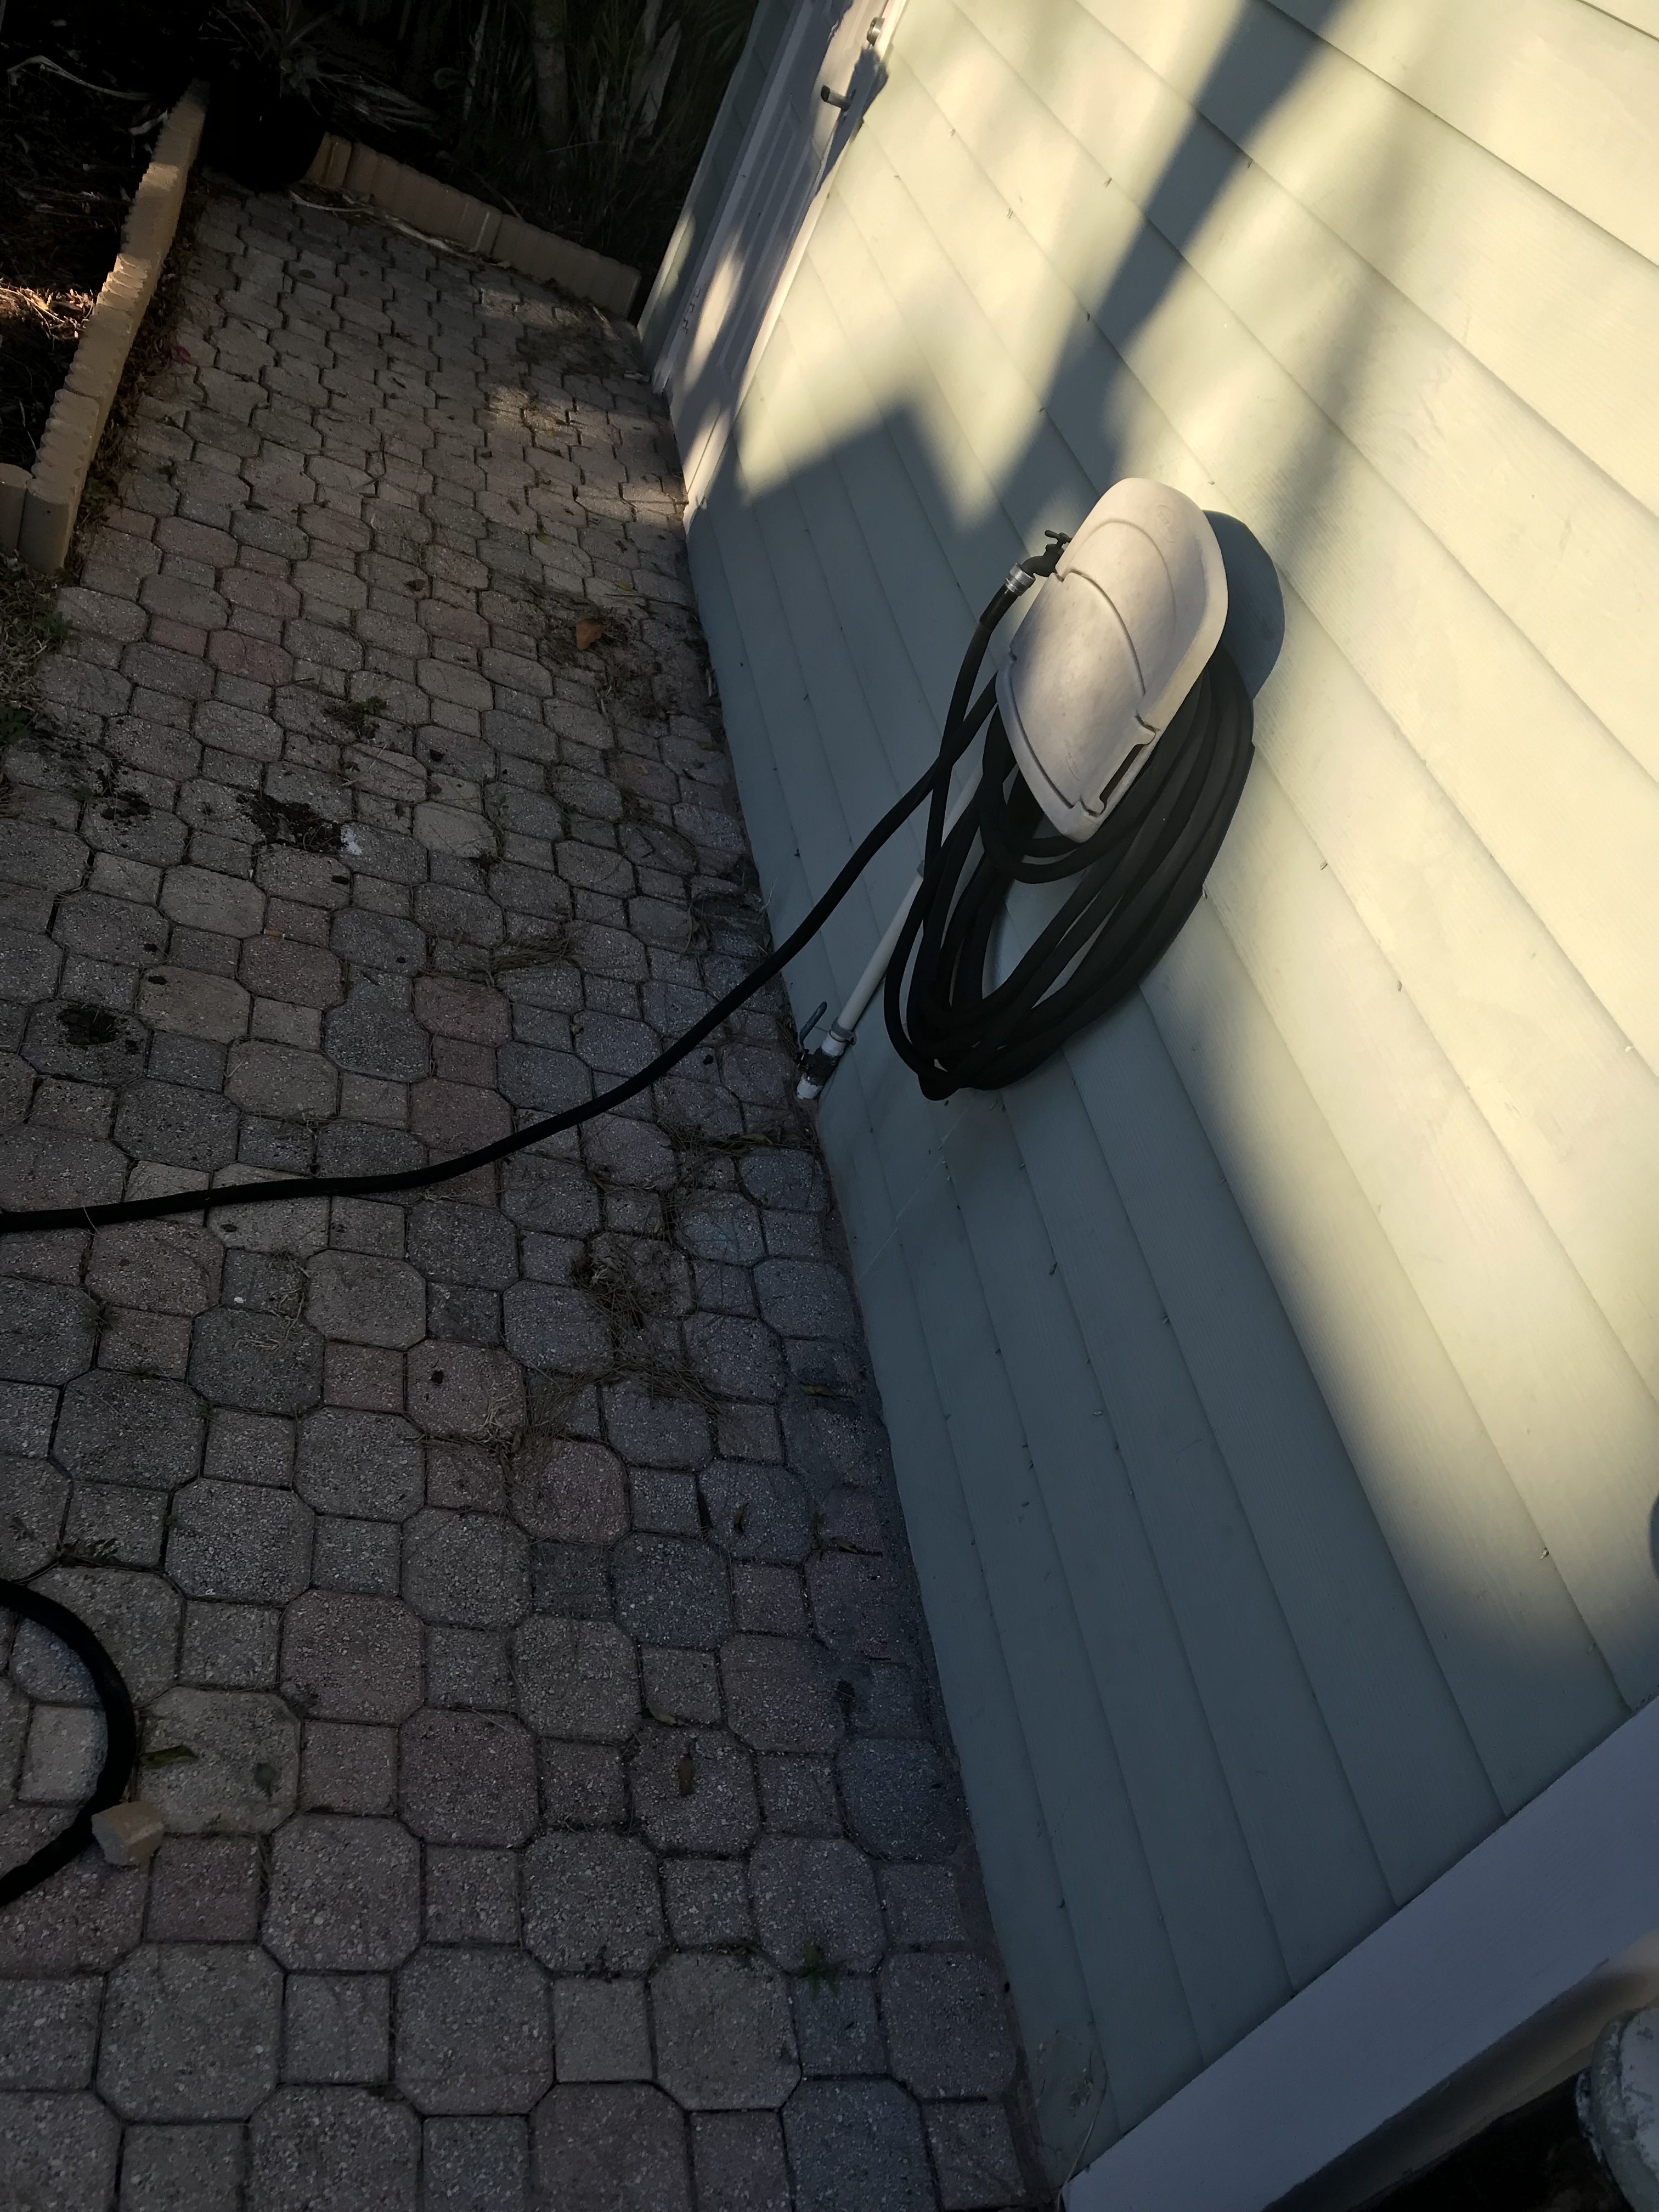
I. A Flotec pump and relay, pump connected with 1 1/4” pvc to a well (currently inoperable). The pump turns on and runs, but no water comes out.

  1. 1 1/4” from Pump to the indexing valve, leading to 6 3/4” PVC lines.

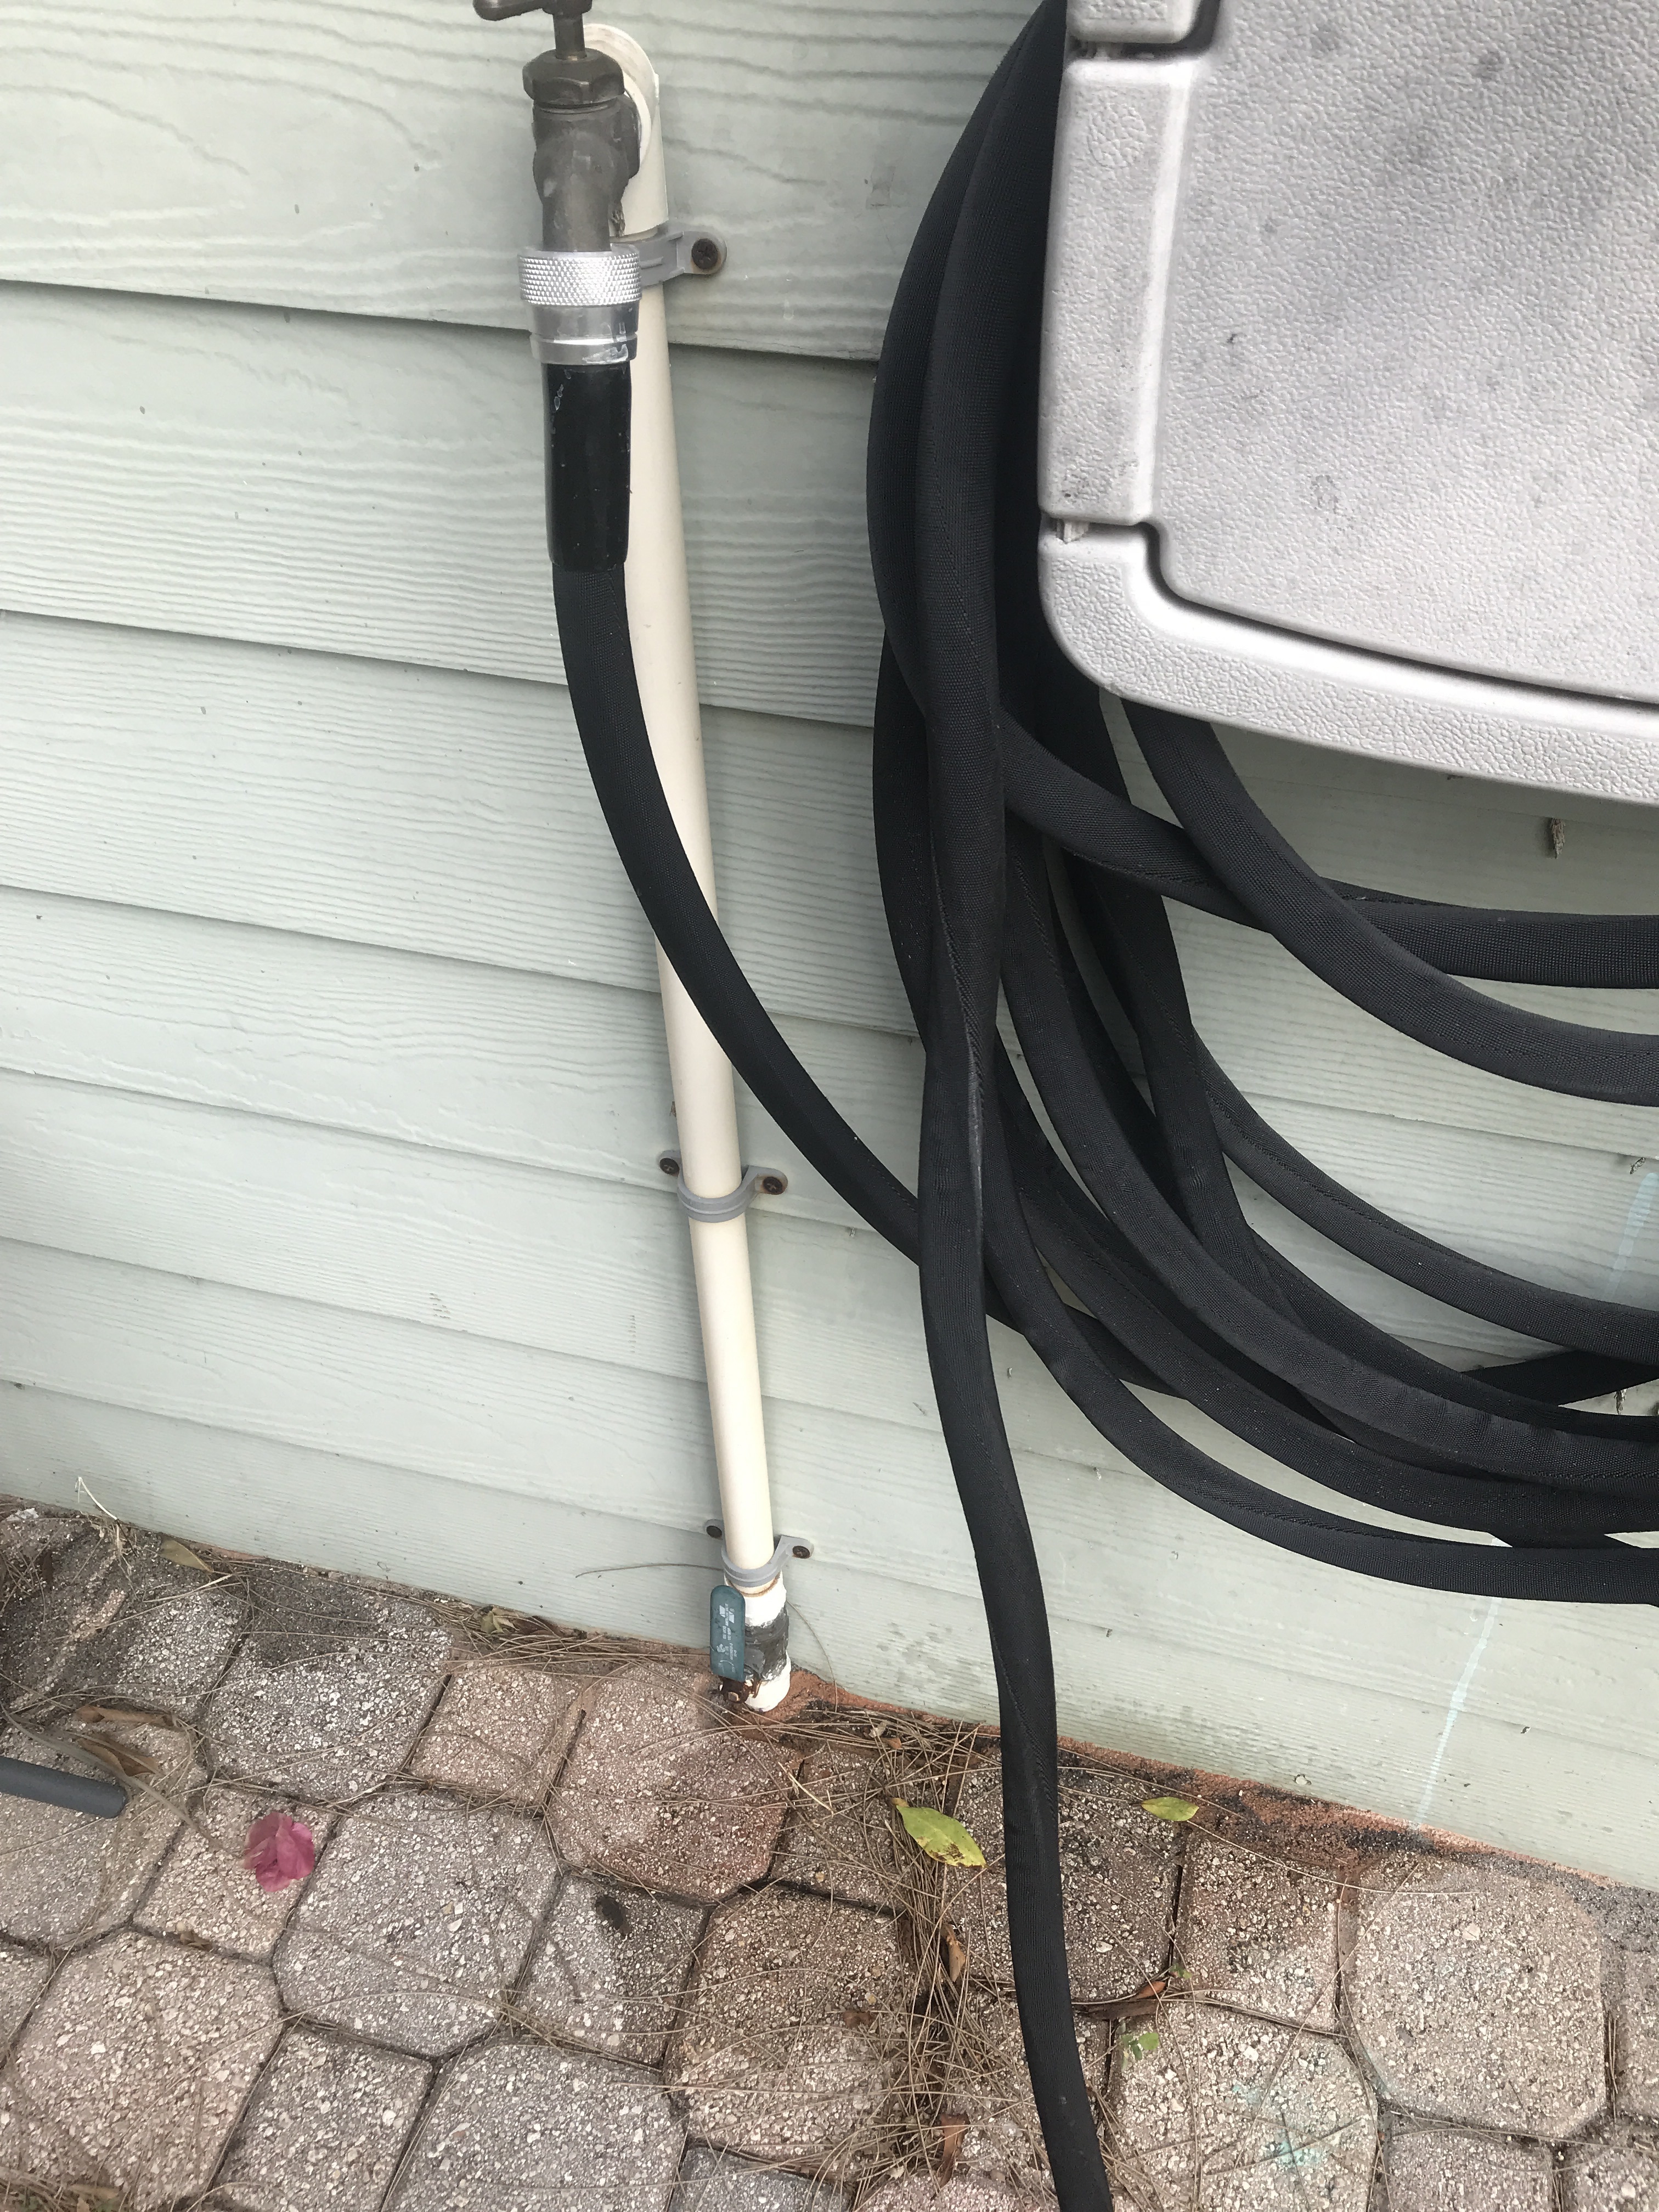
  2. There’s a faucet between the pump and indexing valve presumably for priming. When I connect the hose to this faucet, I can get some sprinkler lines working. Seems the runs for each zone are intact minus some old heads.

  3. After the indexing valve each of the six 3/4” lines has a solenoid valve. These in turn run to the various zones.

  4. I haven’t been able to locate any other shutoff valve or switching in the system.

I’m in South Florida; and it seems most here have a well and indexing valve configuration. It was wired to an old intermatic way on the other side of the home indoors, not in the shed like the orbit and now the Rachio.

It looks like the solenoids were retrofitted and no one bothered to pull out the indexing valve. I guess they just ran the solenoids with a one minute break in sequence to give the valve time to switch? However, that seems really backwards and over complicated. Who knows…

Anyhow I configured the Rachio to use the electronic valves and I’m unsure how to incorporate the indexing valve or if I should just pull it?

Where does the index valve wiring come from? I haven’t been able to locate it. And how was the previous system functional with the orbit scheduler?

What I’m thinking:

  1. Since I’d like to have the option of using either city or well water, I’m considering T-ing off from the hose line that runs nearby the well line, and follow it with a backflow preventer and shutoff valve.

I’d like to be able to bypass the pump configuration until I have the time to address the well, so the lawn does not suffer. Also, once the well is back and running it will make for easier priming I imagine (no hose).

But, would the water also partially flow through the pump and down into the well? Would I have to have a shutoff to prevent it from going into the pump system?

Do I need the pump system even with city water? My pressure from the city is about 70-80psi at the hose head and the longest run is probably 150 feet.

I believe I’ll need a back flow preventer and thinking of just using a manual ball valve. There’s a shutoff near the pump so I can turn that off manually. Anything else I would need?

  1. Pull all the solenoids out of the box, check them and organize them better in a new box. As they are now it’s incredibly crammed and it’s just about impossible to figure out what does what.

  2. Remove the indexing valve entirely? But, then how to go from the 1 1/4” to the 3/4”? Anyone have a photo that could illuminate for me? Unclear how to accomplish this.

  3. Install some kind of clear inline pvc piece so I can see if water is running from well? Is this called a check valve?

  4. When I have time, remove that cap and assess the well. It was suggested to put muriatic acid down there to clean it out?

  5. Maybe install some kind of pressure checking apparatus to adjust for differences between pump and city?

How does this plan sound to you all?

Thanks for your help as always.
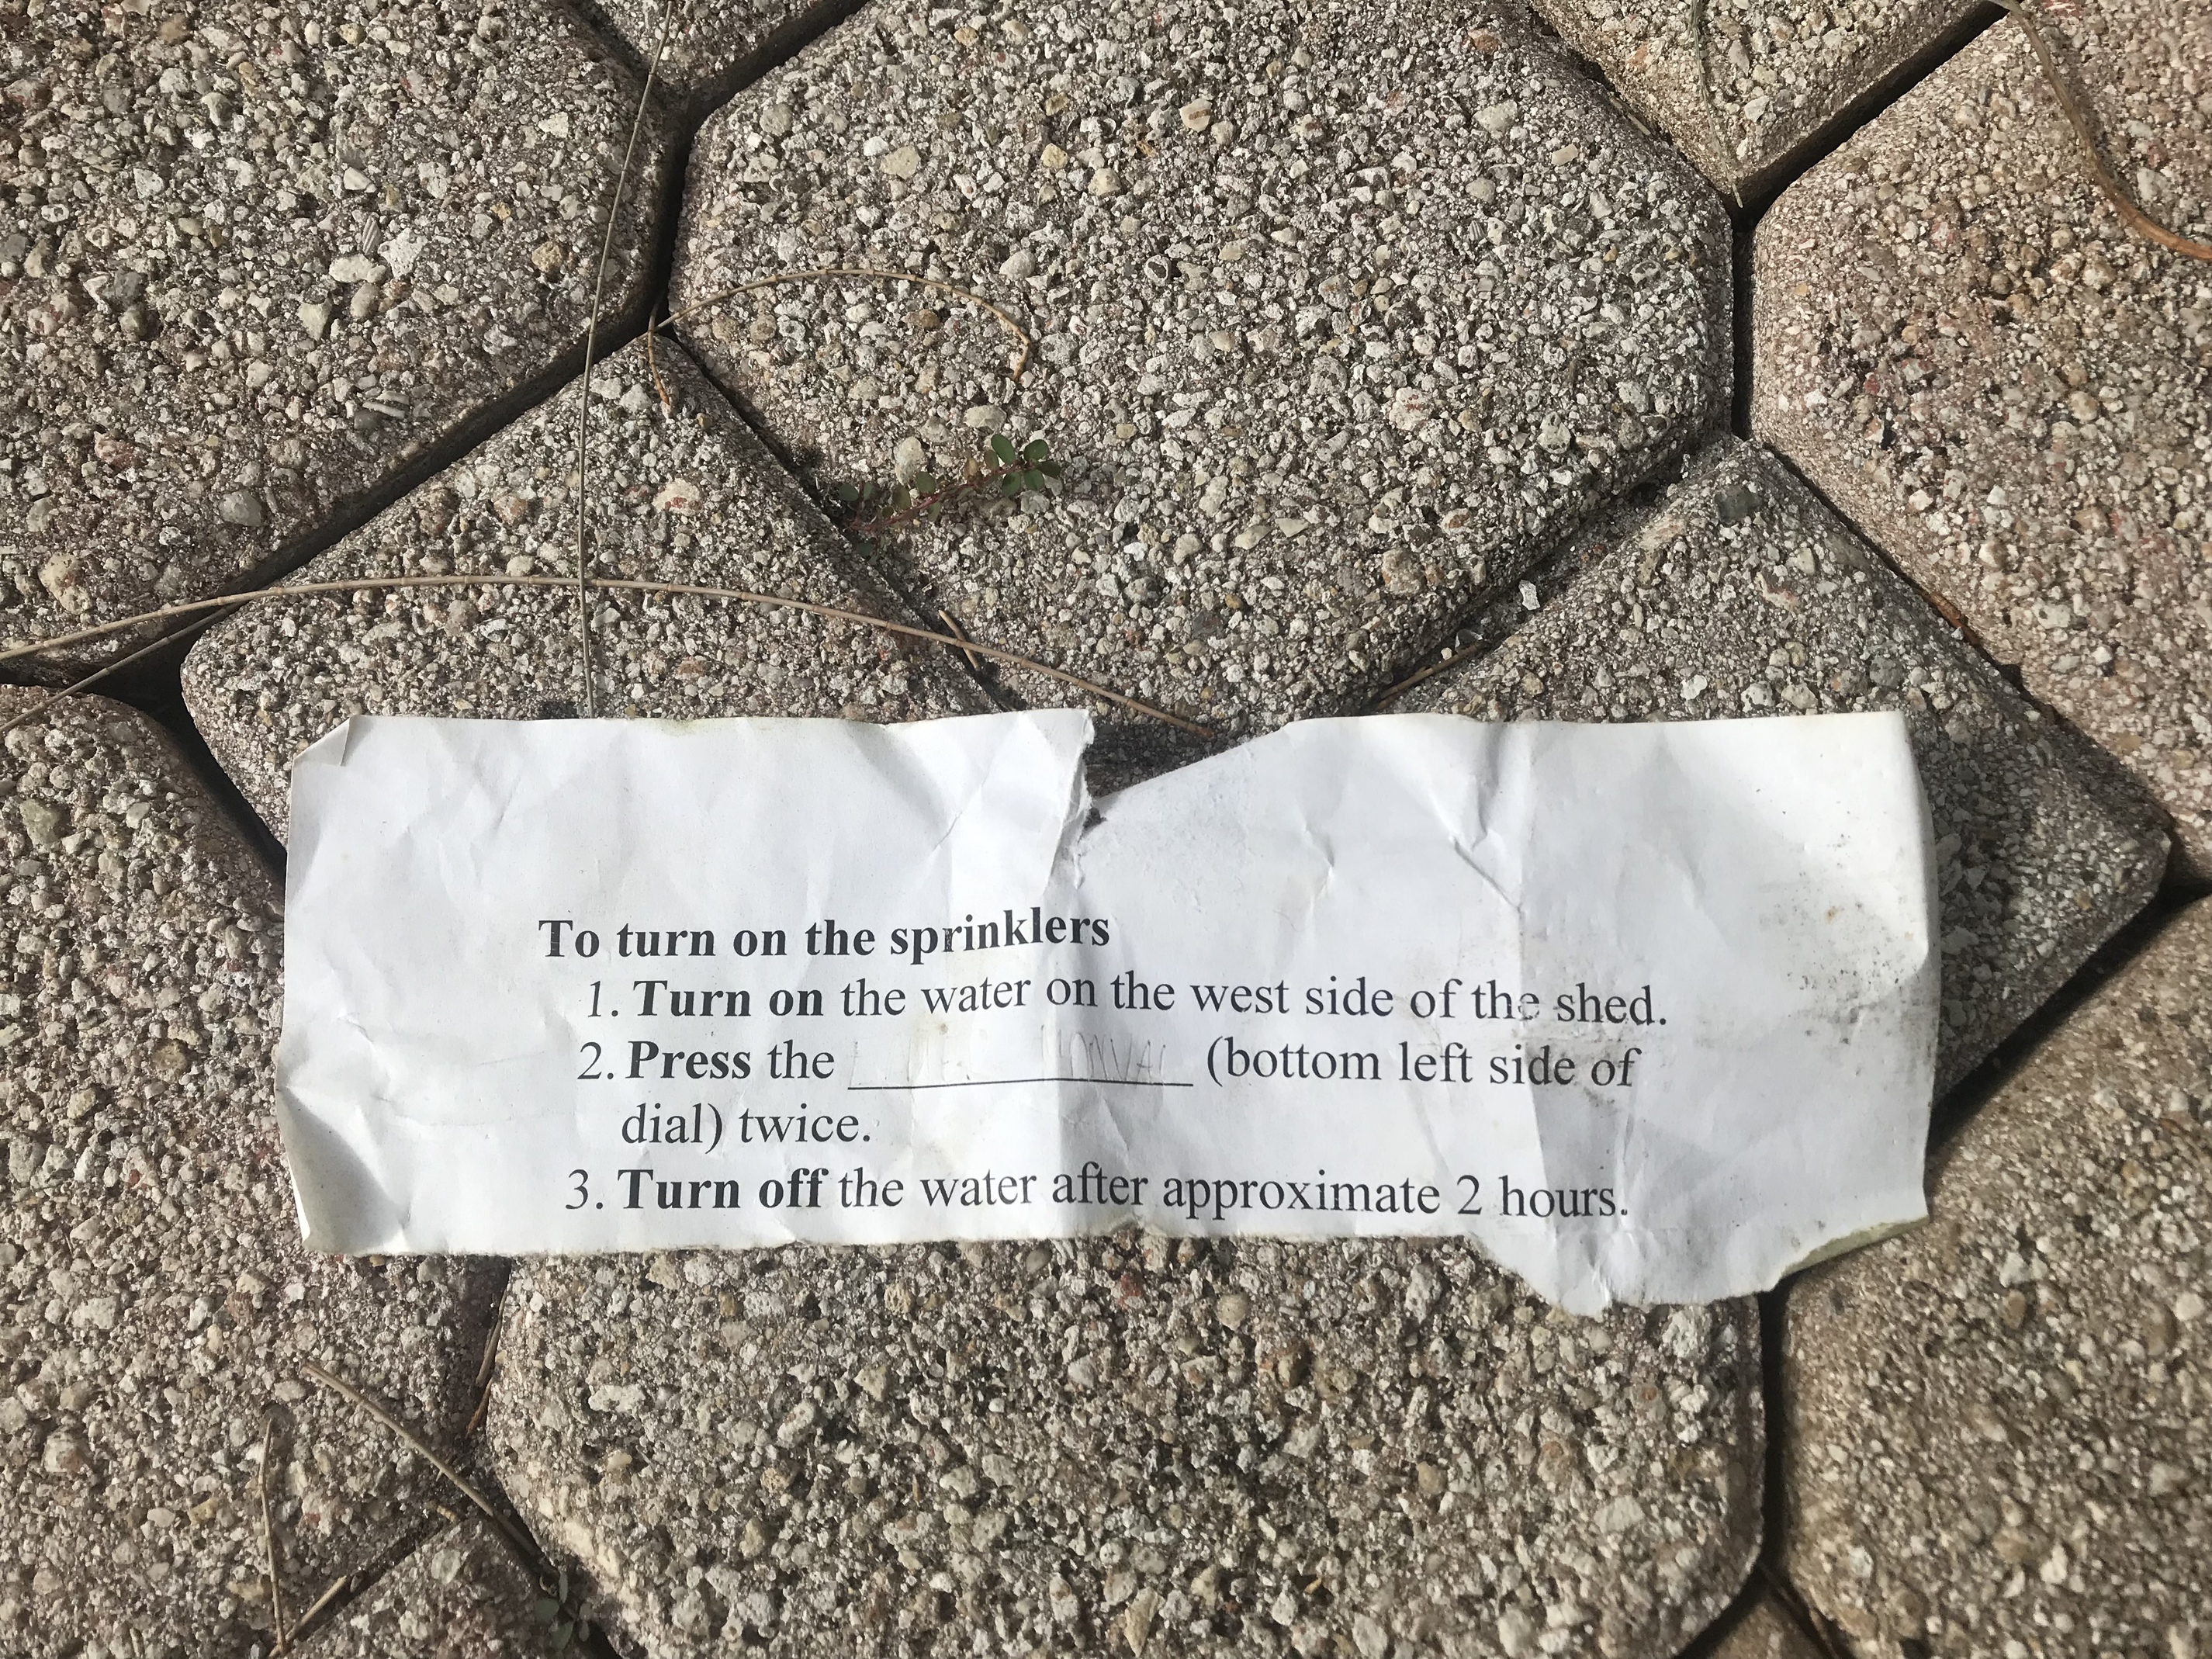