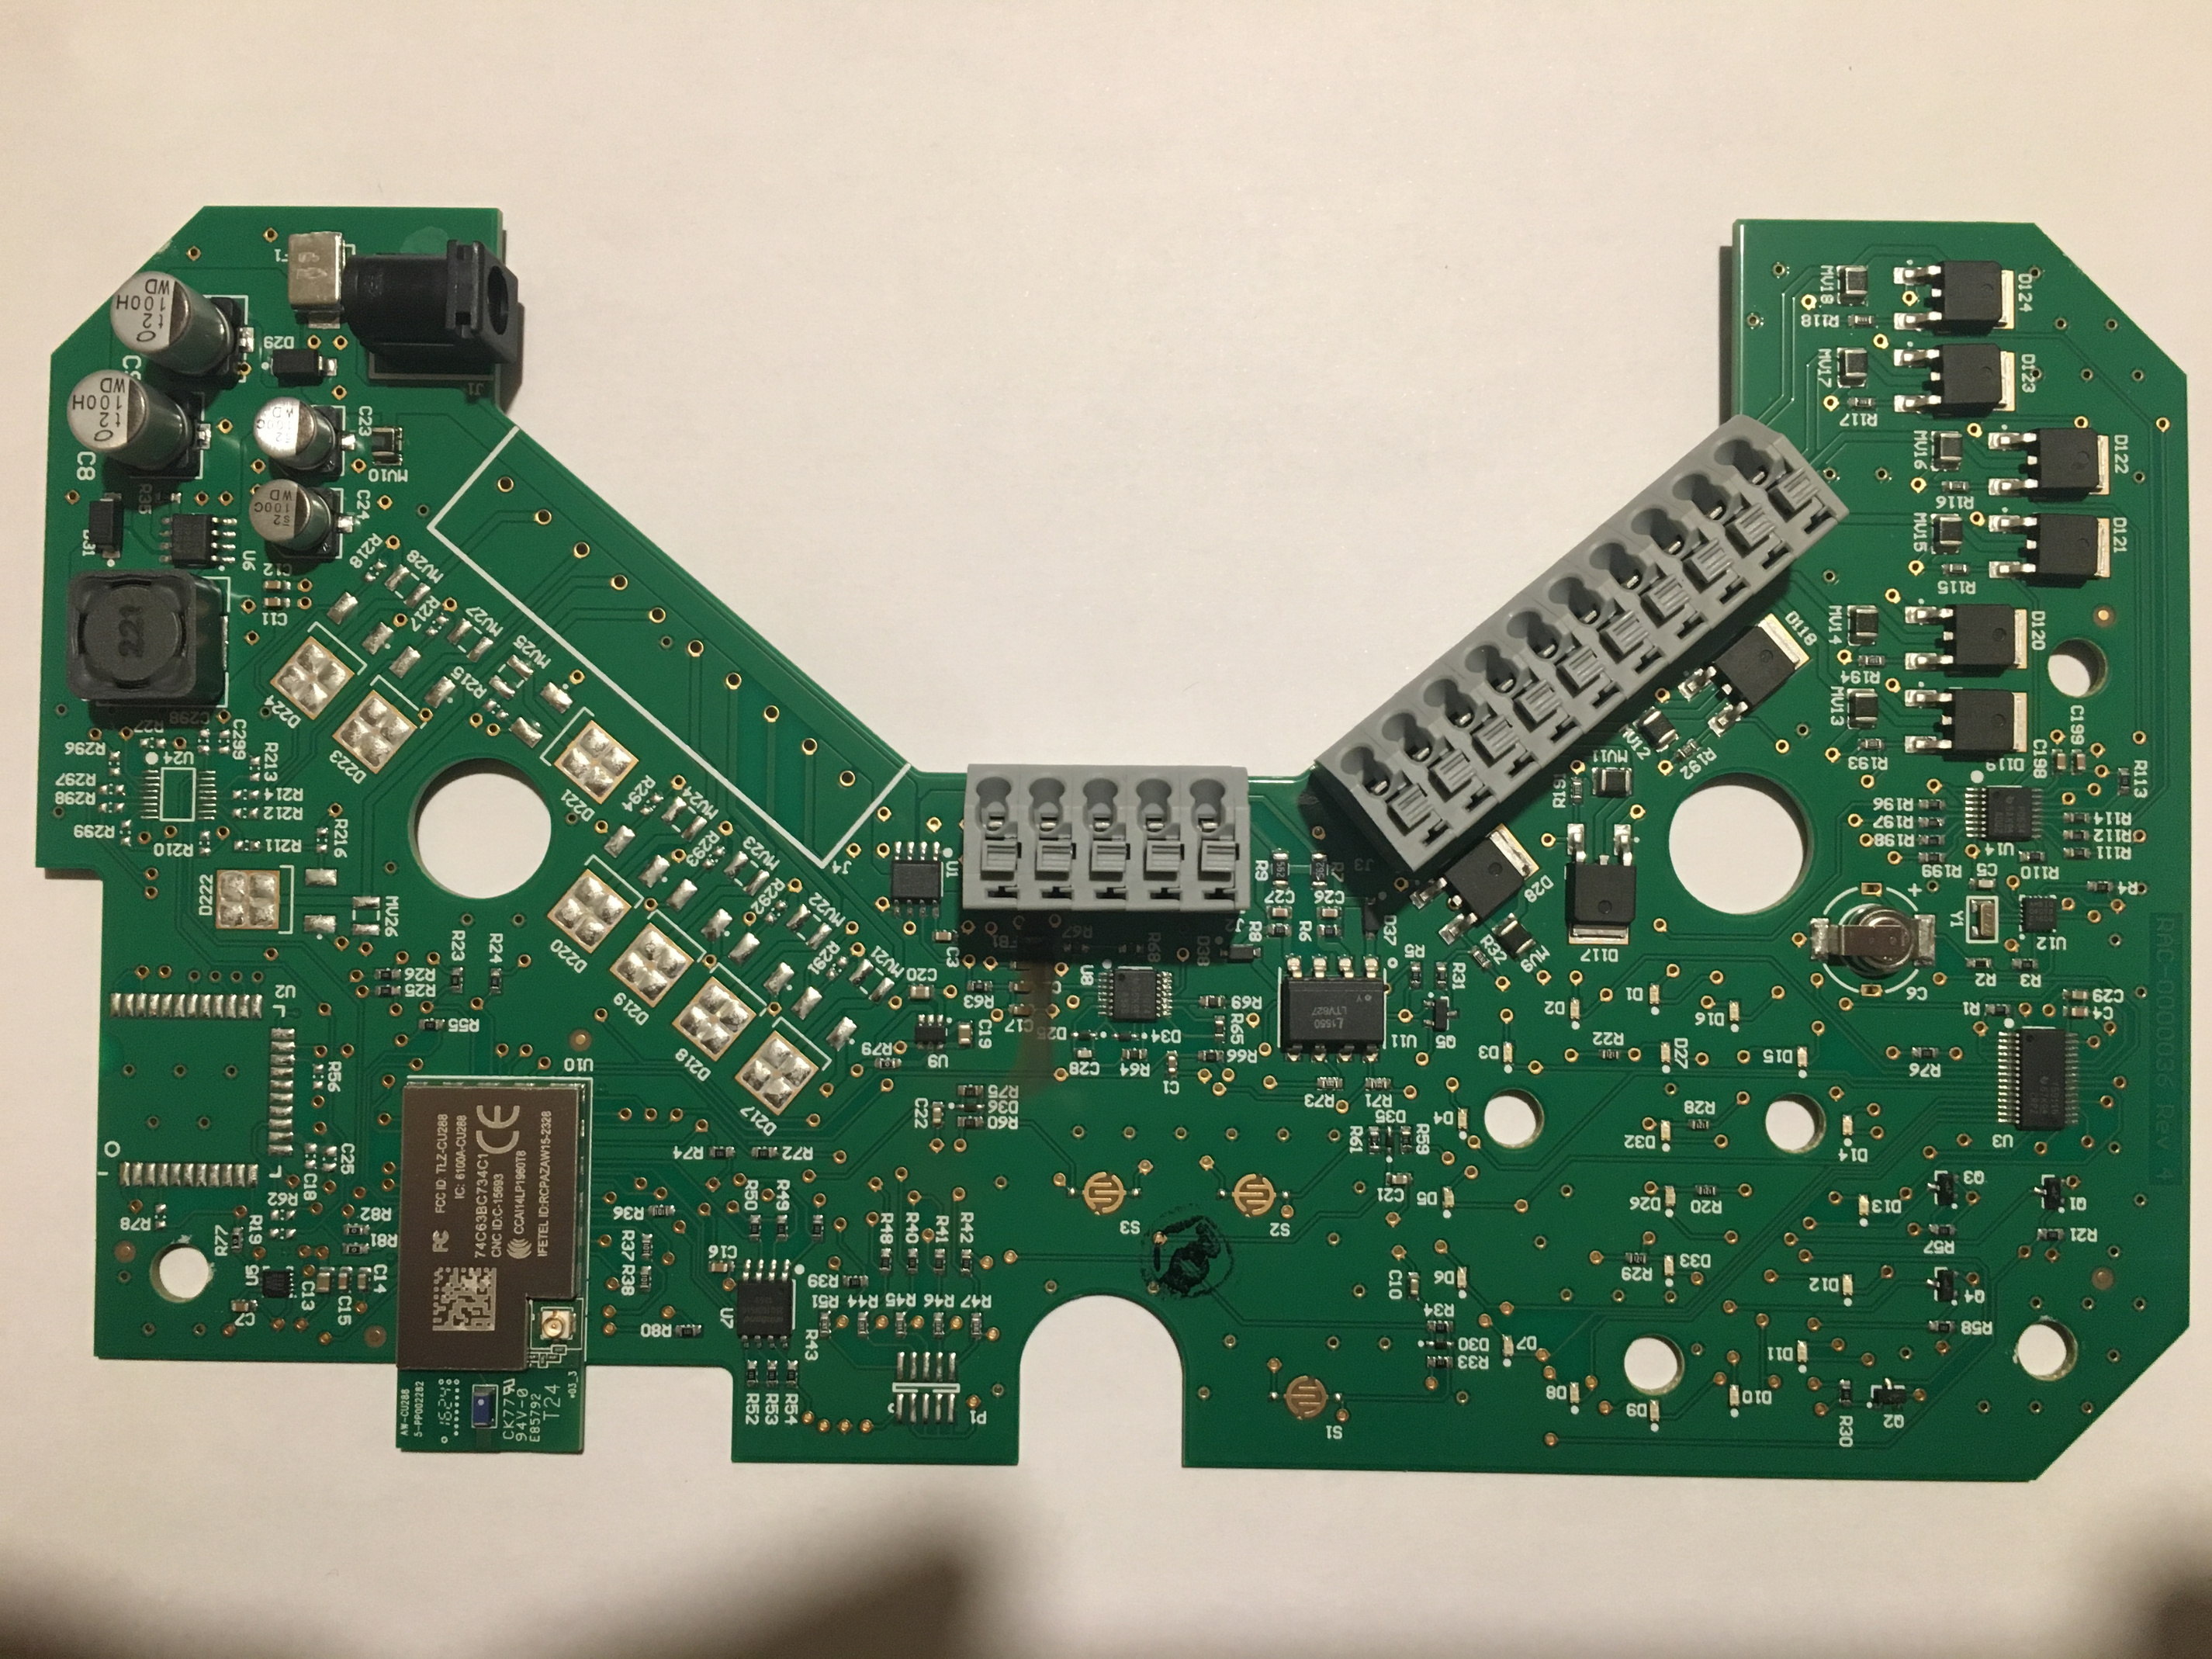
Europe/ tosted my 110V Charger, Unit in a deep Coma!

Hi Gene

let me shoow my trouble shooting activities

a) Input to the unit

      How I measured

      Readings

b) Measuring Voltage difference between at the SC SP

          How I measured

Readings

Thank you once again for your support
JLG

Do you by any chance have a model number of the AC supply your are using? Seems like it has some sort of protection circuit / current limiter, maybe it is just underrated.

I would like to ask you to take a picture showing the Rocchio’s original power jack’s inner opening next to the one you are using. It is possible that the inner hole of the power jack (into which you have inserted the black meter probe on the first picture) is not making a good contact with the Rachio’s socket (it may be too large). According to @franz’s post (link), the inner diameter of the power plug should be 2.1mm.

Thanks for the great pictures!
Gene

Hello Gene,

Good point regarding the transformer,I just read the the information about the transformer and its designed for internment service like door bells, albeit when I connect directly to the water pump solenoid they work perfectly.

Transfomer

I am using the original rachio jack, Have cut it out of the poor toasted transformer.

Thank you once again

JLG

40VA = 1.67A @ 24VAC which should be more than enough for Rachio’s 1A requirement.
Original plug is also a good move. Since you have already “spliced” the original plug onto the new transformer, I would like to ask you to disconnect one of the leads between the transformer and the plug into rachio and measure the current by switching the meter to 10A first (and lower if the Amp draw is not too large) and placing the meter in series with one of the leads.

You can also try connecting the transformer directly to the SC / SP terminals (bypassing the original power plug).

Thanks,
Gene

P.S. By the way what do you mean by “water pump solenoid”? Are you talking about a power replay for the water pump or a water solenoid for one of the zones?

Houston we have a problem …

I connect directly to SC / SP … just for two second… theblue led went to stable blue but a the SC side emit a flash and burned out.

Gene who did everything to save it but not its gone…

can you provide me special price for a another unit.

Thank you, still a rachio support

can you provide me special price for a another unit.

JLG

answering your Post scriptum , I meant the the water solenoid for each zone…

:scream: Oups…

I guess this thread can now be a caution story, and it seems whatever protection Rachio put on the power socket is working even when the unit is otherwise inoperational. :thumbsup: rachio :cheers:

I was hoping that at the end the issue would be with the transformer and/or something minor on the power side, it should not have normally blown up with connection to SC / SP terminals.

Keep us updated if Rachio will be unable to do anything for you (they are usually pretty great at supporting their customers in unfortunate circumstances). If you take the unit apart and take some post mortem pictures, maybe it can still be repaired (if you are willing to use a soldering iron).

Cheers,
Gene

1 Like

Hello Gene

I am sending the current unit status

thank you

Is there any damage visible on the back side? From the initial observation it seems that the “new” damage is limited to a ferrite bead (which is a filter, something like this). Looks like it couldn’t handle the load and melted / exploded.

The good news is that it’s a cheap part (less than a $1) and if you don’t plan to use SC / SP terminals any time soon, you could simply remove it with a soldering iron in order to get back to where things were this morning.

As far as the rest of the circuit, MV10 (which is probably a MOV, overvoltage protector) near the power plug, seems a bit suspicious (not sure what the smudge on top of it is). Would be nice if you could take a close up picture of this part.
An overvoltage could have caused it to degrade and start conducting at lower voltages, or it is possible that 30V AC supply is simply too high to begin with (maybe someone from Rachio could clarify what these MOVs are rated for).

The more I think about it, the more it’s becoming apparent that 30V AC should be considered an overvoltage for this design. MOVs are probably rated for something like 25VAC (like these), which equates to about 35V at the peak voltage. 30V AC on the other hand has a peak voltage of 42V+. If the MOVs on the rachio are anything close to being rated for 25VAC, they would pretty much short anything over 39V.

Hi Gene

You are right the MV10 and the FB1 are burned out. what components are these so I may Buy them?

thank you once again

JLG

Well, the good news is that the main capacitors (C8 and C9) are rated for 50V, so 30VAC supply should be within the Rachio’s tolerance. Without knowing what the other MOVs (MV9 through MV18) are rated for you may need to replace them all in order to guarantee that 30V supply will not trigger them all.

If this is the case, MOVs are rated at less than 30V. and it would be a good idea to replace all of them.
From the looks of it, the size of MOVs are 1210, in which case 30V mov would be this one (link), I would not go higher due to 50V rating of the capacitors.

Size of the ferrite bead is harder to judge, it is probably either 0603 or 0805. 0603 is a safer bet and should fit into 0805 footprint as well if need be. In this case this (link) would be one of the acceptable parts.

If you are using less than 8 zones, you could try moving one of the good MOVs to replace the damaged one.
For example Moving MV11 over to replace MV10 would remove the surge protection from zone 8, not an issue if you are not using that zone.

Alternative to buying a ferrite bead filter, is to simply remove the damaged FB1 part and shorting the footprint with a piece of wire. SC / SP terminals will work again for majority of possible needs.

So, in summary, you may need to buy these (or similar) parts:
10 of these: 399-13766-1-ND (to upgrade MOVs to 30V to work with your supply)
2 of these: 1276-6387-1-ND (to replace the damaged filter on SP terminal)

Cheers,
Gene

1 Like

Thank you Gene

The board is the E.R of a more knowledgeable, and with sharper eyes, friend of mine.

I will keep you posted

JLG

2 Likes

hello Gene

I only replace the MOV, and shunted the ferrite

Its Working!!!\

thank you very much for your support

JLG

2 Likes

Very glad to hear it :thumbsup:

Did you end up replacing just one MOV with a good one from unused zone, or all of them with 30V versions?

Cheers,
Gene

Just the burned one

@jolugo sorry to bother you, but one last question for the sake of Science :wink:

Now that your unit is operational again, would you mind measuring the AC voltage across the transformer or SP / SC terminals while one of the zones is active?

Originally I thought you would need to replace all of the MOVs in order to be compatible with a 30V transformer, but now I wonder if a load from a single active solenoid is sufficient in order to reduce the AC voltage well below the 30V idle voltage.

Thanks,
Gene

Hi, I know this is an old post, but kind that something similar happened to me with the rachio 3 :frowning:
I now plug it using the 24 VAC from my old/current rainbird controller and it doesn’t turn on either.
Nothing on the circuit seems broken (by eye at least). However I notice the self resetting fuse, if I got the component correctly (see image), gets quite hot when I plug the device. Does that mean the fuse is broken?
Any idea what replacement alternatives there are for it, maybe @Gene knows? I might need more than one, not easy to get electronics where I live.

Thanks
Cristian

Just a further point of clarification - you are measuring open circuit voltage (30v) which will always read lower when actually powering a device

Seems that the fuse is doing it’s job, heating up due to load and shutting down. Something down the line is shoring out, most likely one of the MOVs on the board (not the fuse itself).
If you can get your hands on a can of compressed air (kind that is used for cleaning keyboards and such), you could use it upside down to frost the board and identify the component which is actually damaged (it will be the first one to get hot and clear frost from itself and surrounding area).
This will give you an idea of what I’m talking about:

Hi Eugene!
Thanks for the reply and advice. Nice trick I wasn’t aware of.
Honestly, this seems trickier than I originally though :frowning: and it will require quite some effort for me succeed (or at least have the chance of).
I have a relative traveling to US next week and I will ask him to buy me a replacement.

Cheers :slight_smile: