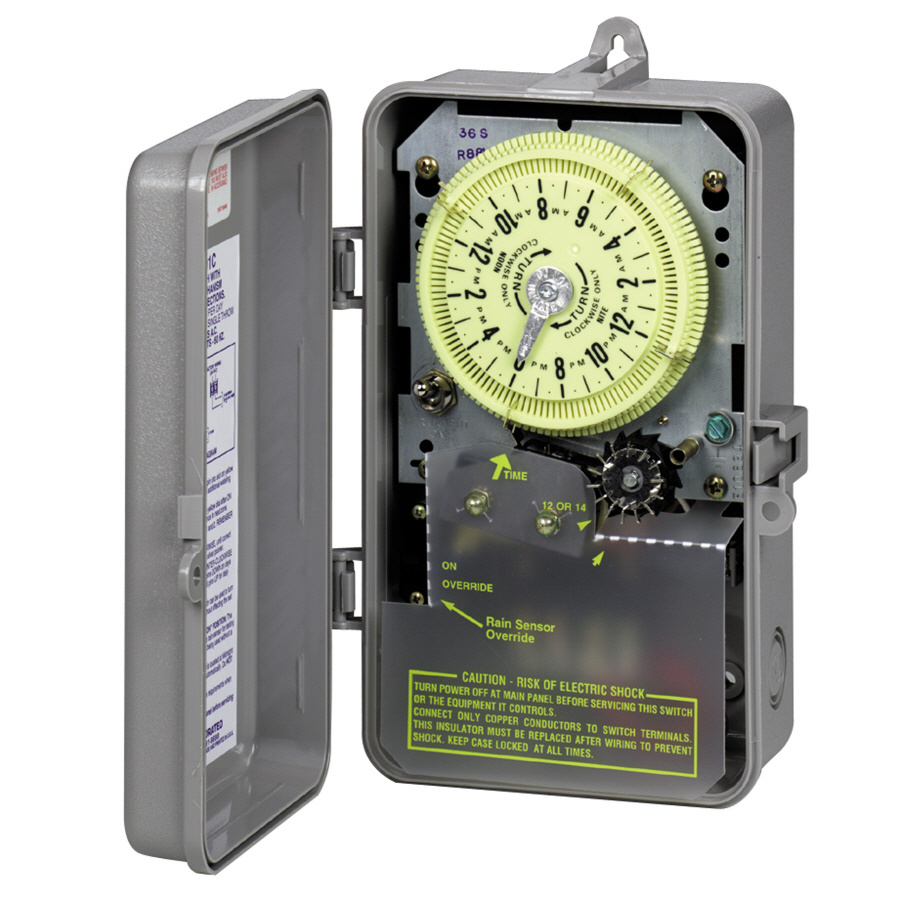
For the life of me I cannot get this thing to work. Currently have sprinkler running on a Intermatic Analog Irrigation Water Timer ans bought the Rachio many months back and now getting around to TRYInG to install it. I don’t have zones and have everything set on one zone as that’s the way my Gardner installed it. I’m using well so bought a relay pump and able to understand those wires. However I have no idea how to connect this thing. Have seen multiple videos on your tube and they all refer to a common wire which I don’t have. So in essence, when I turn the pump on, all sprinklers go on. I do not have any dedicated wires going toward zones or anything.
So do you not actually have any sprinkler valves at all?
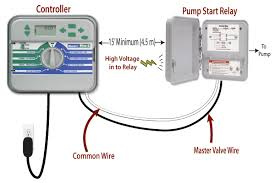
If not, I guess all you would have to do is hook the pump wiring up to the Rachio (assuming it is connected via a relay of some kind…).Once connected, you would have to set up the software side with pump control, and you would have to create a zone that would in essence be a ghost zone used to create a schedule. When that schedule runs, it will trigger the pump to kick on, thus running your “zone”.
I will say, depending on your mix of plants (or watering needs) on this “zone” it might be tricky to set up anything but a fixed schedule similar to what you had on your analog clock.
Rachio won’t be able to connect directly to the pump wiring. You’d have to set up a relay that would handle the voltage side of the pump, and Rachio would just trigger the relay. You’d need a pump start relay installed that would then allow the Rachio common wire and master valve/pump wire to be connected.
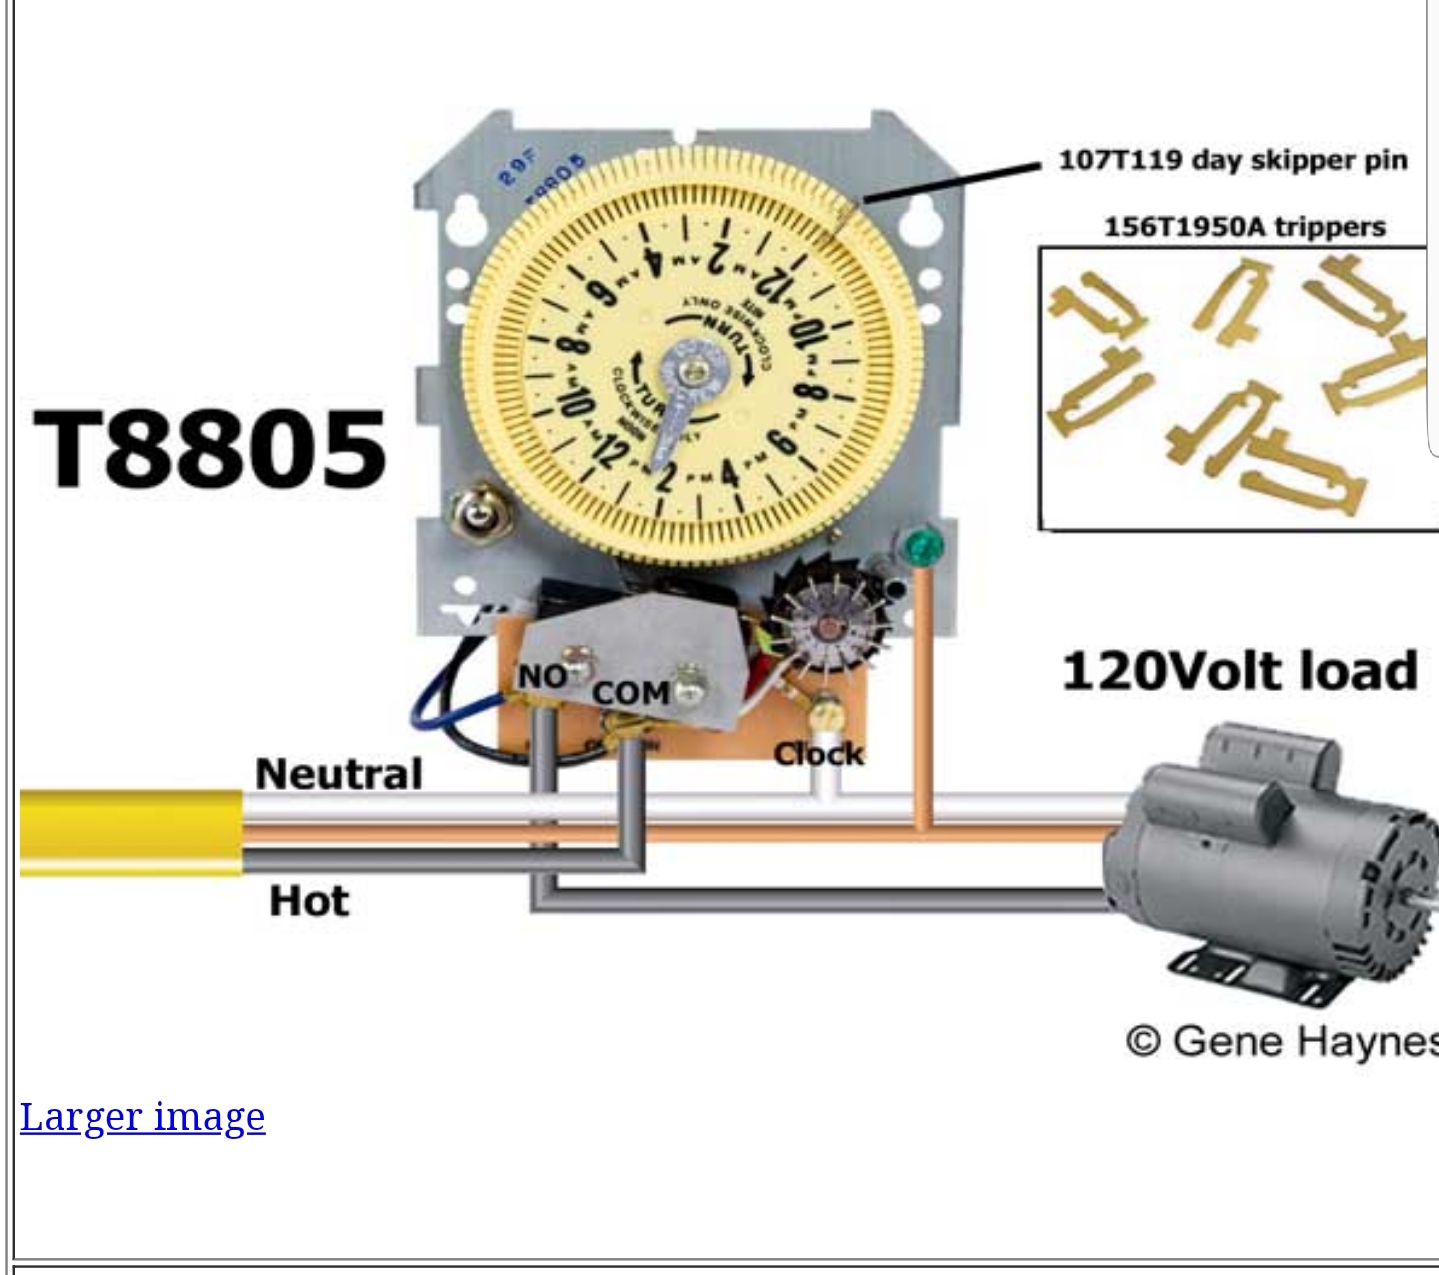
Picture this with a Rachio in place of the Hunter dumb clock…
@YoMeHOW - you may have an indexing valve setup that doesn’t use wires, but pauses to move the selector to another zone - that is if you have more than one sprinkler zone. On the Intermatic time there would be multiple on/off blades to accomplish this.
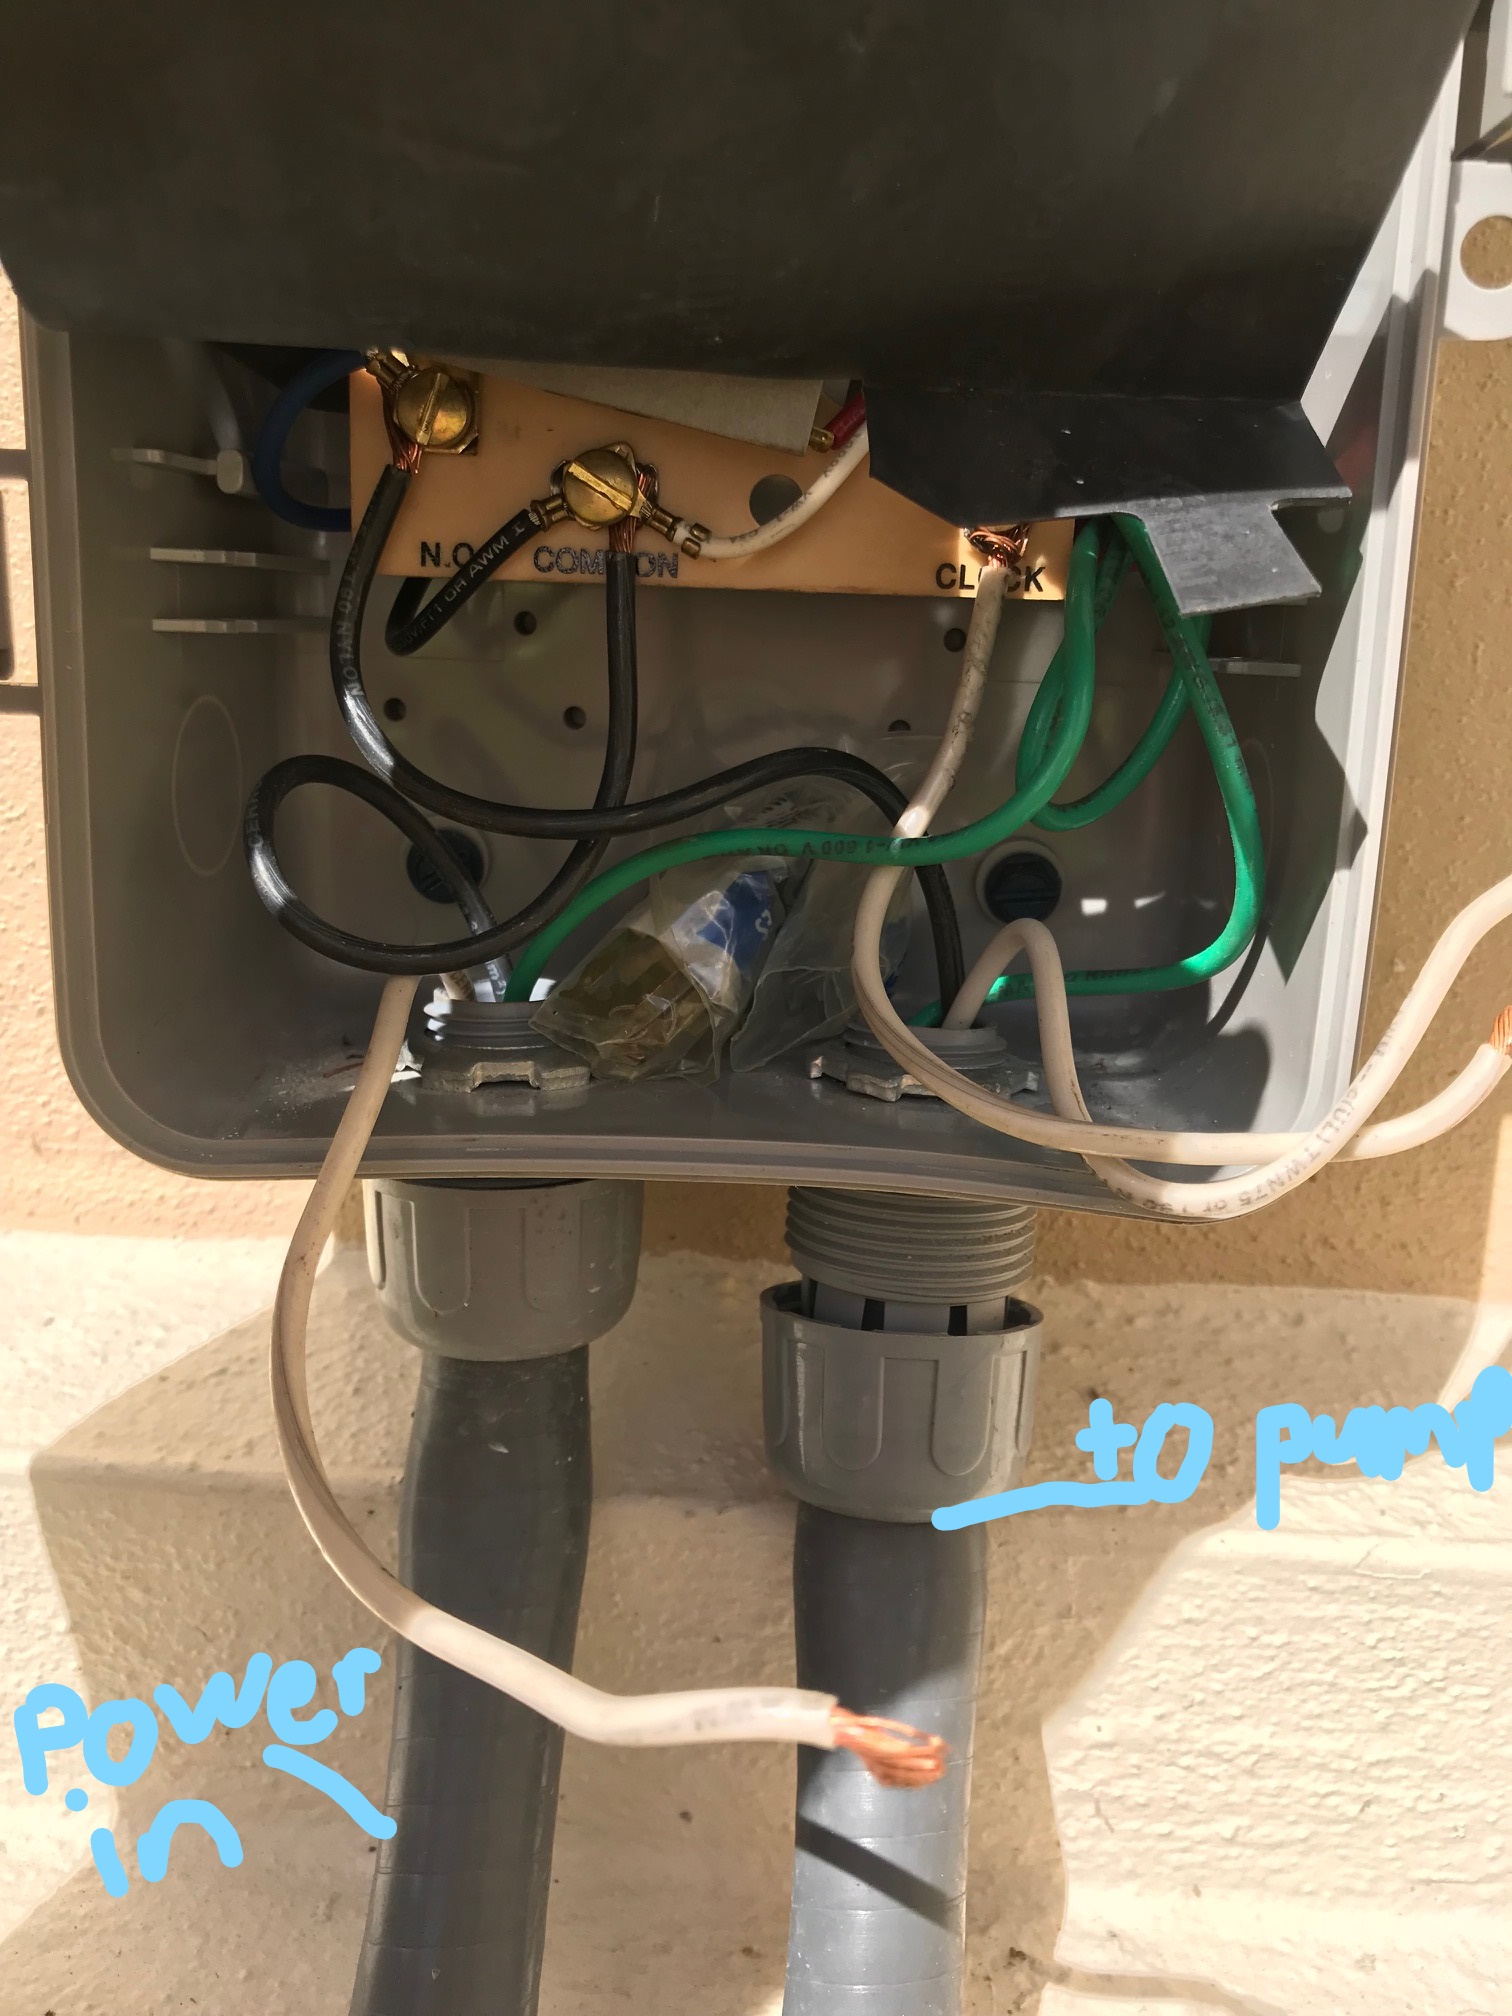
I posted a picture of what I think they have. It sounds like it is handling the high voltage of the pump directly, thus giving them a single “zone”. That Intermatic unit would have to be replaced by a pump start relay, to which Rachio will control as a master valve.
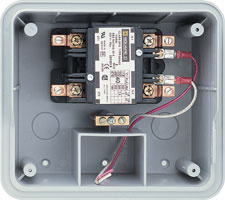
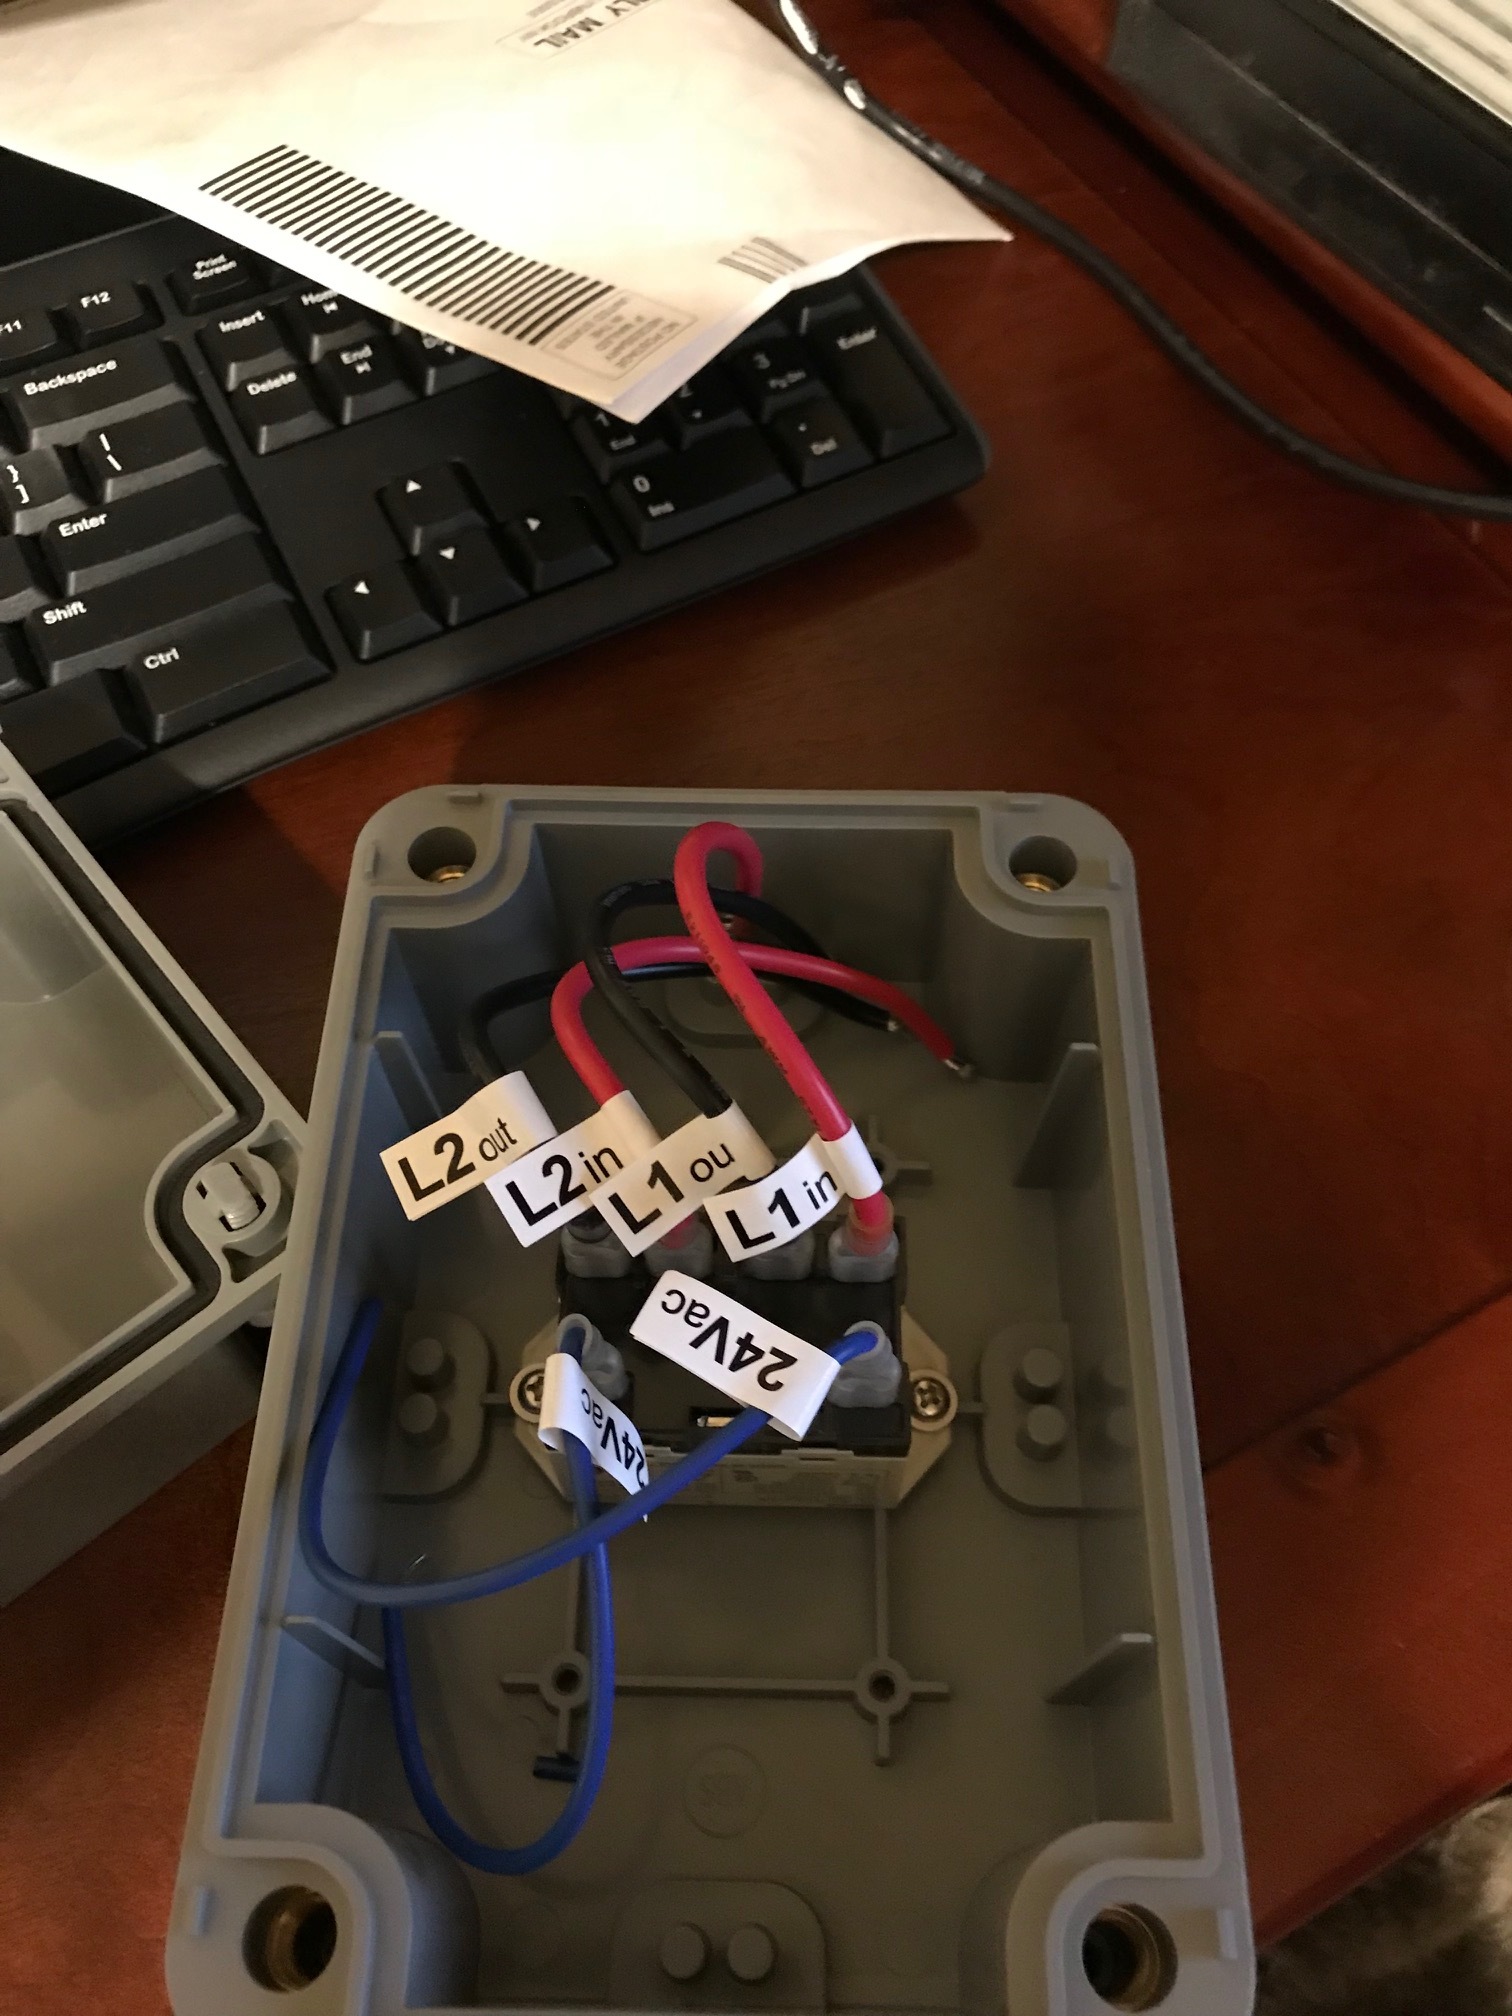
Yes I have a pump start relay. Currently my pump is connected directly to a power circuit board to receive power. I have added a pump start relay. NowI have a way to power pump using the pump stat relay. However I have my Rachio with no wires and im understanding the wire that needs to be connected to Rachio is the Common wire? What ios the common wire? I currently have the Orbit Pump start Relay- Will provide picture below. So in the pump start relay, I have different wires, L1/L2 in and then L1/L2 out- then another two blue wires that say 24Vac. 24Vac I dont plan on using. Now as far as the wires in the pump start relay, L1 in and L2 in is from the circuit board (Power entering) and L1/L2 out is to go toward the pump. Now whats considered my common wire once again and where does that connect to on the pump start relay so I can connect all this to Rachio Controller.
The pump start relay and Rachio combo is what is going to replace the current intermatic timer you have now. The pump start relay is going to handle the heavy lifting of the 120v pump wiring while taking a low voltage 24Vac nudge from Rachio to fire the relay, thus running the pump. Without knowing the exact model of pump start relay you have, this is what I would ASSume (so don’t make an ass out of me!)
L1in and L2in would be wired to the power in side of the current Intermatic timer. L1out and L2out will connect to the “to pump” side of your Intermatic timer. The 24Vac lines will become the common and Master Valve/Pump for the Rachio. These really shouldn’t matter how they are wired since polarity doesn’t matter. Grab some 18 gauge wire and run one leg of the 24V to the C terminal of Rachio, and the other leg to the M terminal of Rachio.
Once you get the wiring done, it will be a pretty straight forward setup of Rachio. Make sure you specify that you have a master valve/pump. Like I mentioned earlier, you will need to create a zone in Rachio so you can create a watering schedule. This will be a ghost zone since all we are trying to do is fire the master valve/pump when the “zone” runs.