Good day All,
I am trying to wire up my IRO in the place of my Rainbird. I see more wires for the rainbird than the Rachio requires. Could someone provide me with assistance?
v/r
Drew
Good day All,
I am trying to wire up my IRO in the place of my Rainbird. I see more wires for the rainbird than the Rachio requires. Could someone provide me with assistance?
v/r
Drew
Drew. Thanks for reaching out to us. Sorry for any confusion with your wiring. So your main wires are the white common wire and the 4 zone wires below that. With our controller simply connect the white common to the C slot and then the corresponding zones 1-4 on our controller as well.
The upper left section are your 24VAC and Ground slots. You will not need to put these wires into our controller since you will be using the 24V Power Adapter that we provided to power the Rachio. The Red and Black wires are for a rain sensor, which I assume you have. If you want to connect those to the Rachio controller you can, but a rain sensor is not necessary with our intelligence. That being said if you want to connect your rain sensor you can. I am not positive which Rachio controller you have, our Gen 1 or Gen 2, so I’ll explain how to connect to both.
Gen 1 is pretty simple, just connect the Red and Black wires into the yellow R1 and R2 slots. It doesn’t matter which color goes where. If you have a Gen 2 controller you will put the Red and Black wires into the S1 and SC slots which are positioned in the middle between the zone wires. This article shows how to do that. Again the rain sensor is not necessary so if you don’t want to connect them that is fine.
That should do the trick. Let me know if you have any other questions Drew.
Thanks again,
Kevin
Sir,
I feel pretty stupid now. I just got done hooking it up and came back to answer the forum with how it gets hooked up and I saw your response. This by far was the easiest device to install ever. I had it installed in 15 minutes and that includes the time to connect it to WIFI. Thank you for the instant reply. Companies rarely give this kind of customer service. I read rave reviews about your company plus being made in America (Me being a soldier thats important) and I went with your device over the rain machine. Have a great day.
No worries Drew. Happy to hear that the install went so smoothly. Those old controllers are not easy to deal with so I can understand the initial confusion.
Thank you for your service to our country!
If you ever need anything from us don’t hesitate to ask. Have a good rest of your Sunday.
Kevin
you’ve got a rain sensor in there too… don’t forget that one!
And not for nothing… sell the old controller. I’d never have believed it before a buddy of mine sold his for $90!!.. but there’s a market out there for the dumb timers.
Hello Kevin
I have the similar one with my home and I have the Rachio Gen 3 with me. So, if the top left are the 24VAC and Ground Slots, what do I do to those wires if I am not required to install those to the Rachio 3. Is there a preferred method to disconnect the or is it going to be hanging in my garage. Also, if I have the same one Mr. Drew has got, do I still have to drill holes in the wall as per the template to install the Rachio. I am not a very engineering savvy, and it usually takes over few weeks to do a simple task, hence I am asking all the questions up front before I get rid of my one that is working now.
Can you please let me know
Please let me know when you get a chance.
Thanks
Laxmi
Hey @lgovindan, Can you take a picture of your current setup? If so, that would help us explain to you what to do for your Rachio 3 set up.
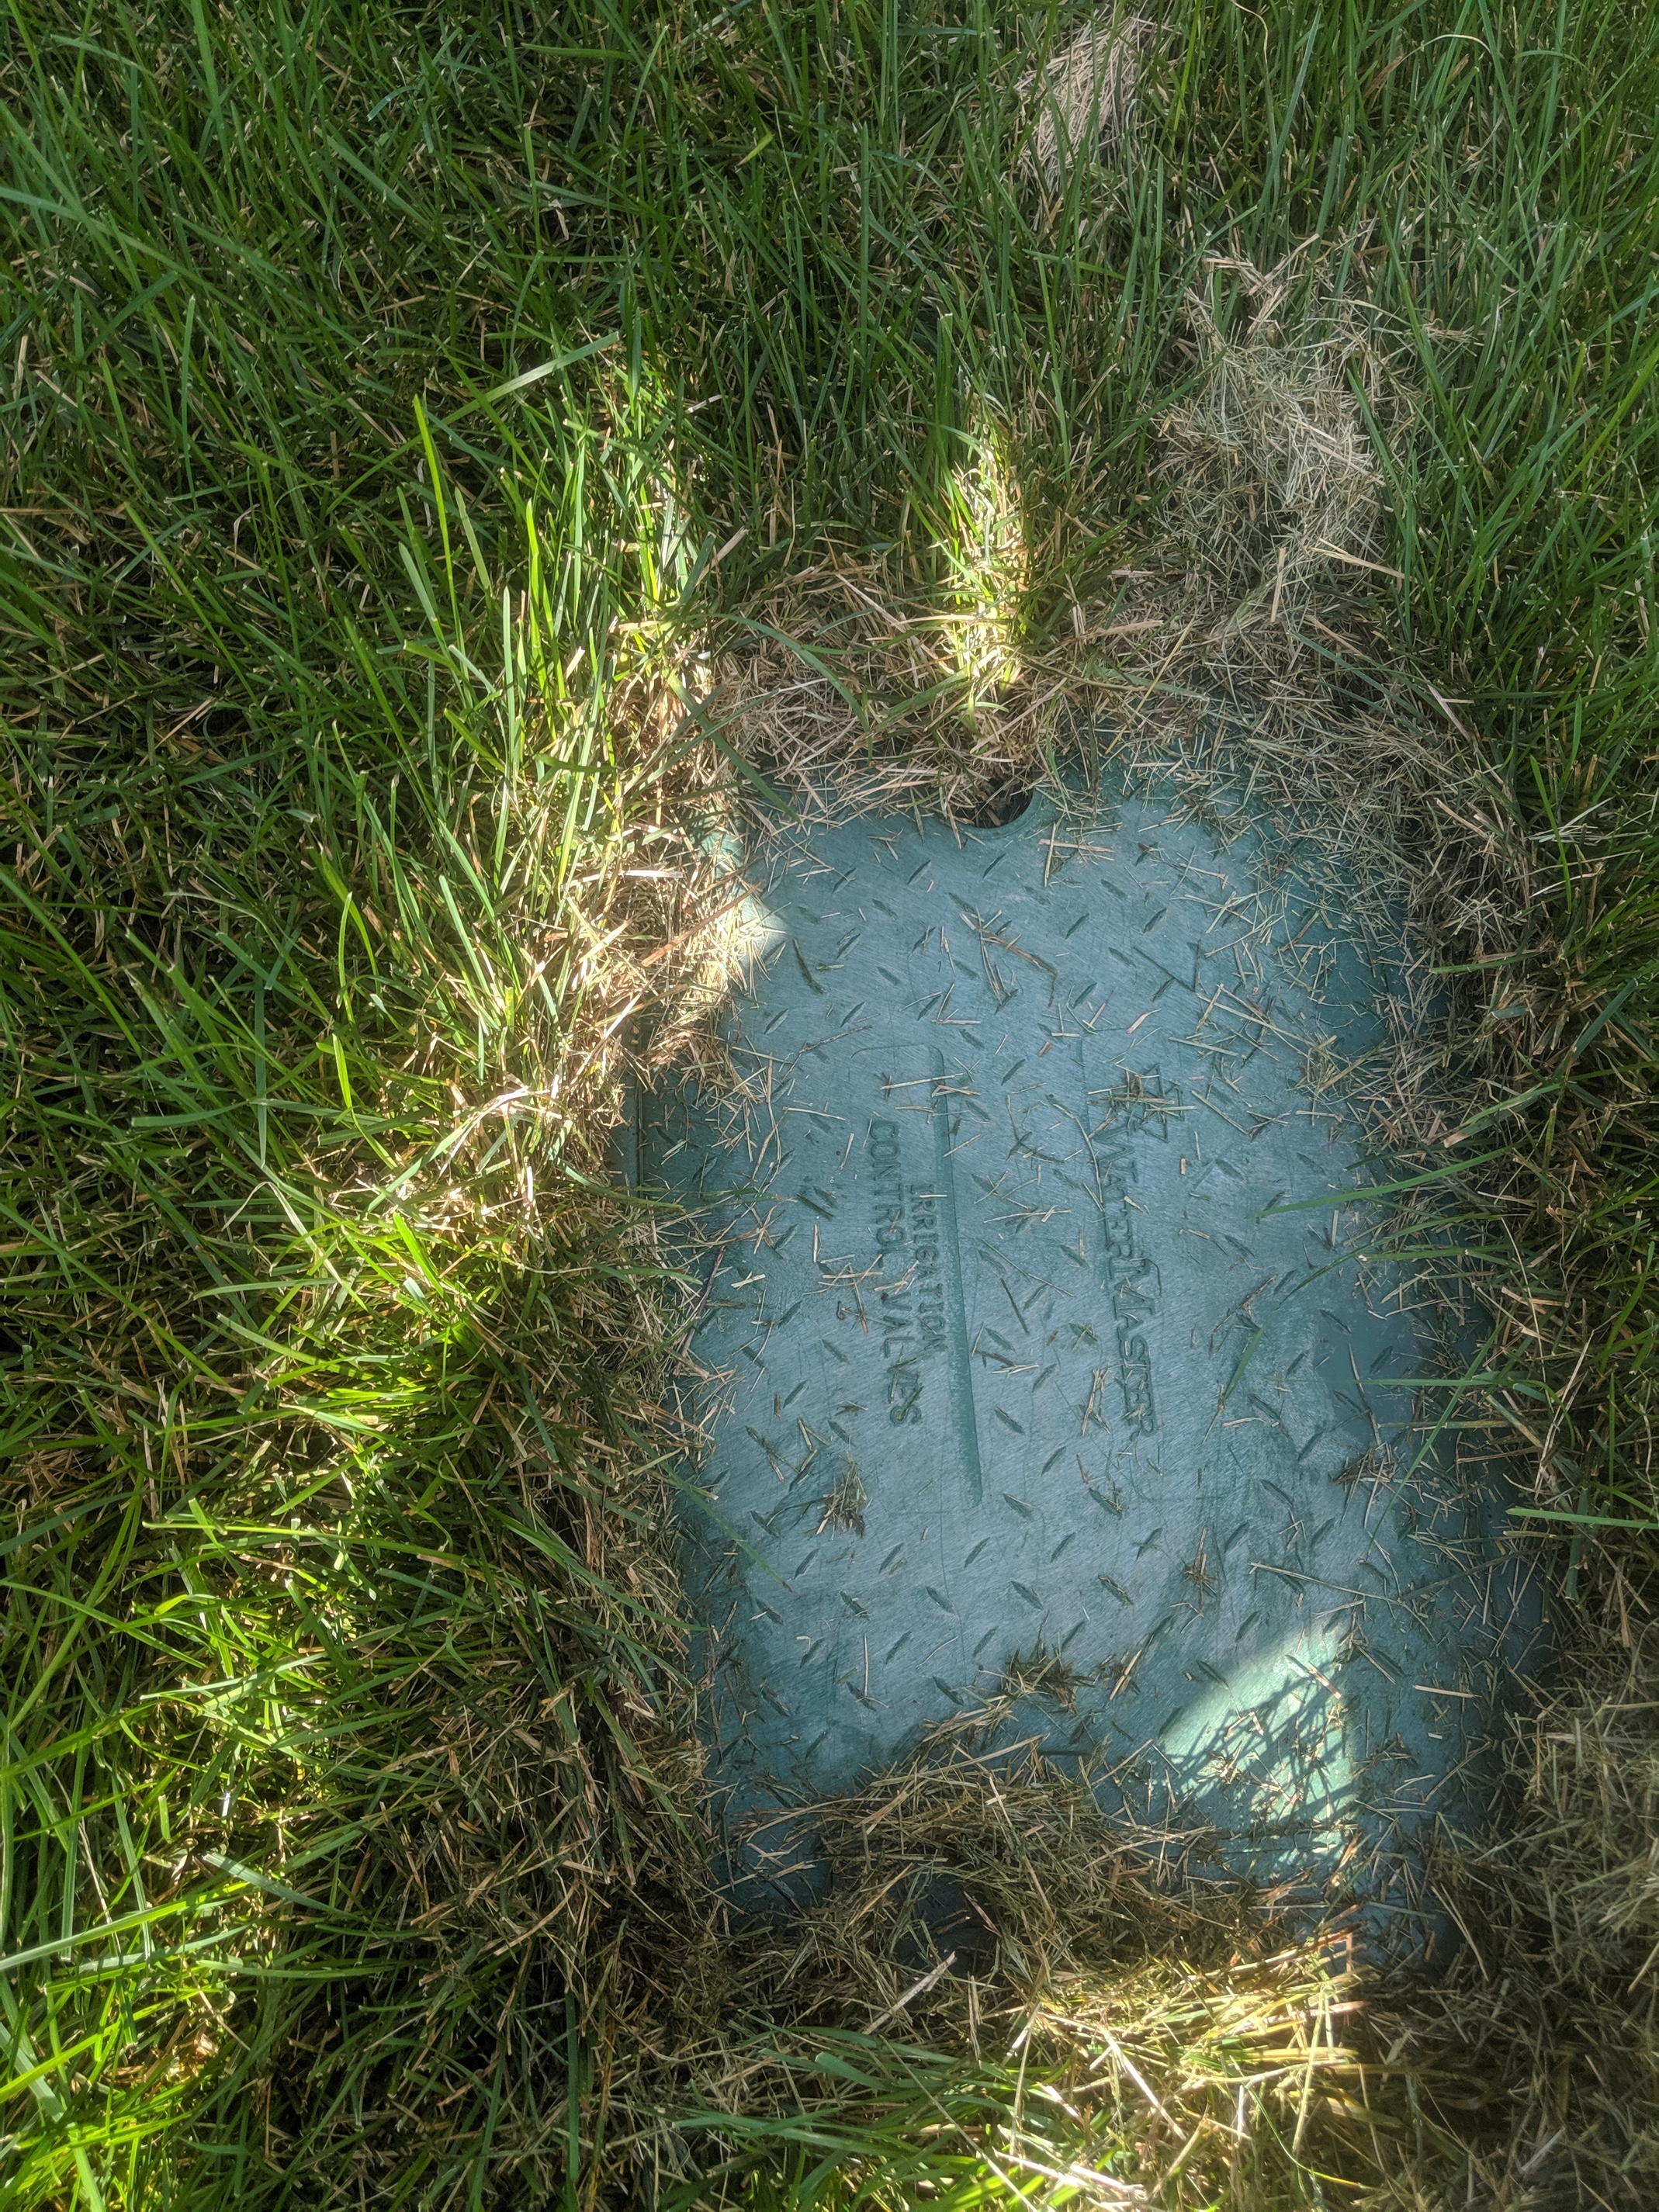
@lgovindan - I’d trace back the power and ground wires for the Rainbird to the power supply adapter that supplies them and unplug that adapter to free up the plug.
I’m guessing that the holes won’t line up between the Rainbird and the Rachio. One may place the Rachio where one hold can be reused, but I think the others will be new holes.
For the rain sensor, it is optional (belt and suspenders mode). The wiring depends on if it is a wired (S1 and 24 V-) or wireless (see an article under support.rachio.com for those directions) rain sensor.
Hi There,
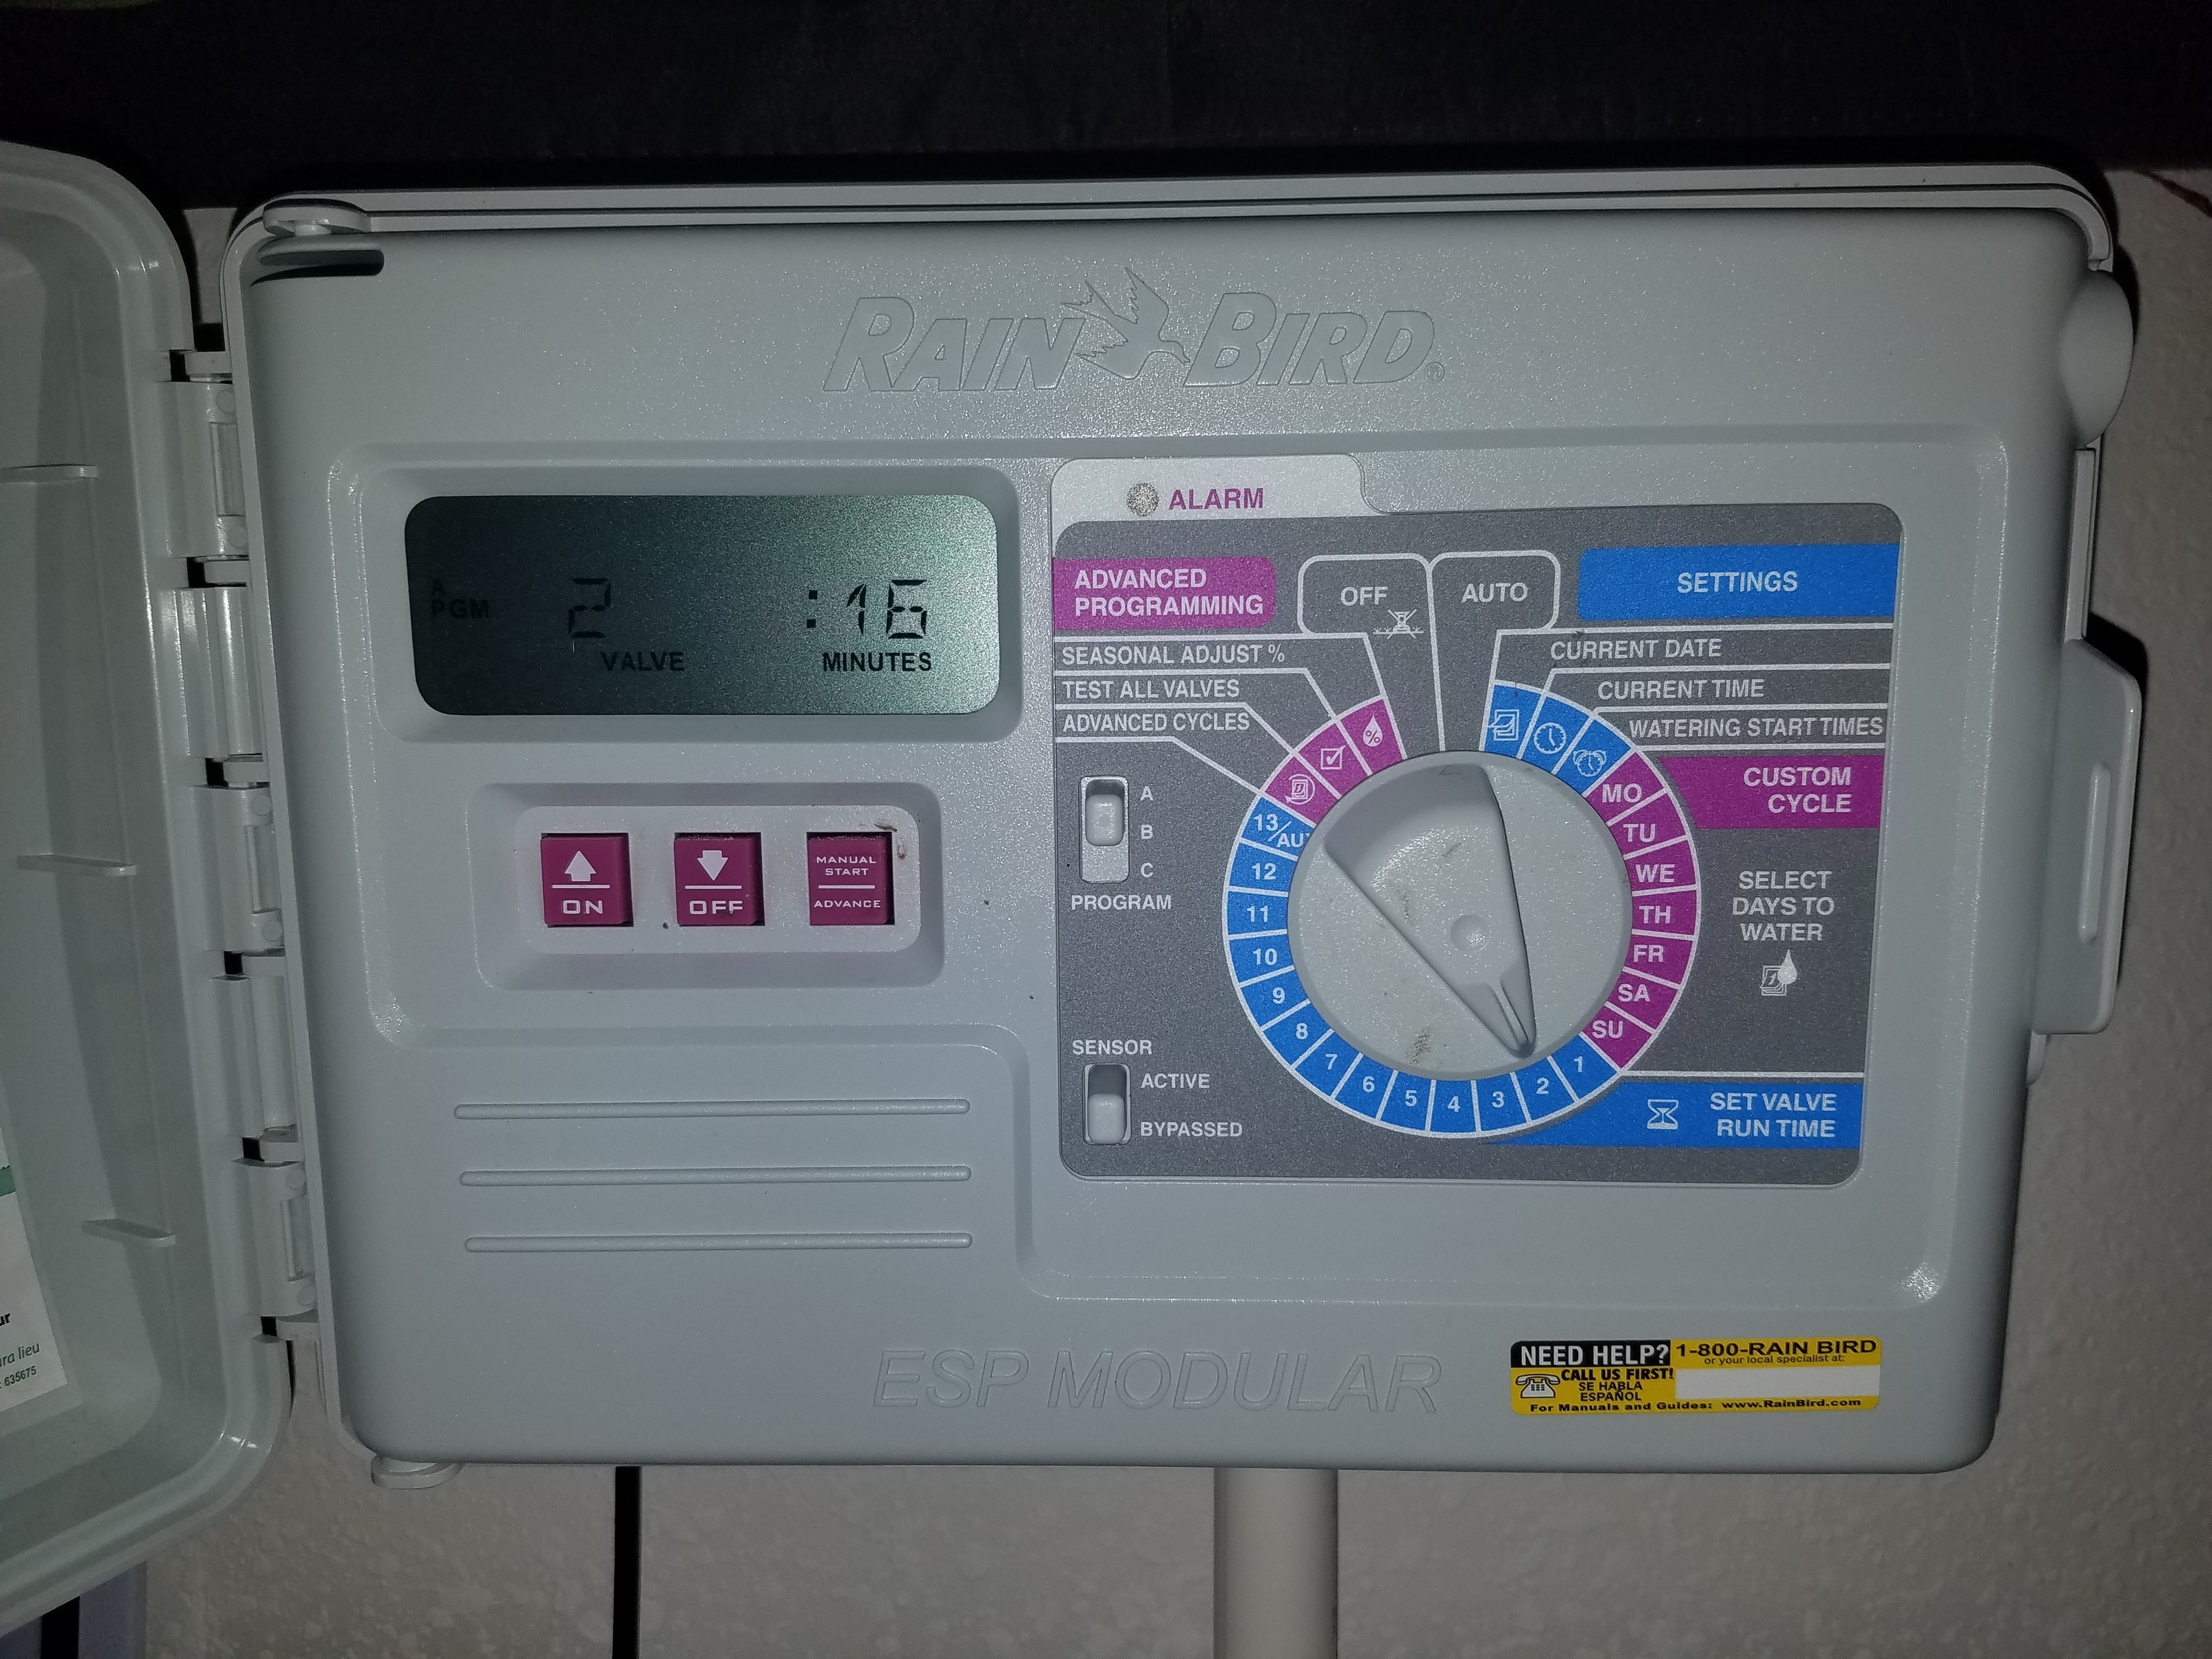
Thanks for your response. Here is what I have - attached pictures for view. The topleft one are the first picture - I believe that is where the electric and such comes - because they are coming from a controller cable to this.
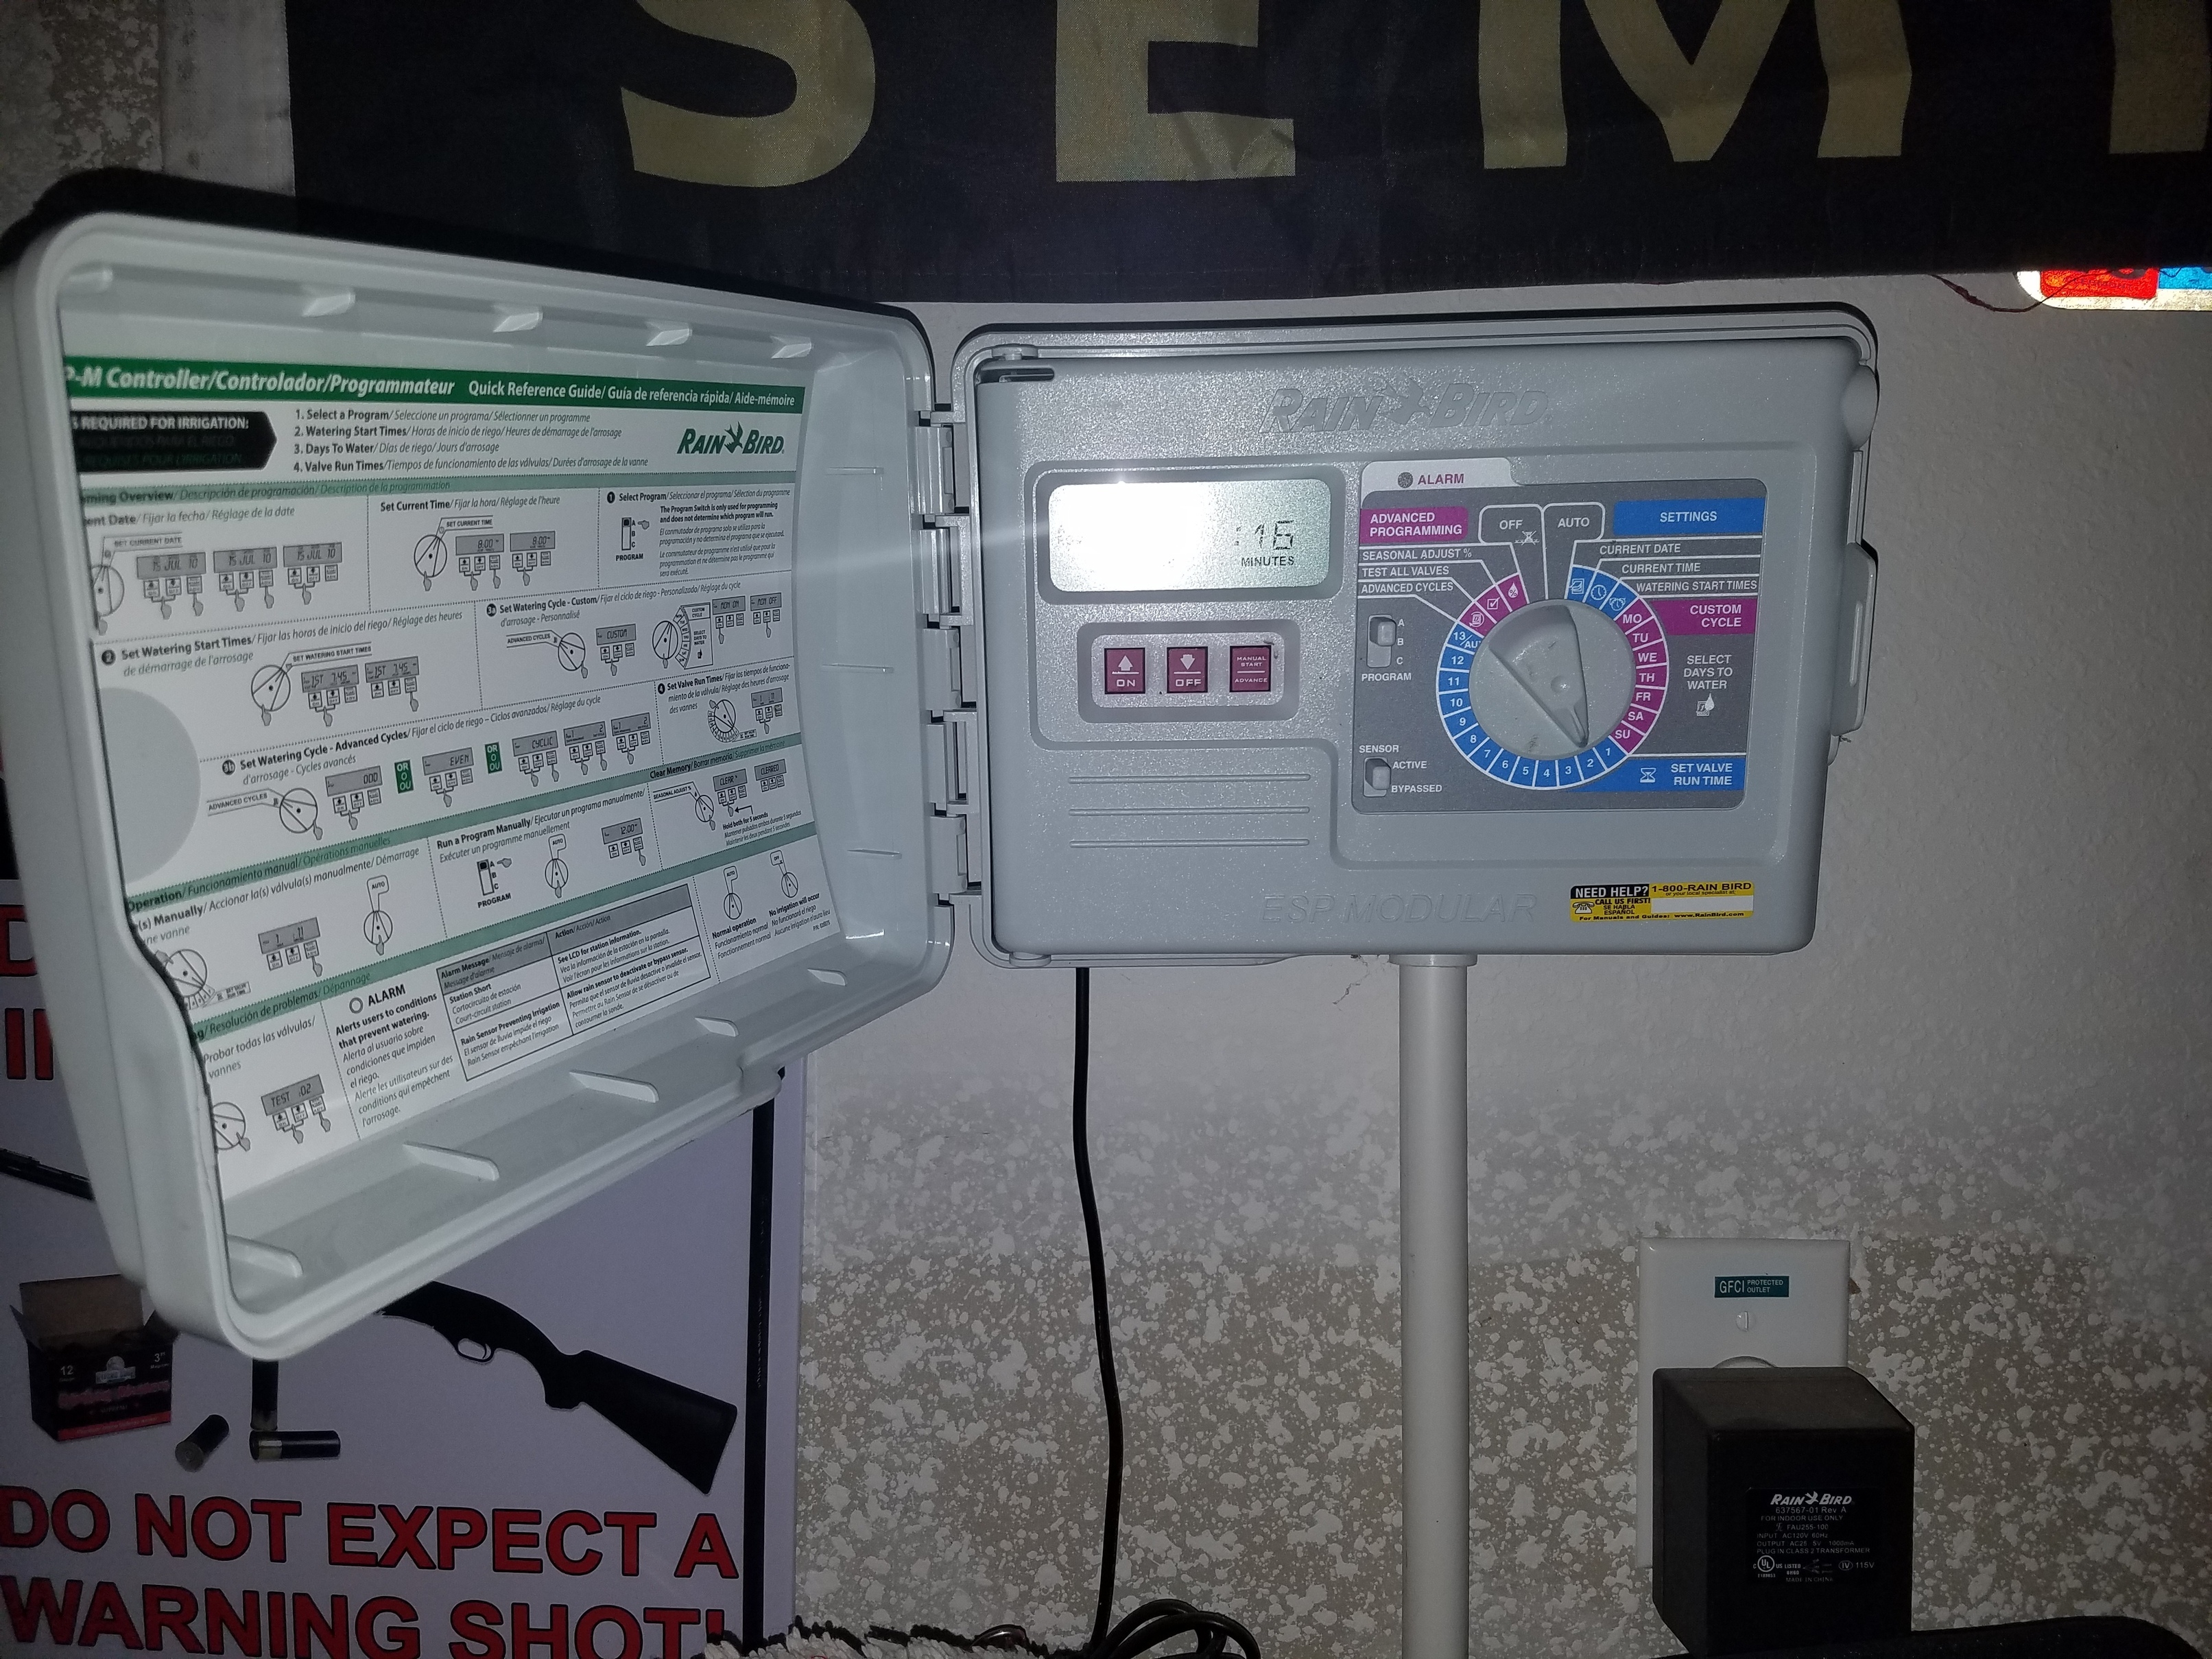
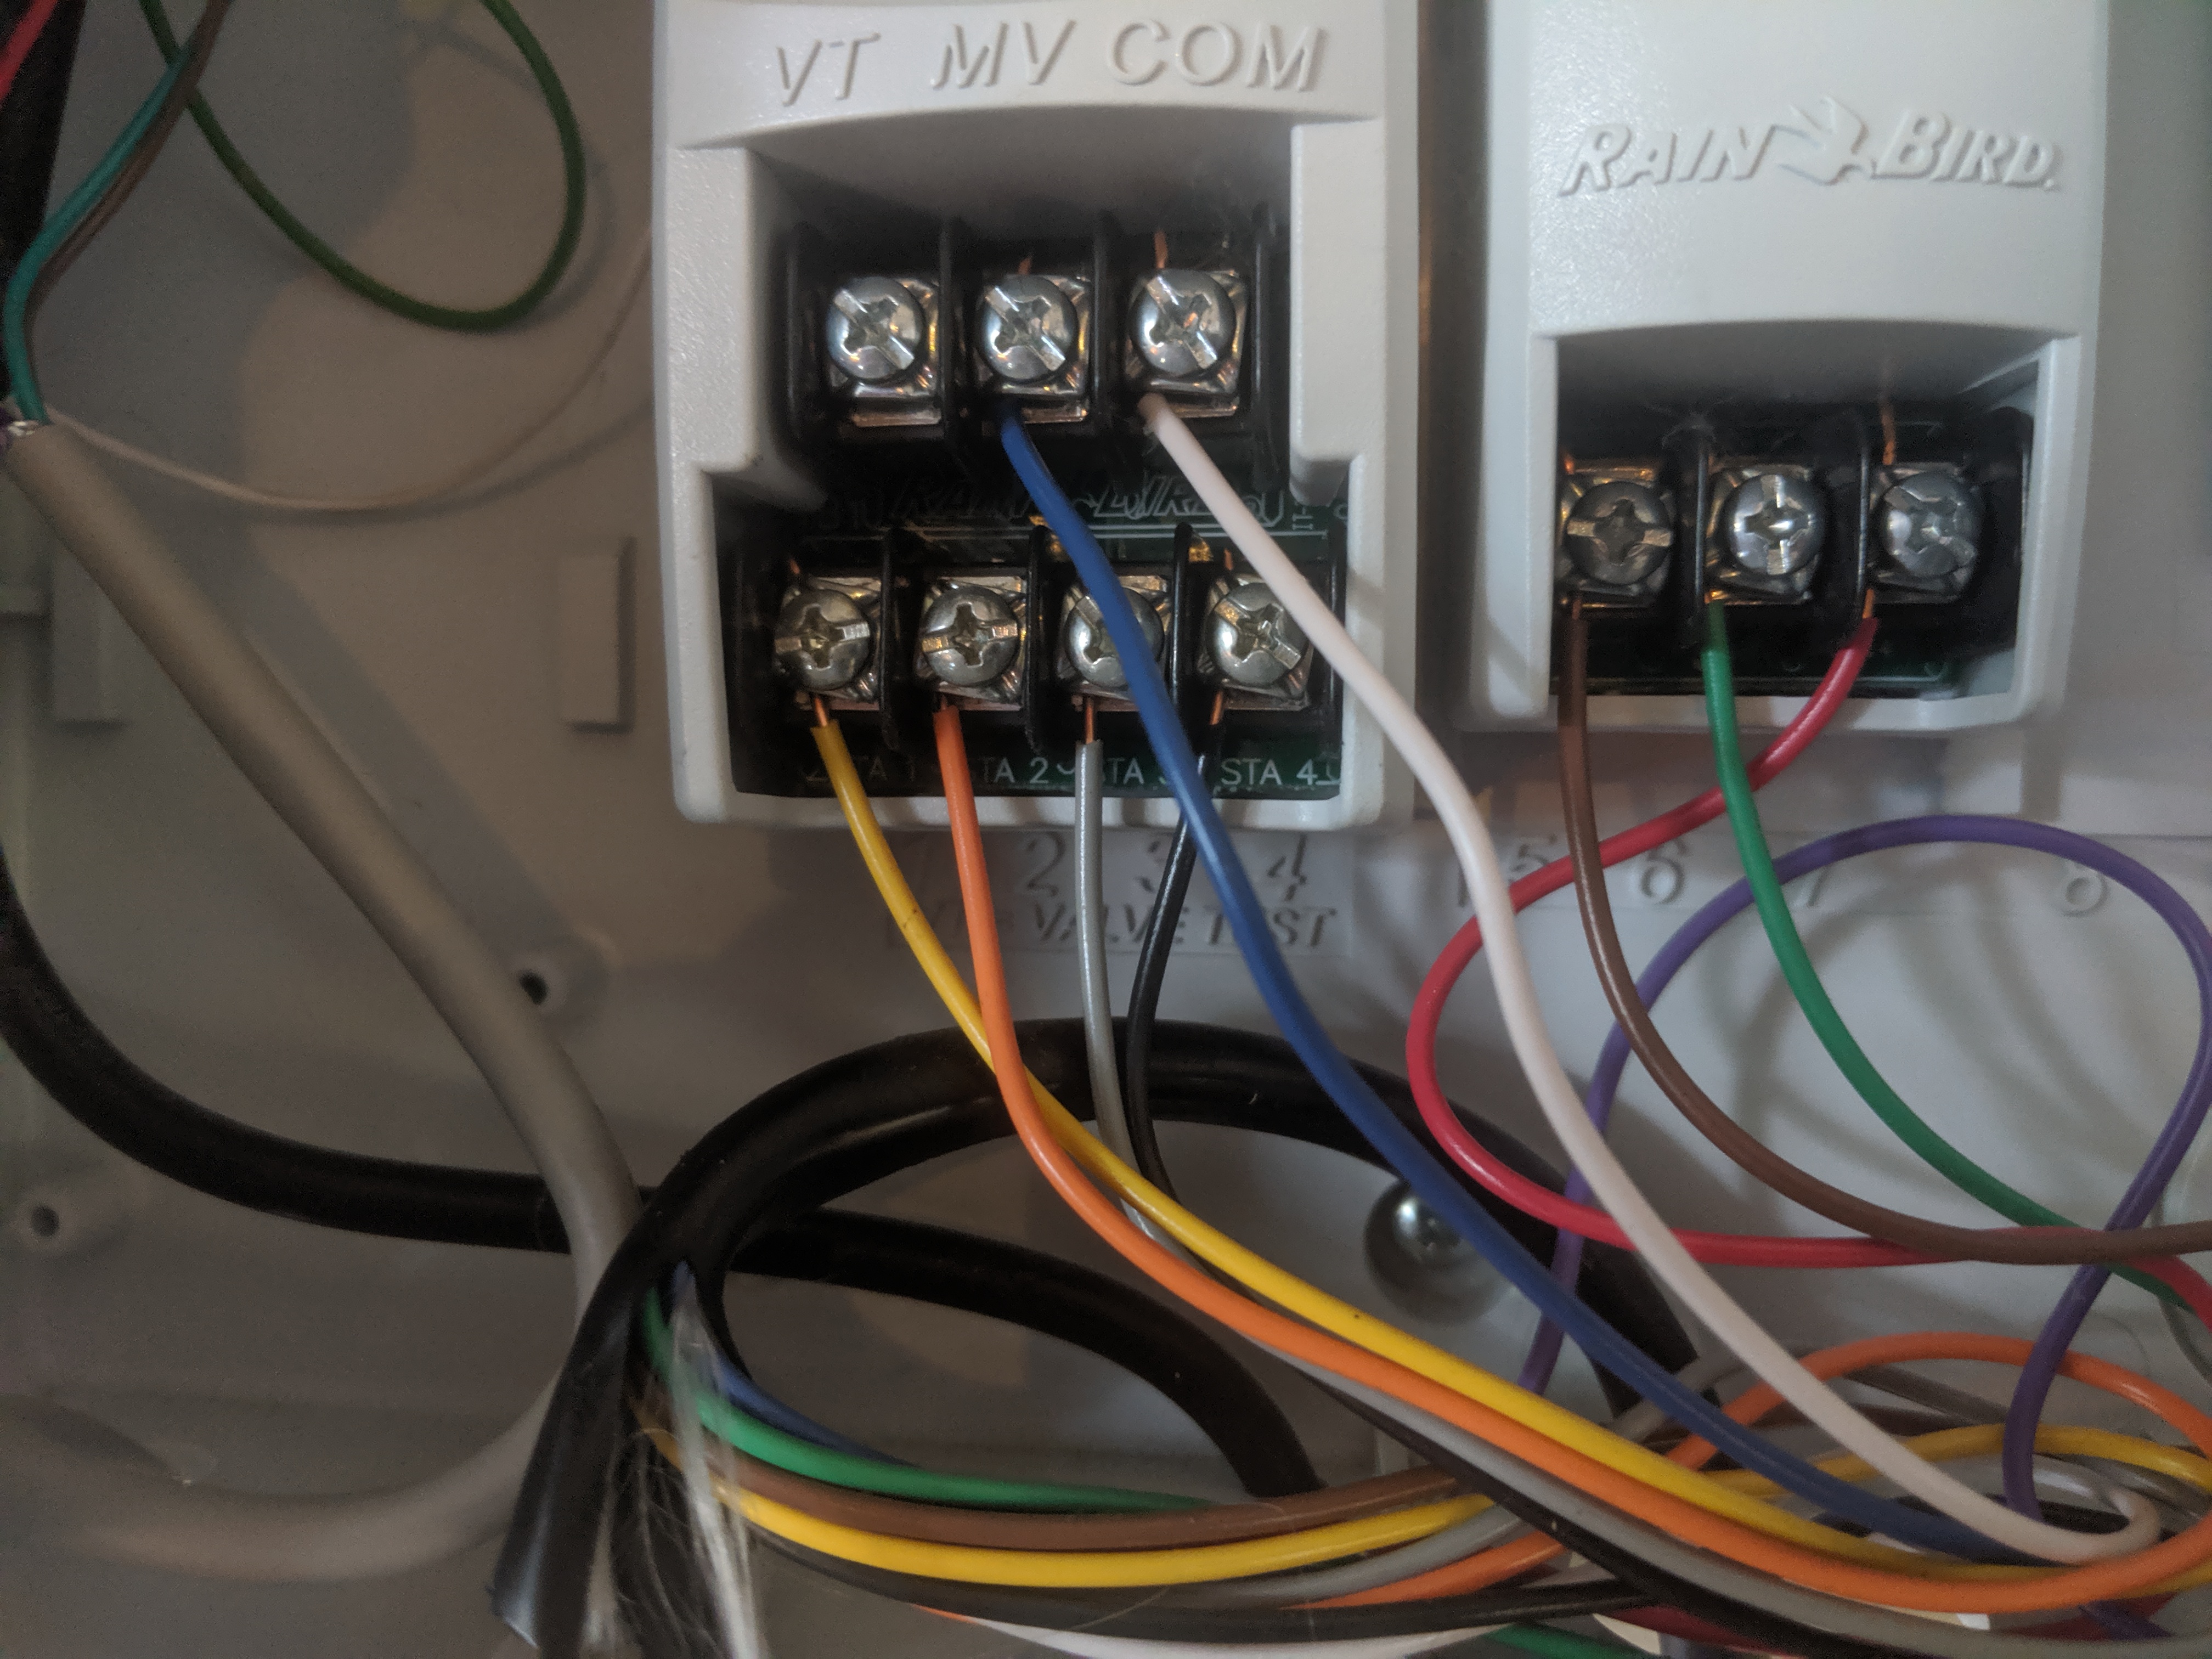
The other one has all the zones (7 zones) and three more extra wire not sure what or why they are.
Any help to unplug all these and plug them into Rachio would greatly be appreciated. I am not that engineering saavy to be able to figure it out and just do it. So, your help is greatly appreciated.
Thanks
Laxmi
@lgovindan - top picture
Two orange wires (24 VAC) and green wire (GND) will be abandoned. If possible, trace that black bundle back to a plug in transformer and unplug it so it won’t be sitting there taking up a plug.
Black, red, brown and green - probably go to a wireless rain sensor. Guessing Black to 24 V -, Red to 24 V +, brown to 24 V -, green to Sen 1 (there is a chance the brown and green will need to be swapped - if you want the rain sensor active - do test it to make sure it is being sensed by the Rachio) . See ->
Bottom picture:
Hi there - Thanks for the information. The bottom one seems to be very straight forward. So, with respect to the top one, what you are saying is, the black, red, green and brown will end up going to the wireless rain sensor in Rachio - black to 24V-, Red to 24V +, brown to 24V - and Green to Sen 1. But when I look at Rachio 3 - I see a VAC 24 -, VAC 24 + S1 and S2. I don’t two 24V -. These are in the right side of the Rachio 3. I read the Rachio Support and don’t see the wire colors like blue and yellow as discussed in the article.
The other option is, to completely ignore these and remove them from wherever they are coming from, so we will not have to worry about it. Is that right?
Sorry for asking too many questions, can you please let me know.
Thanks
Laxmi
@lgovindan - Yes, there are two options - connecting the rain sensor or not. The only advantage to connecting the rain sensor is if there is an unforecasted rain event - the rain sensor will stop the watering.
One will need to double up the wires in the 24 V- terminal - two wires in the slot.
Different rain sensors will have different colors of wires. I was taking an educated guess based on the existing connections. Providing the existing make and model would help confirm the wiring, if desired.
Hi Mr. DLane, Are you asking about the existing Rain Sensor make and model? I will try to find out that tomorrow (have to climb a ladder to find that out) and keep you posted. Thanks for all your help, hopefully I will be able to have this installed this weekend. Would be a great achievement for me…
Thanks again
Laxmi
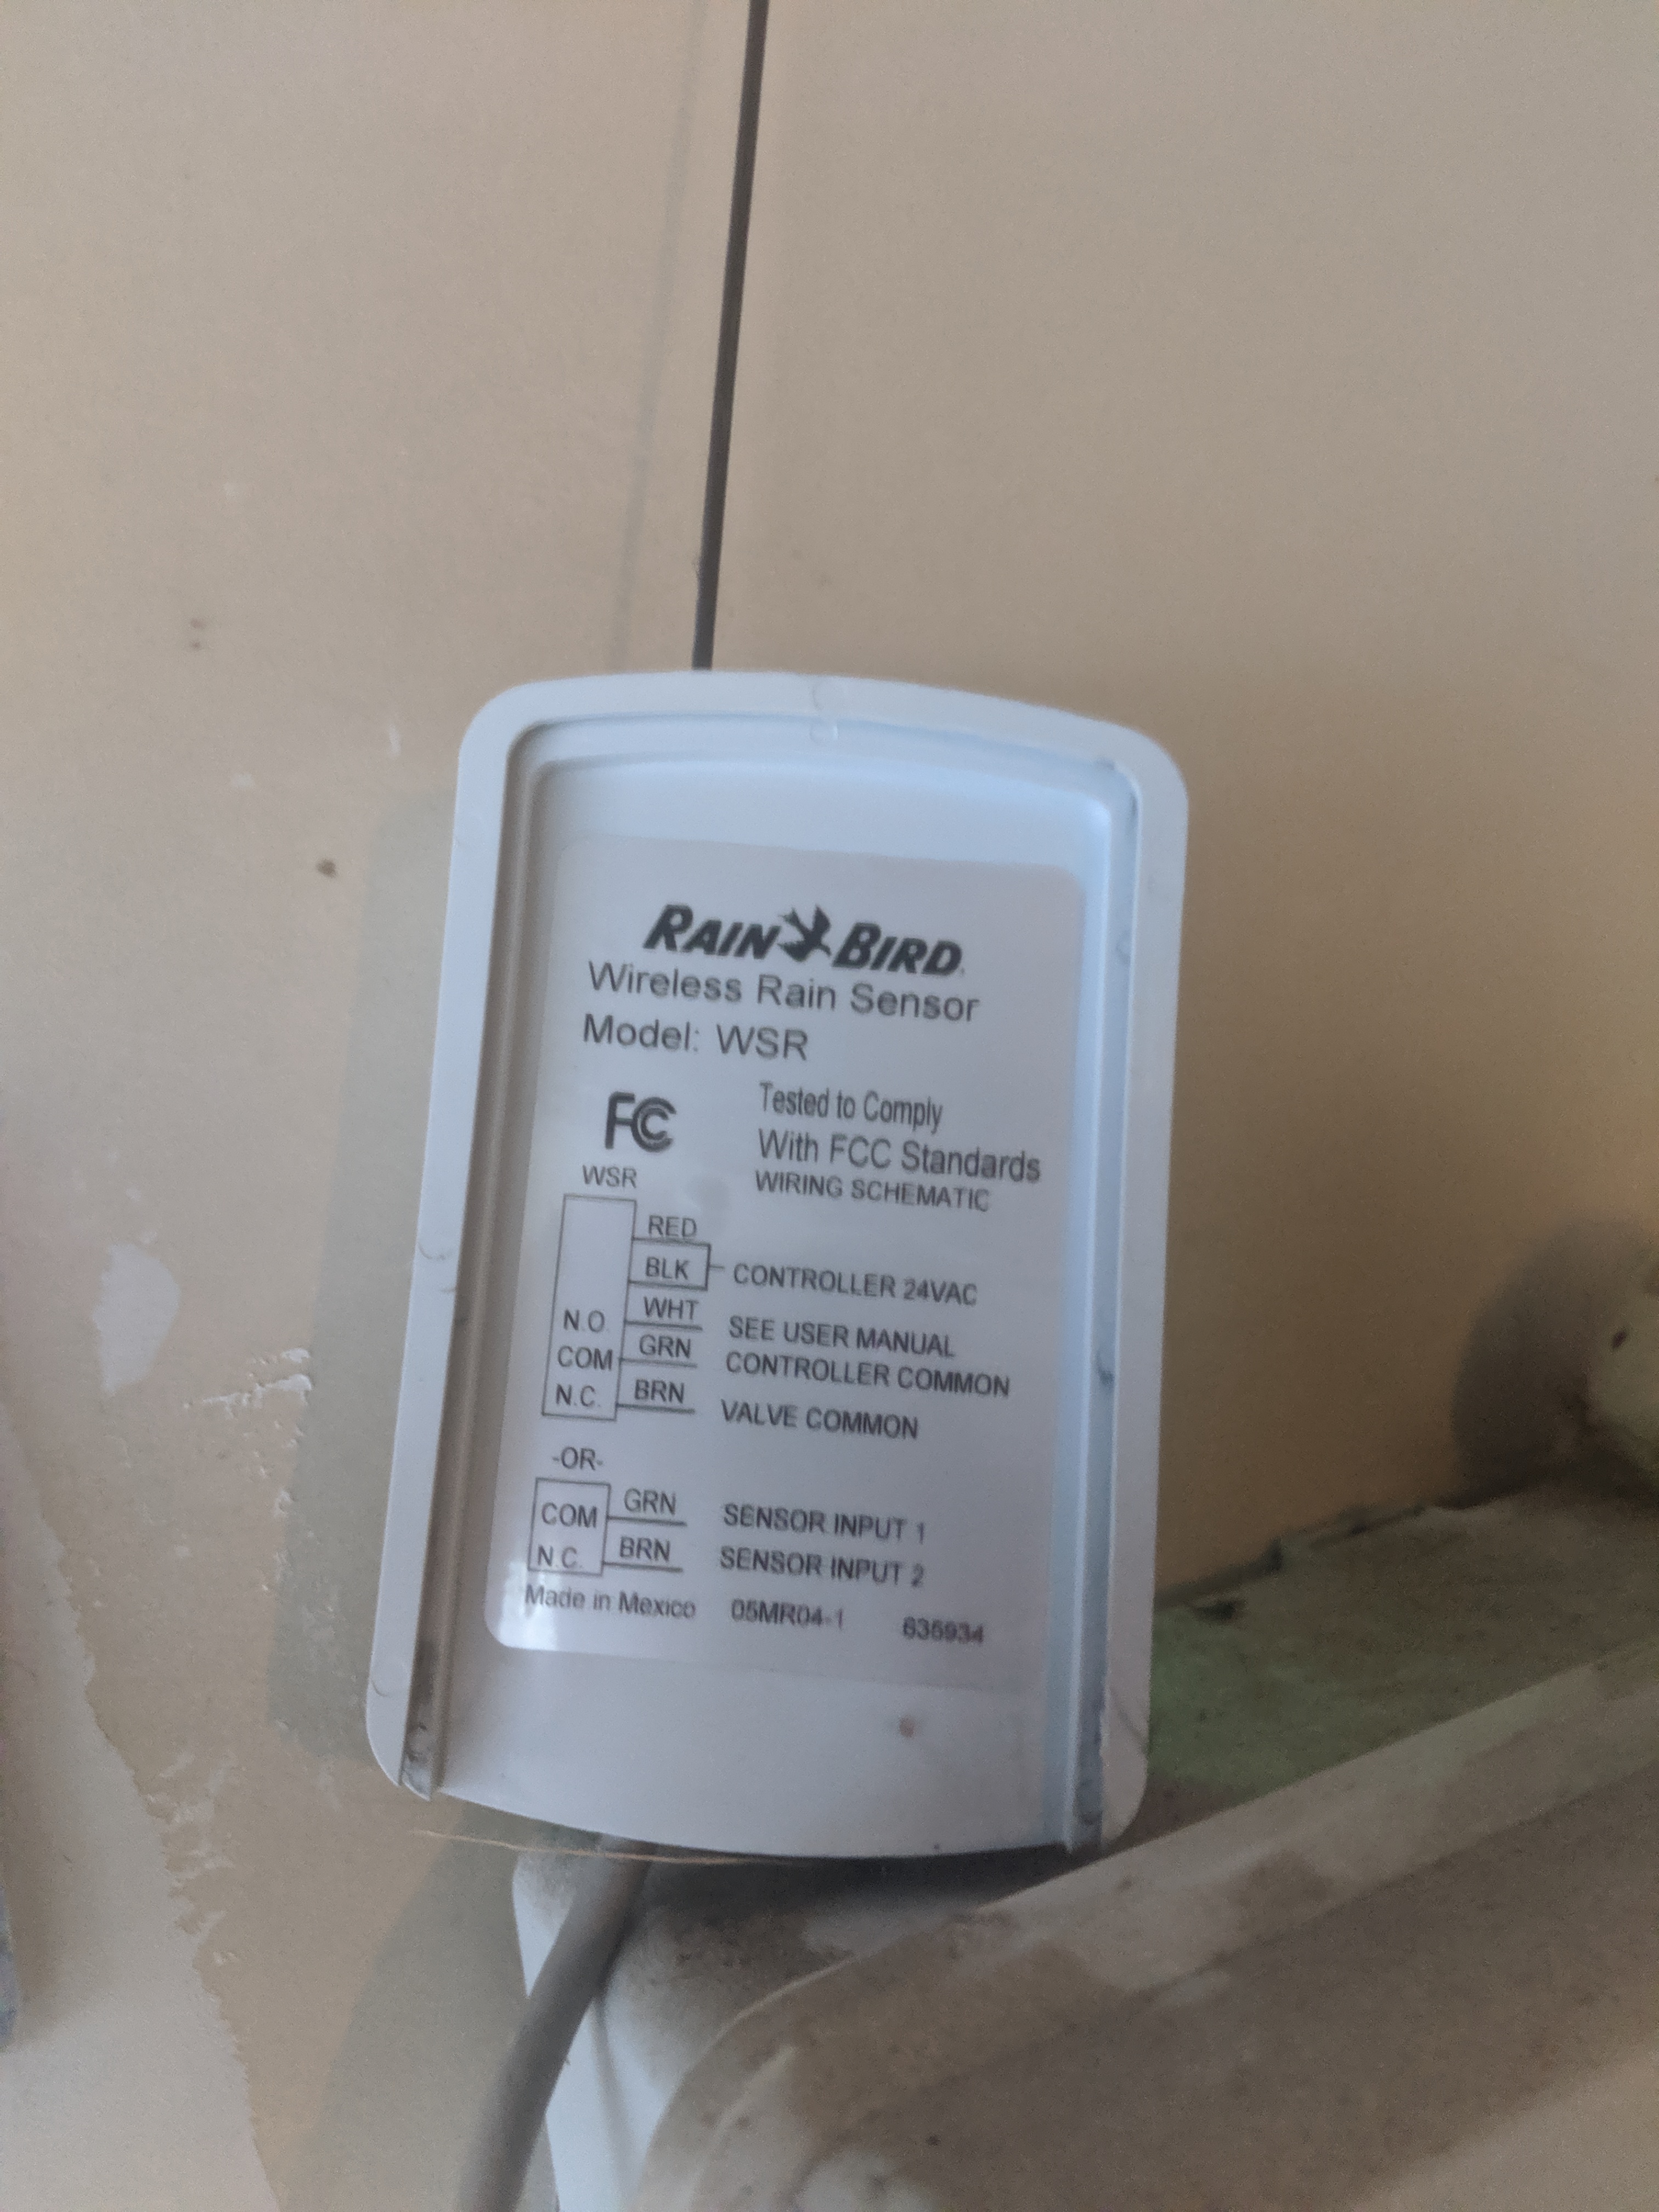
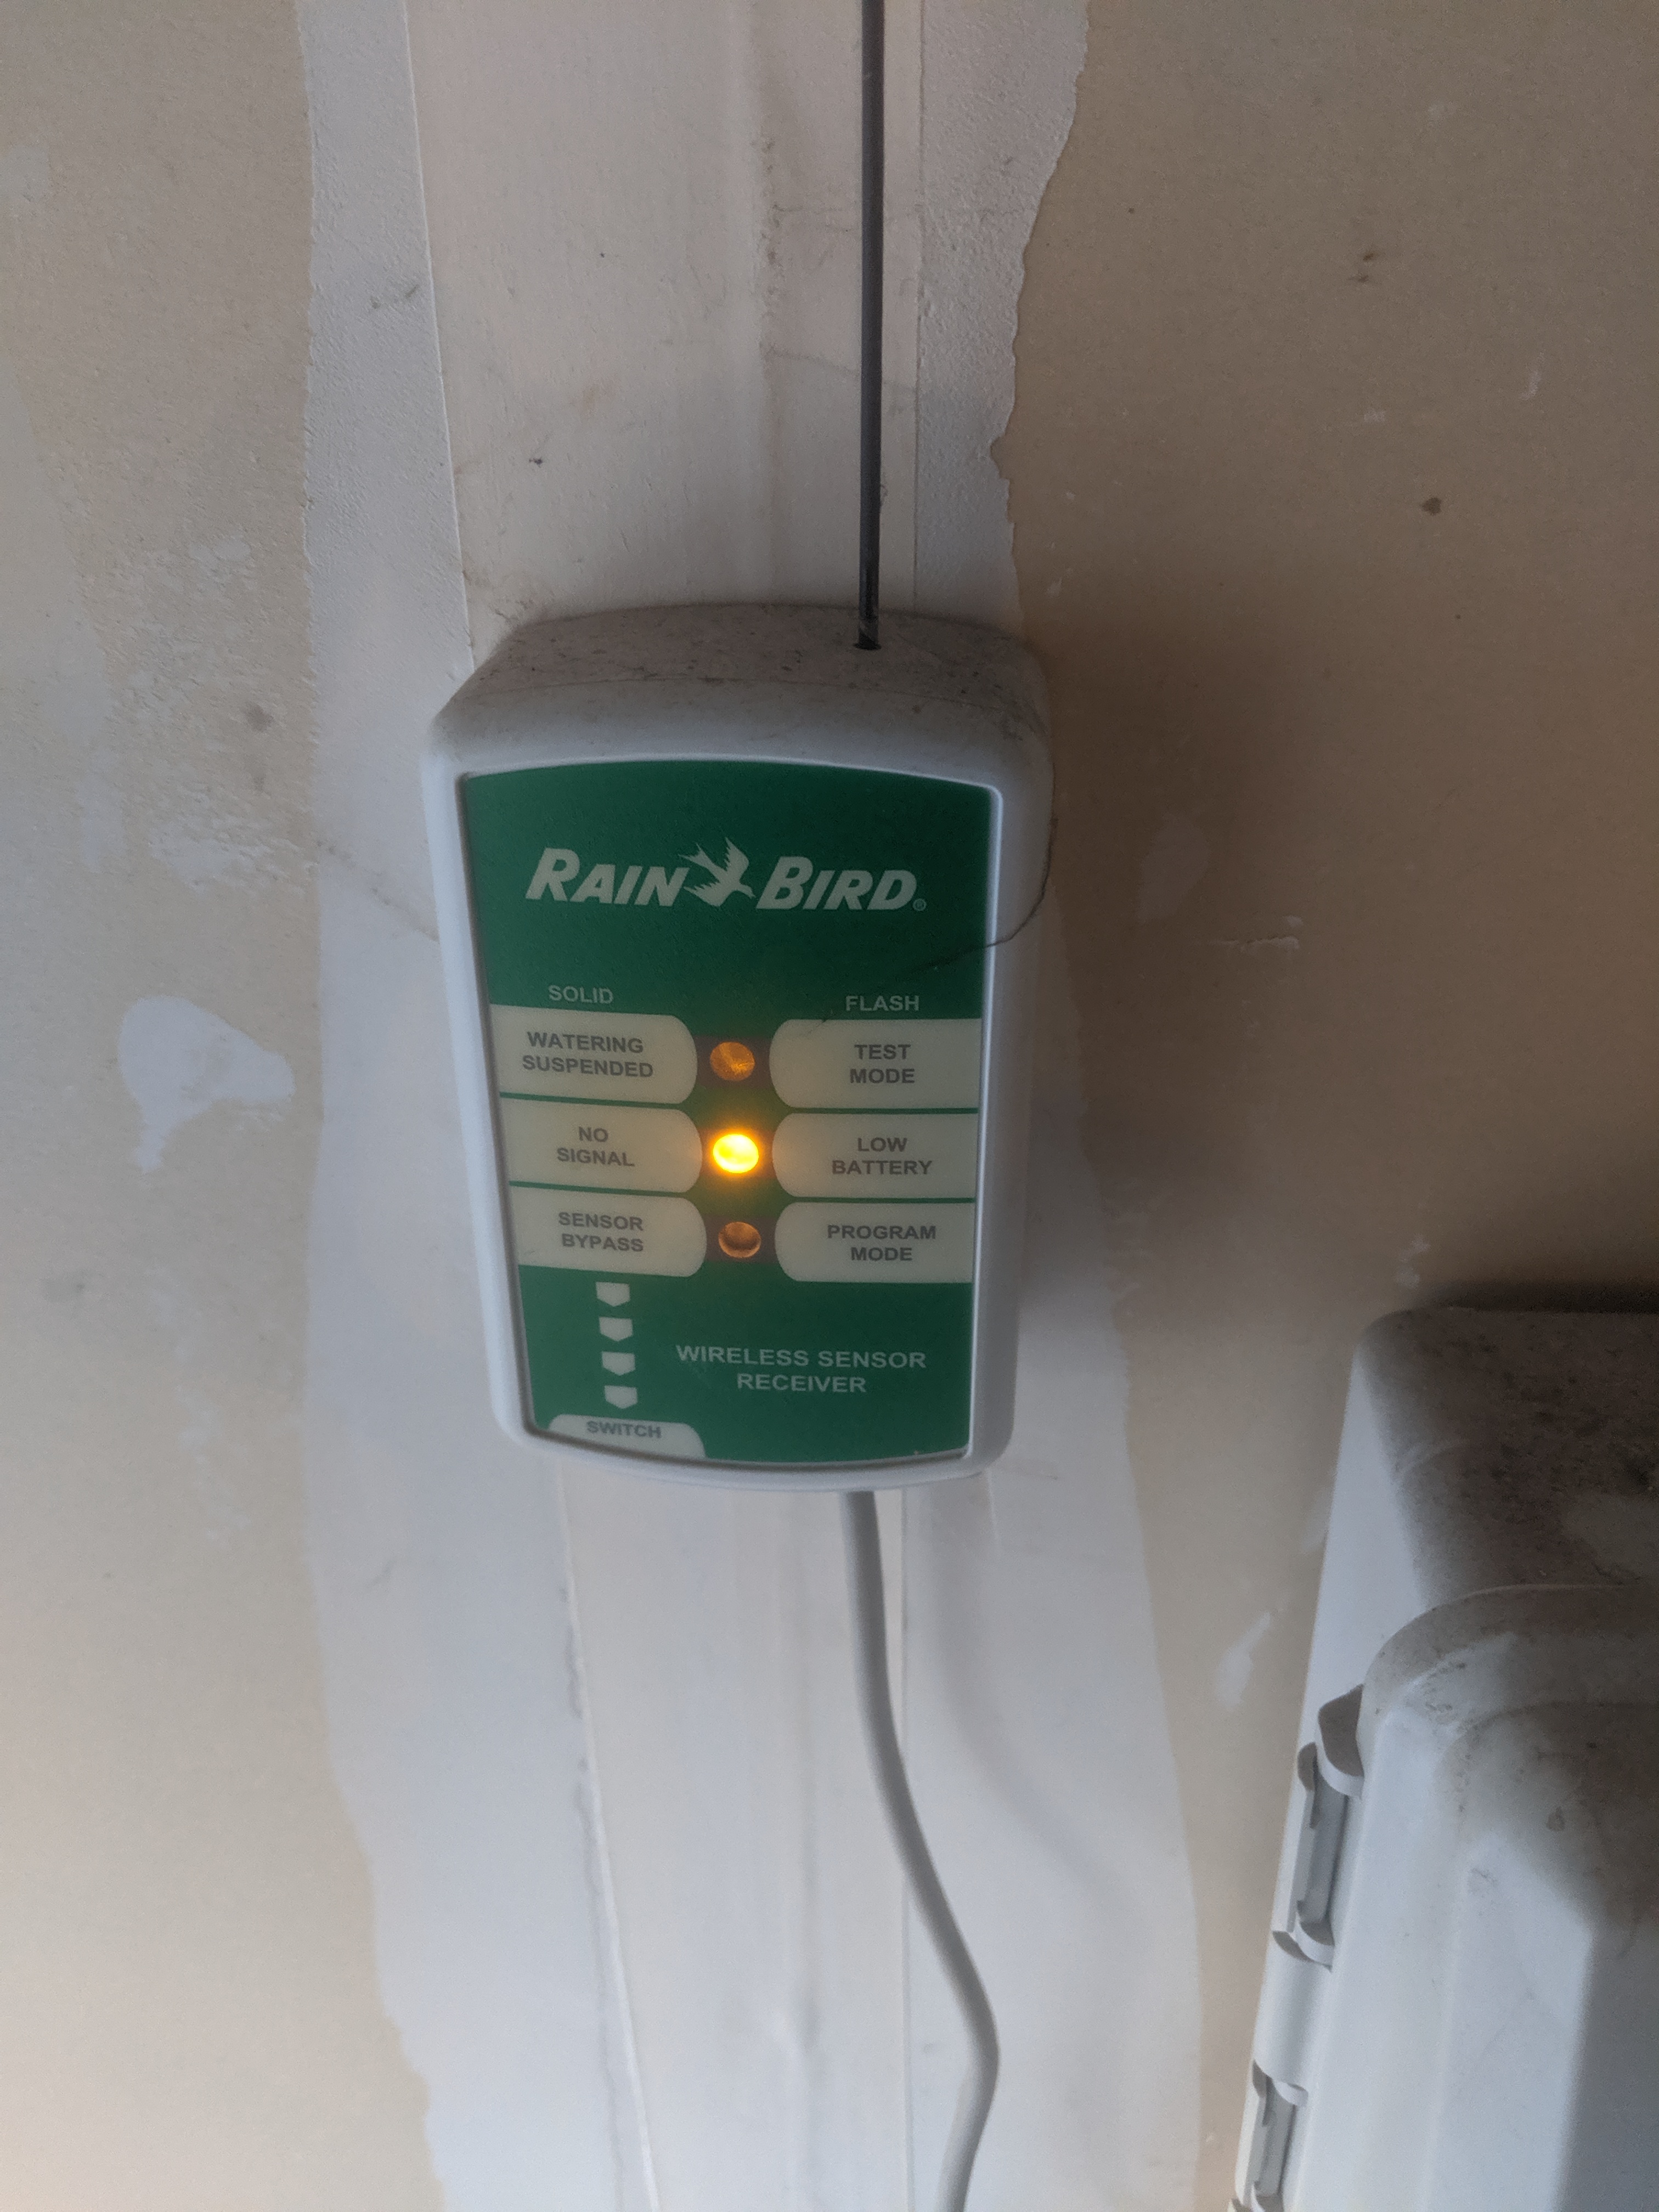
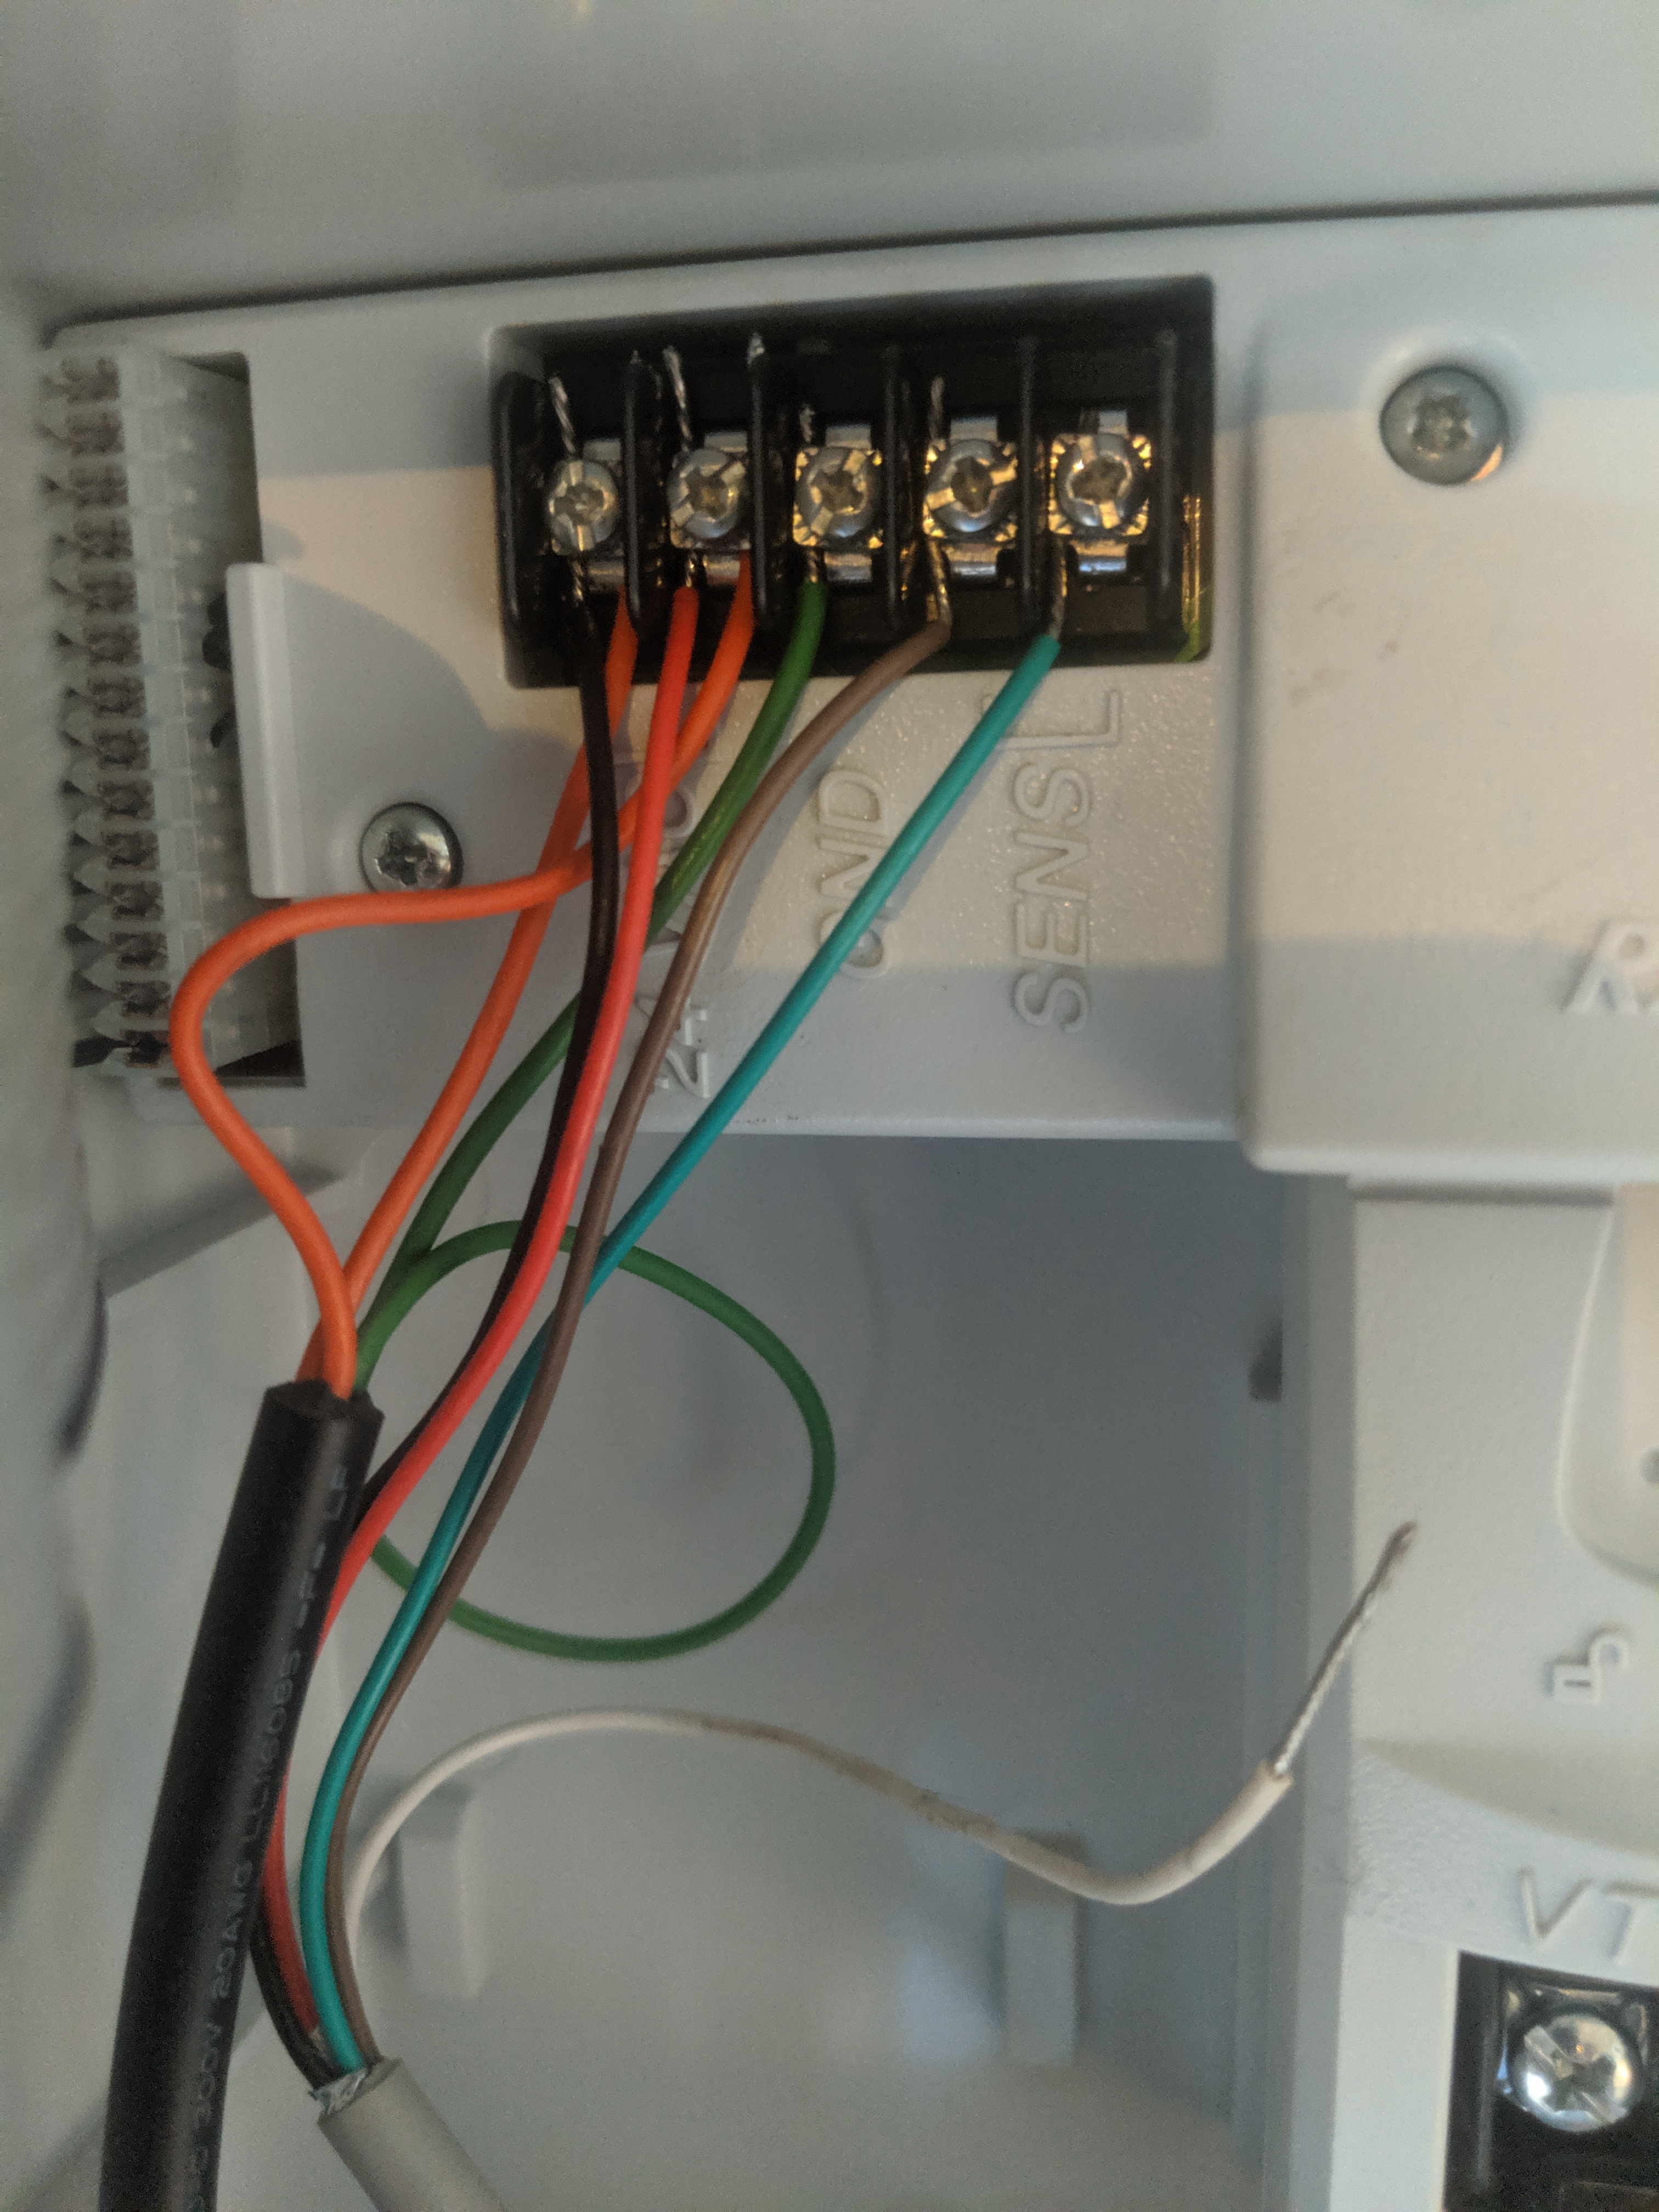
Hi
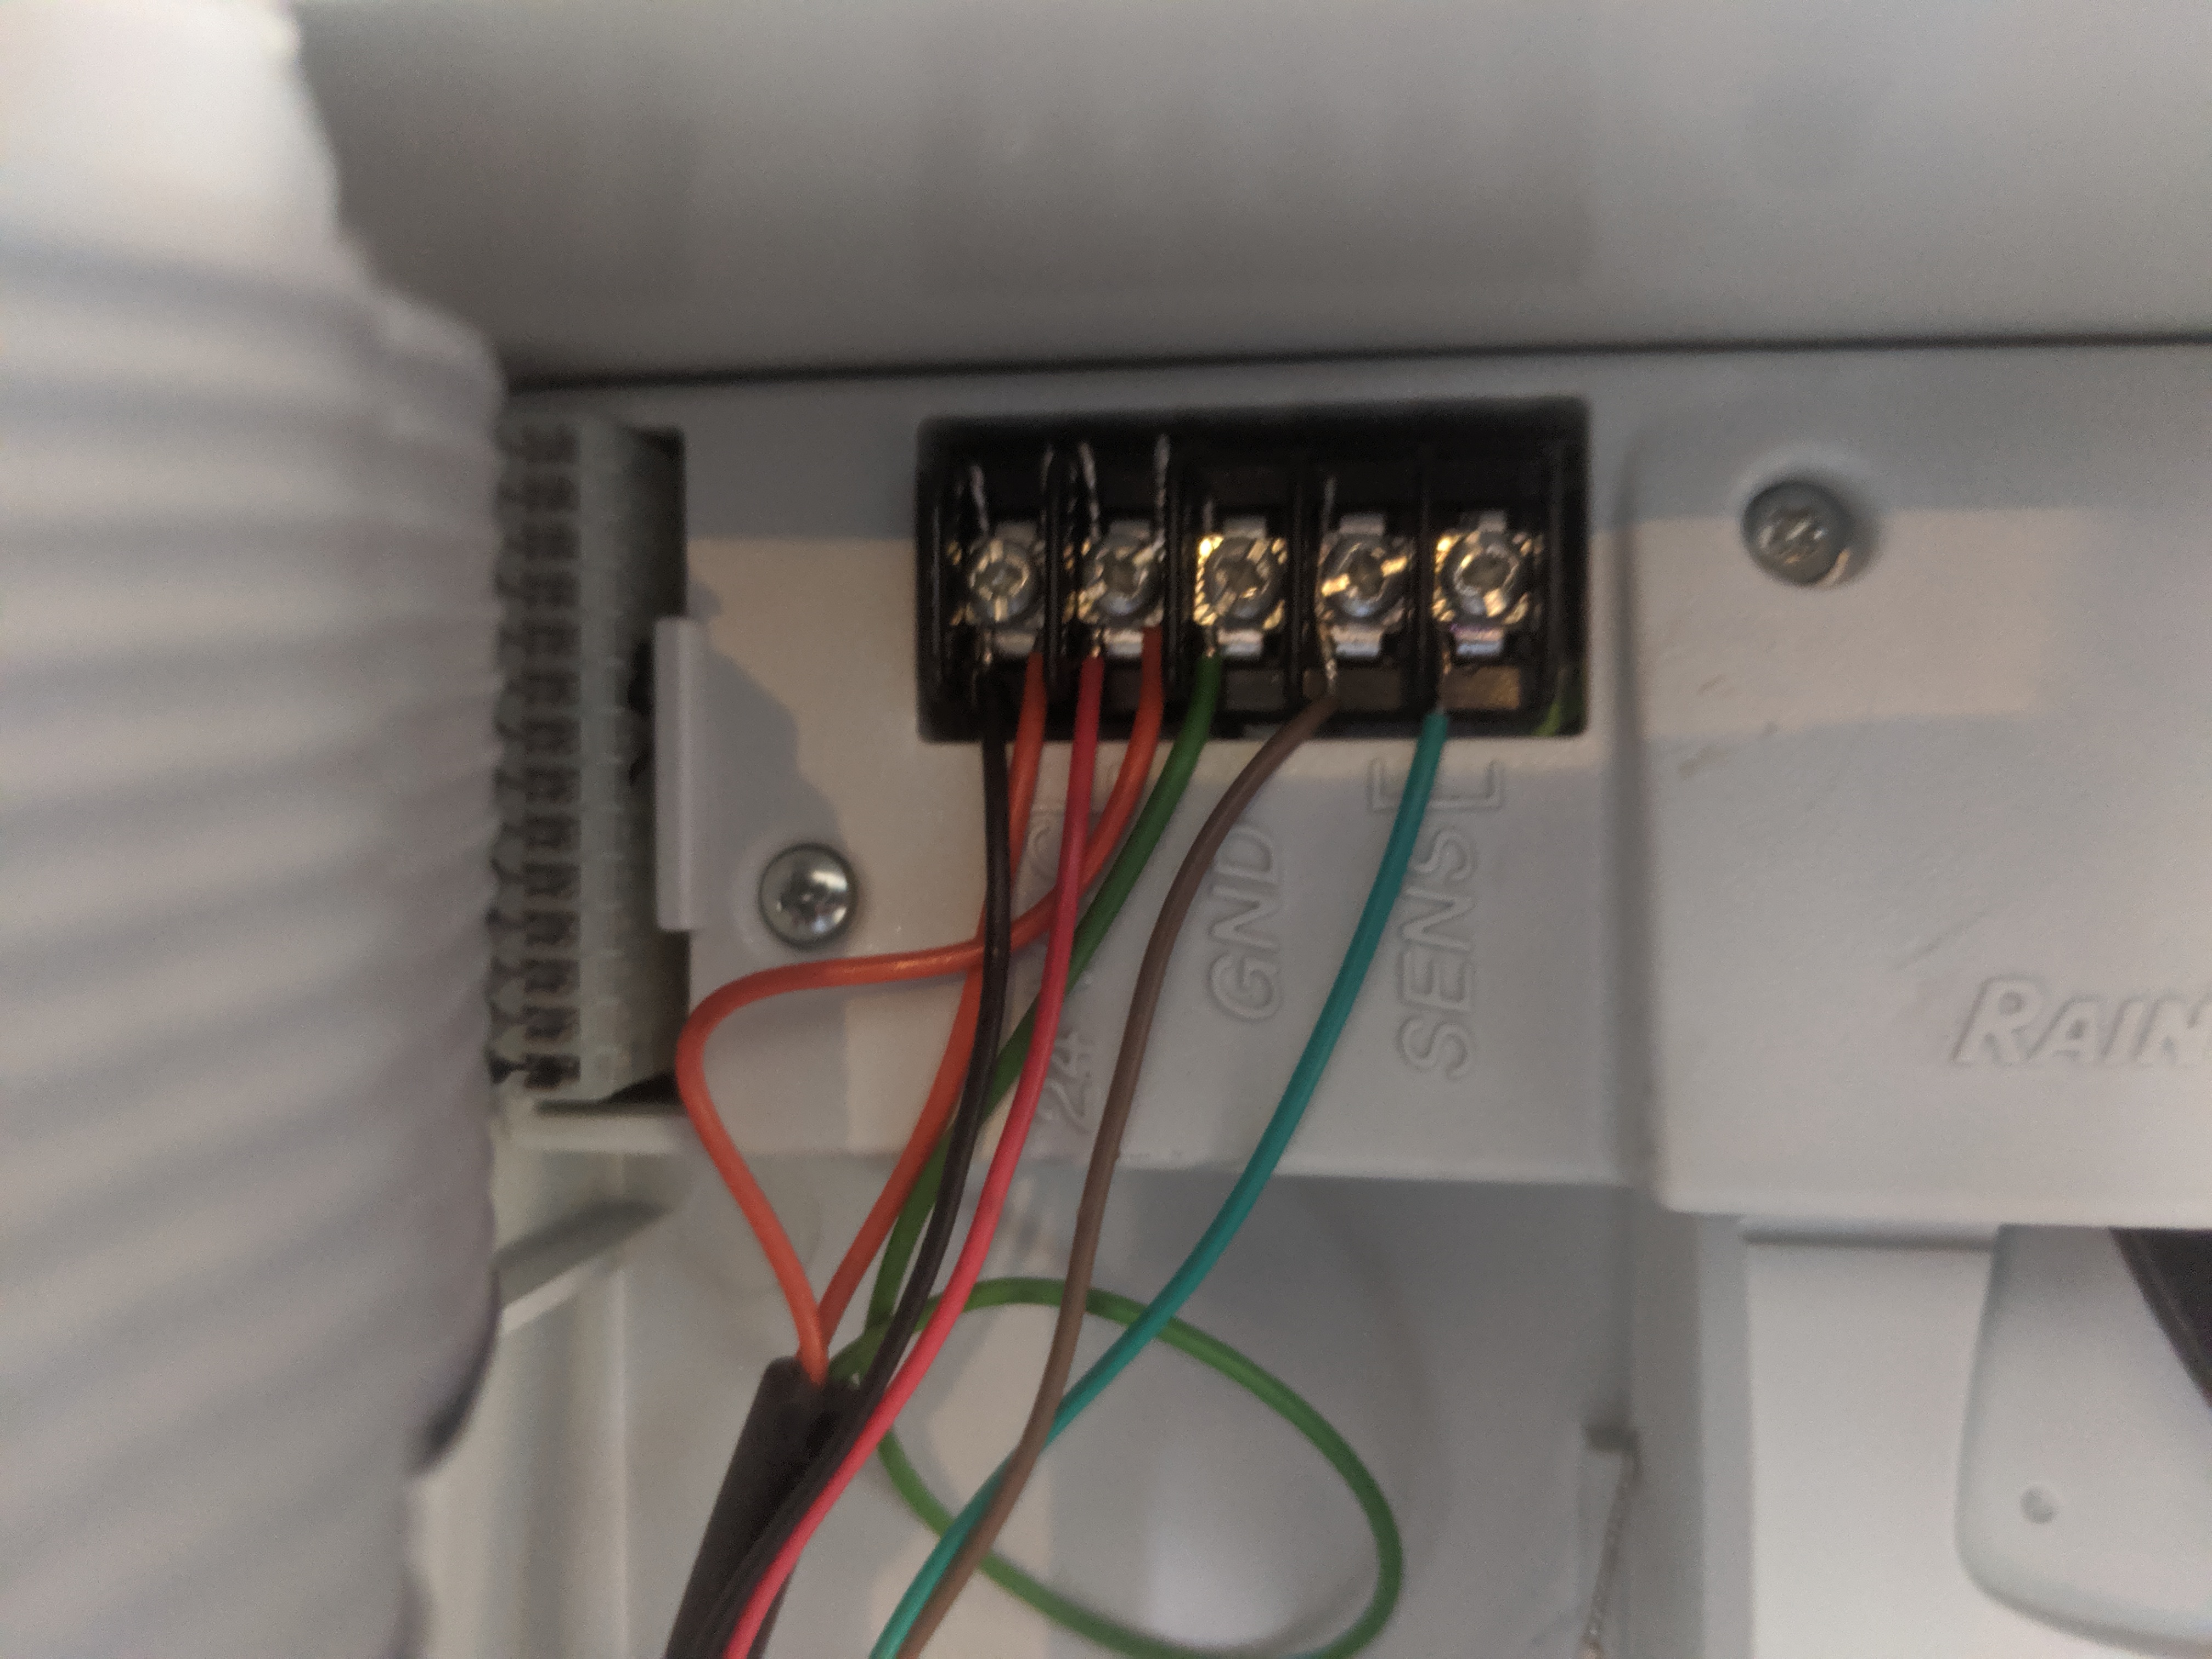
Thanks for all your help. Here is the picture of the Rainbird Sensor, and more closer picture on the Controller as well. I do see there are couple wires left open in the controller (little white wire) and then there are two sets of wire going to the top right in the controller (one in a black sleeve and the other coming from the rain sensor - gray one)
I notice one from the Black set and one from Gray goes to the 24+ and 24-. There is one going to GND and two wires from Gray one going to the sensors.
So any help in where it should go in the Rachio 3 would greatly be appreciated.
Thanks
Laxmi
@lgovindan - thanks for the pictures, it confirmed what I thought it was. So for the two wire bundles, where is what needs to be done with them.
Black bundle - abandon. It is the incoming power for the Rainbird. Trace it back and unplug the transformer it will be coming from. Not needed for the Rachio.
Gray bundle - wireless rain sensor. There are two choices - abandon it (Rachio will use the forecasted weather) or install it as a fail safe/backup.
For the installation option:
Have fun!
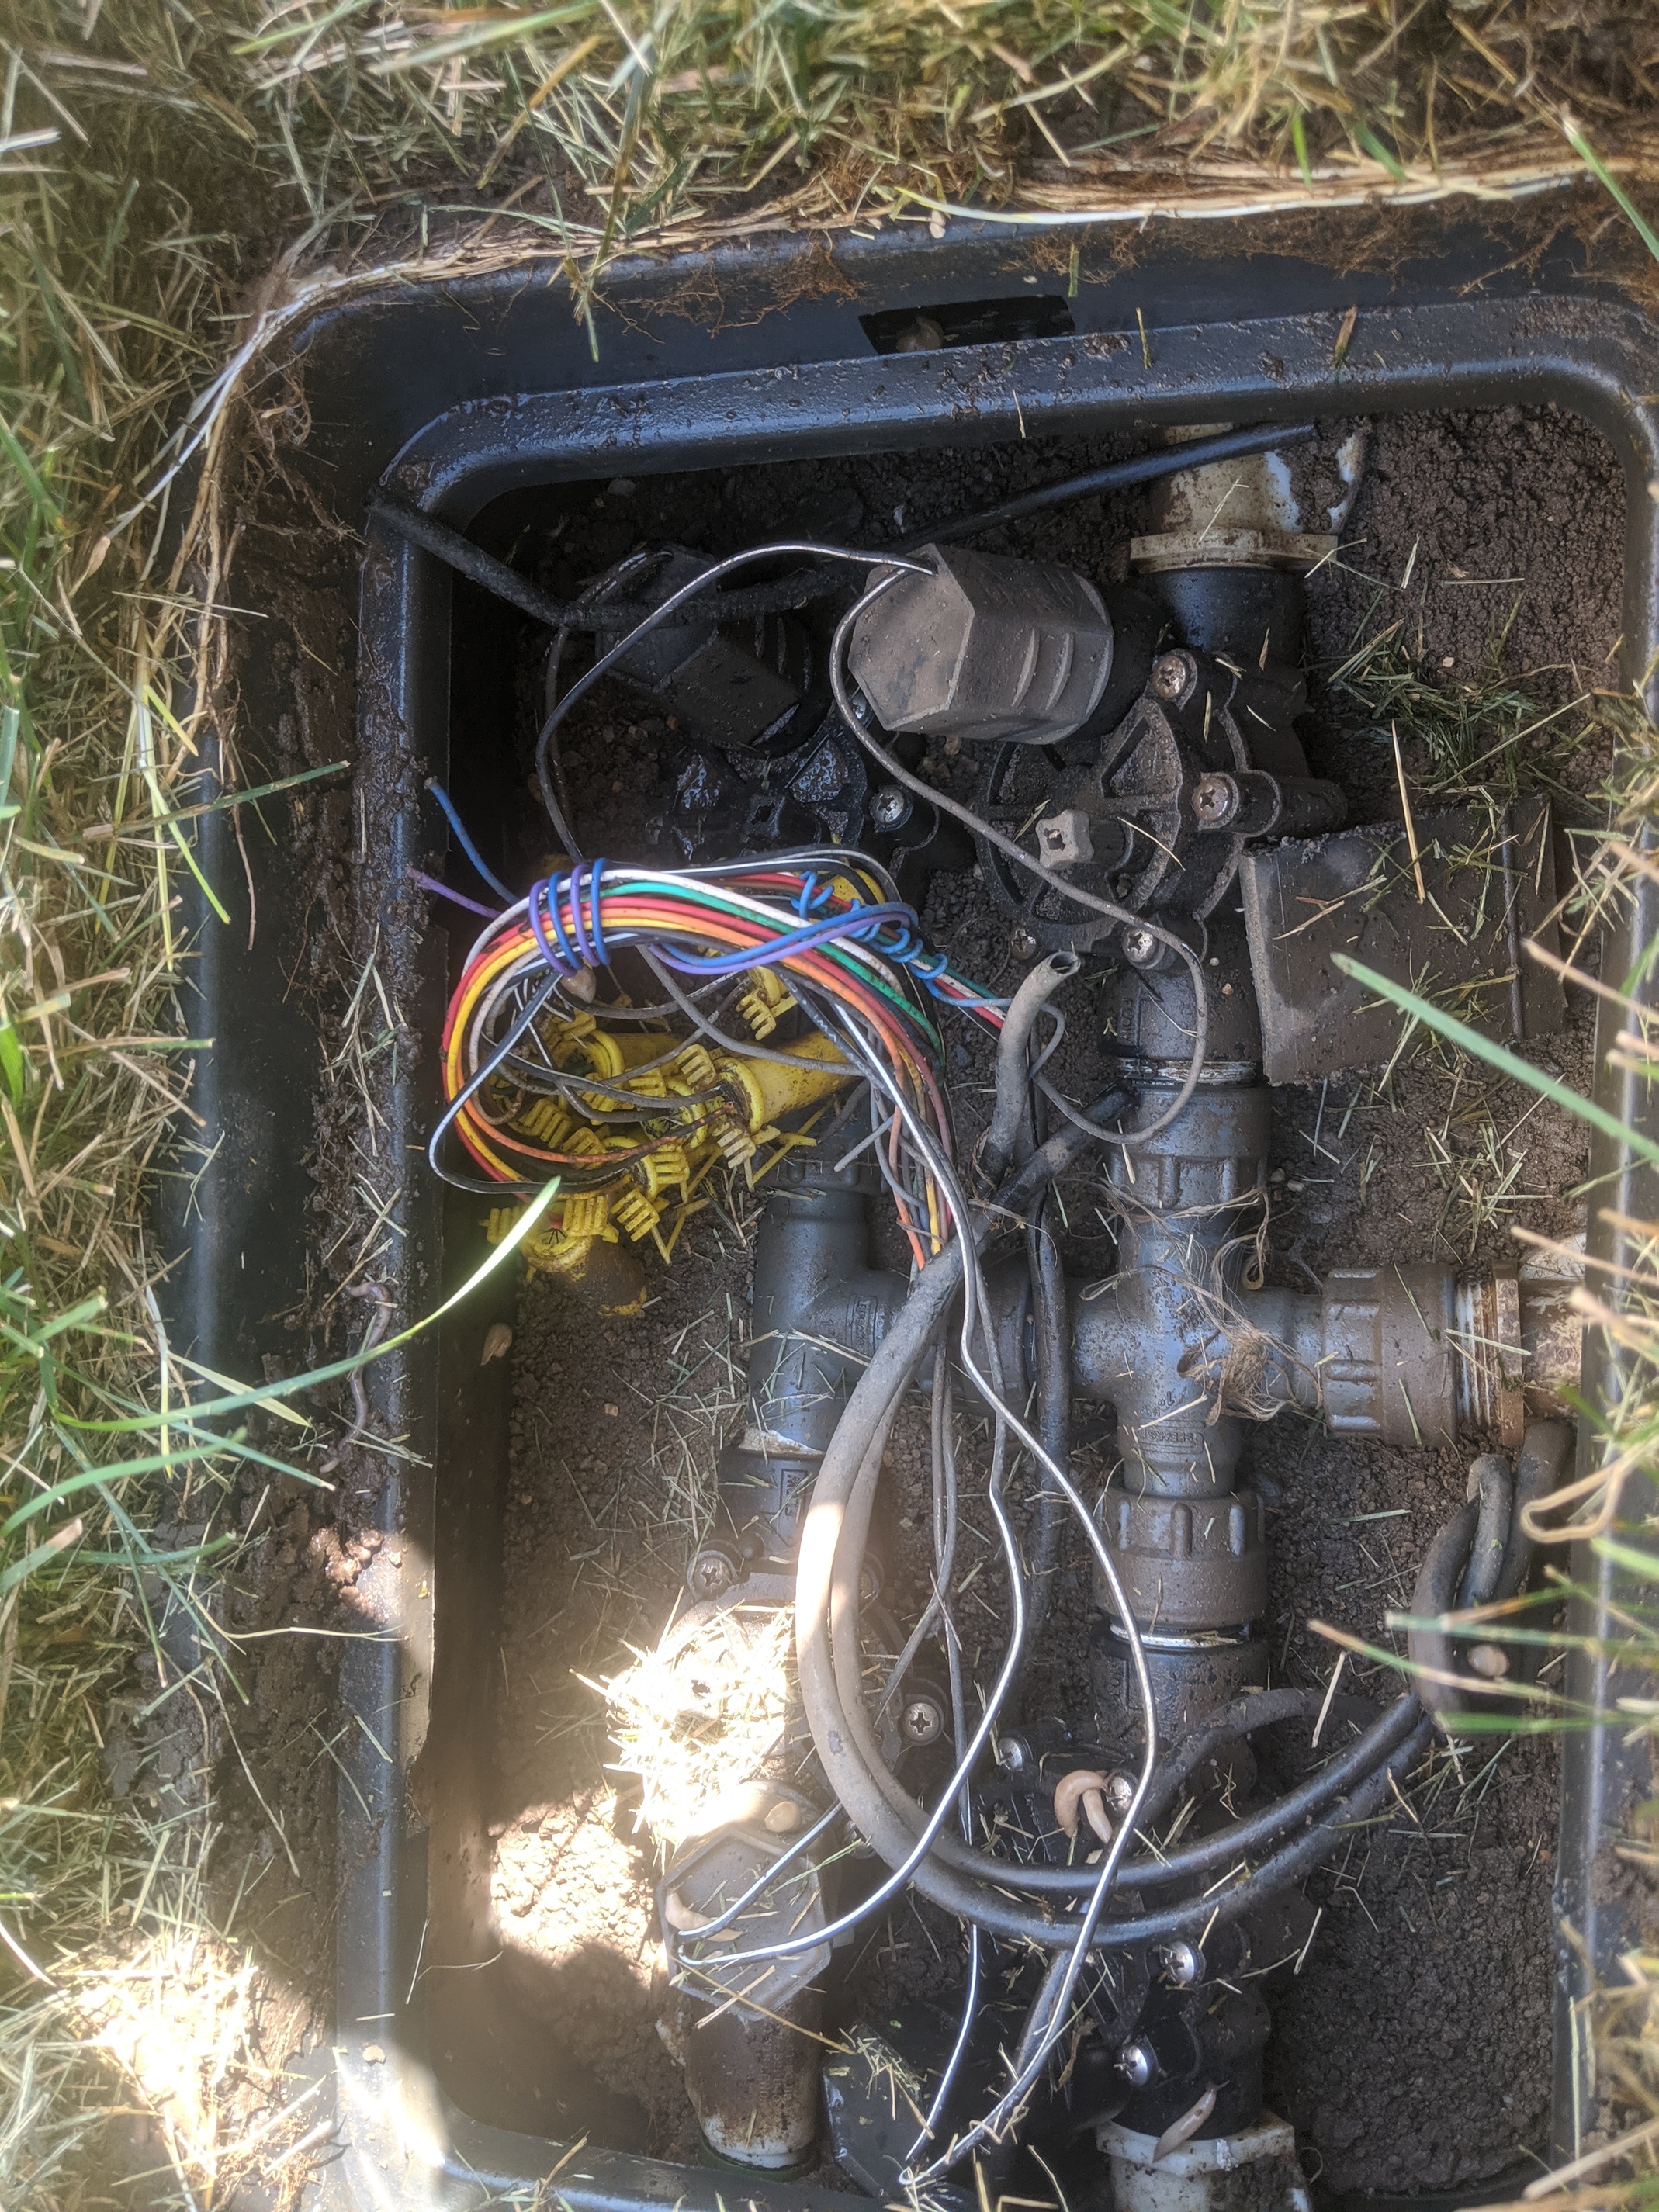
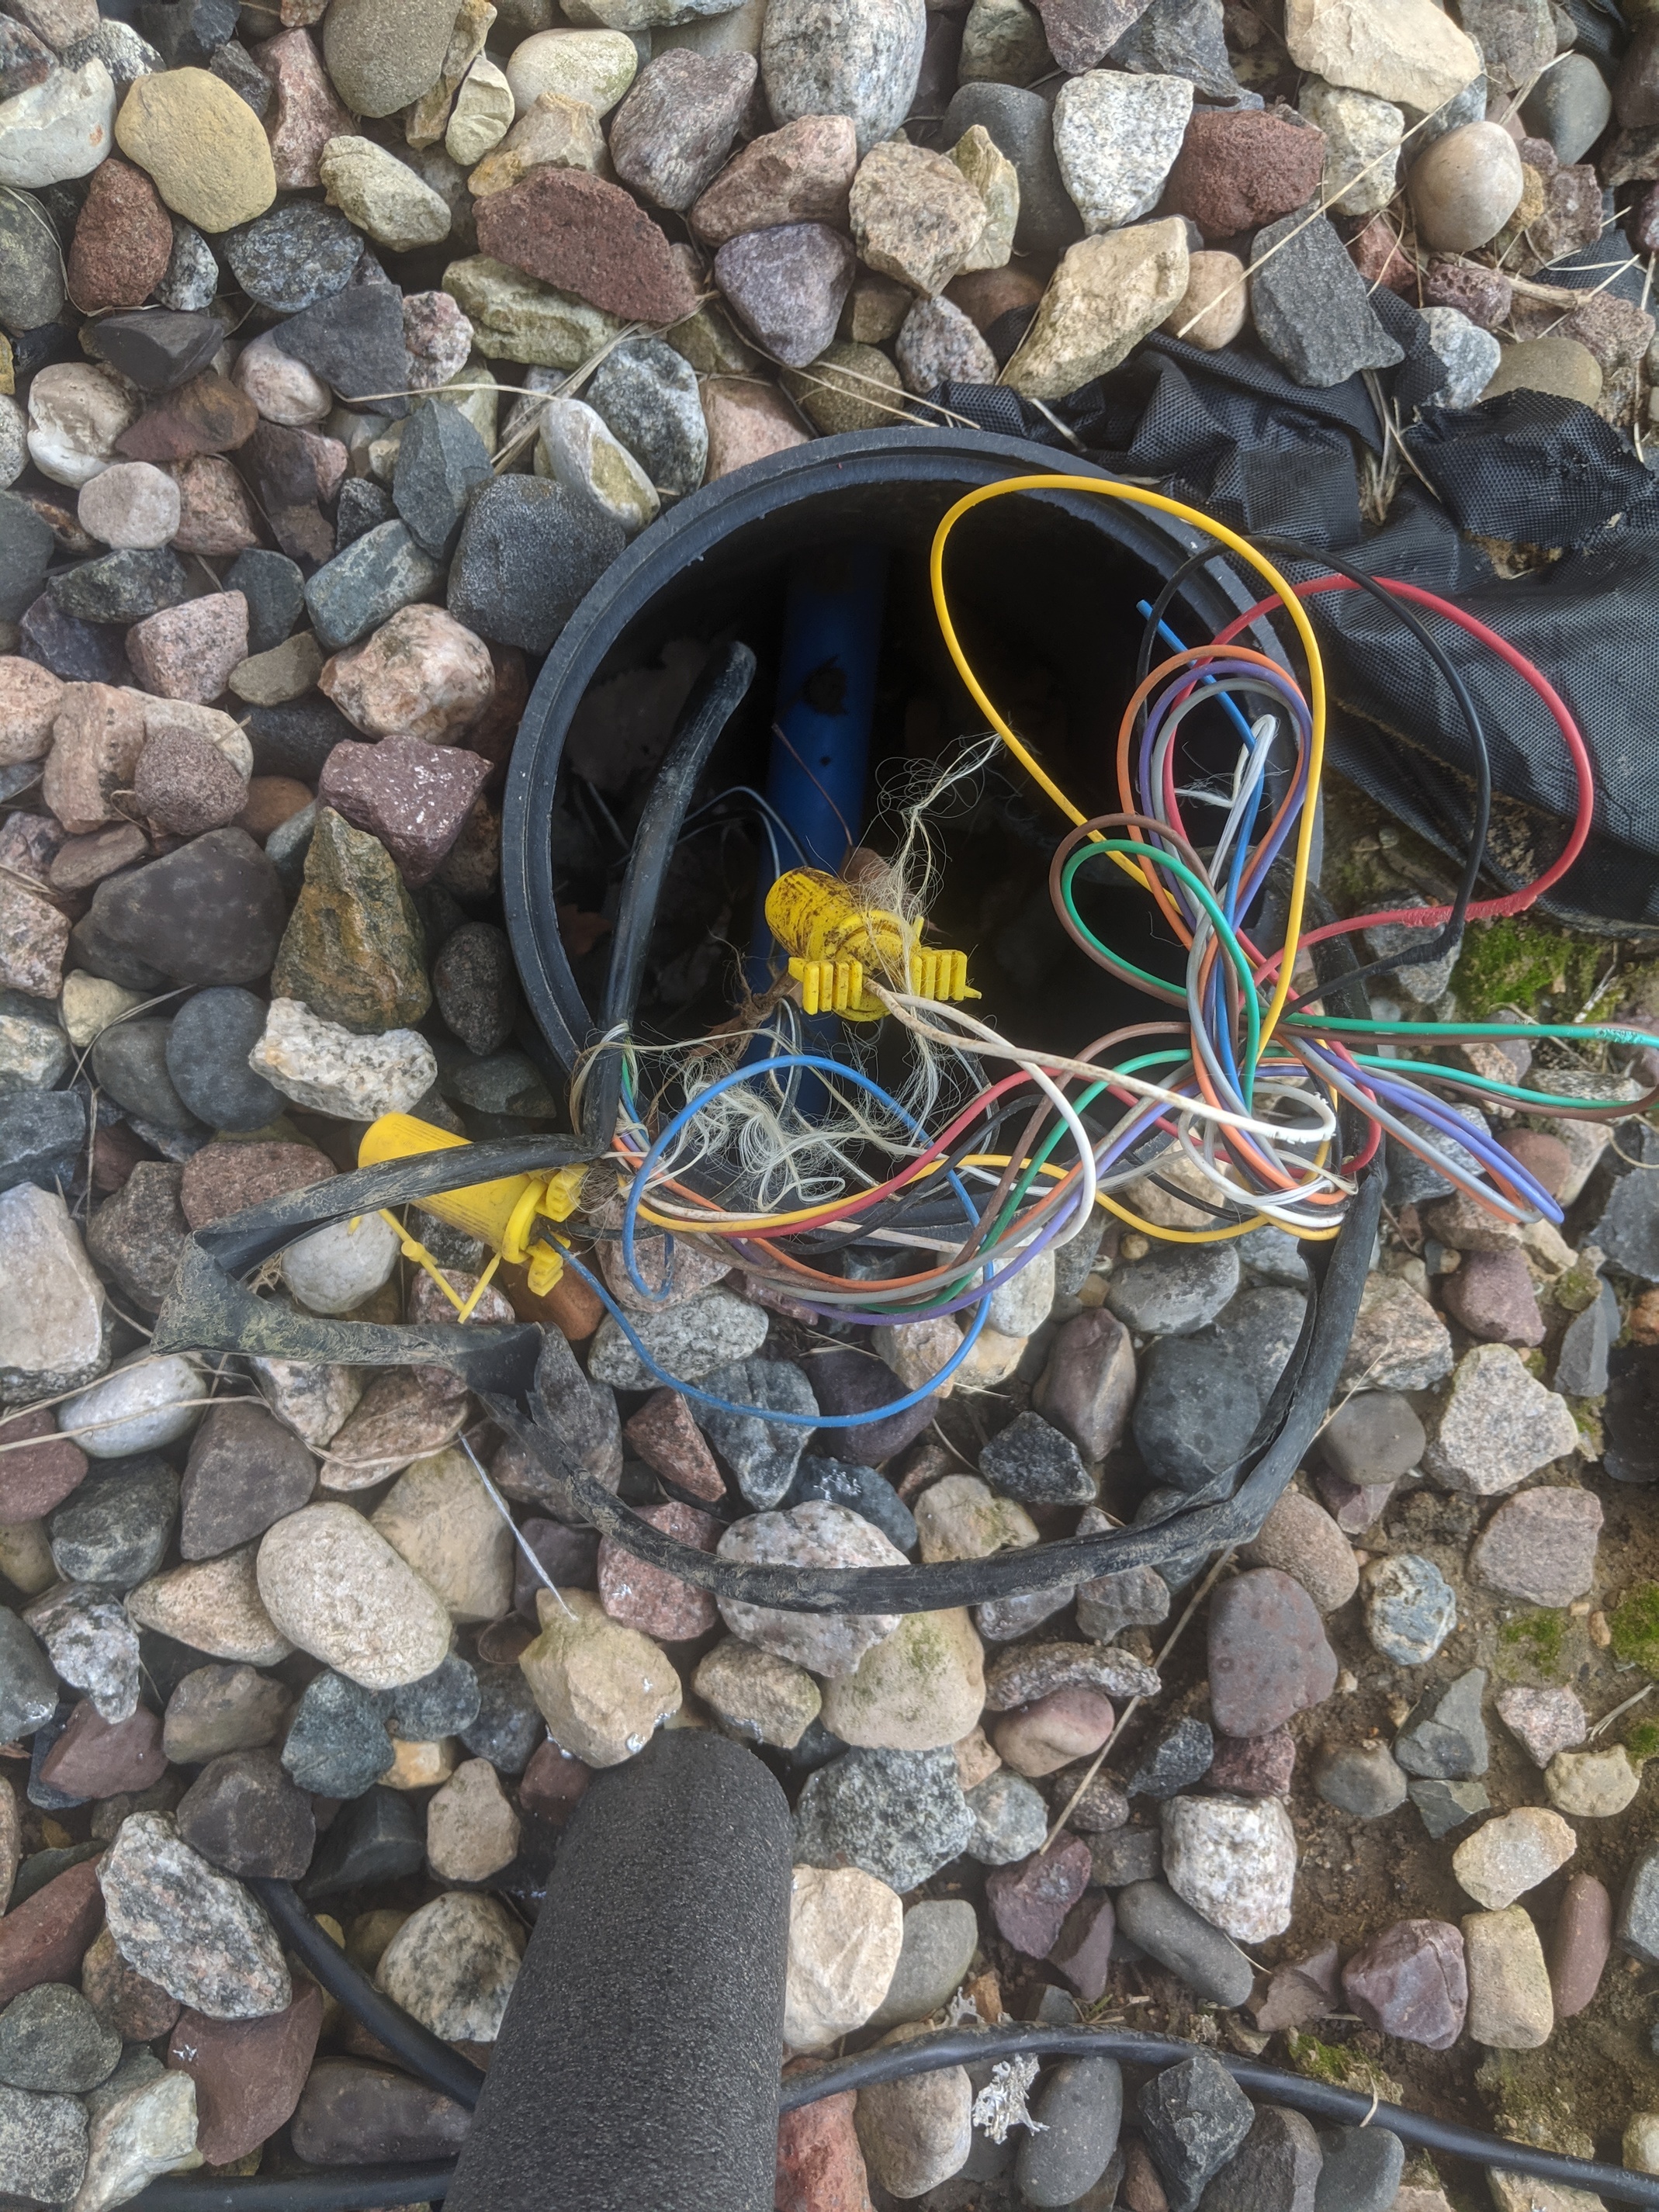
Hello Mr DLane, Thanks for your input. so I traced the black bundle and it went through the garage to the outside to a place and then into the master controller - where I got lost once it went out. So where is the transformer that I will need to stop it from or just cut all of it at the master controller. I have attached pictures of all 3. There is one coming into the 3rd picture from the master controller and there is one that is coming from the wall (inside my garage) and they are all in this twisty in this two yellow stuff in the picture 3.
Can you please let me know. So sorry asking too many questions.
Thanks
Laxmi
@lgovindan - I think the wrong black bundle was followed. There appear to be two black bundles in the Rainbird. The bundle that goes out side is the field wire that connects to all the valves.
The other black bundle is the one that is connected to the 24 VAC and GND terminals with just three wires. This is the bundle that will terminate in a transformer somewhere. If the transformer can’t be found, then just cap off the two orange wires with wirenuts.